|
This document is under active development and discussion!
If you find errors or omissions in this document, please don’t hesitate to submit an issue or open a pull request with a fix. We also encourage you to ask questions and discuss any aspects of the project on the mailing list or IRC. New contributors are always welcome! |
This manual assumes you are using Asciidoctor to produce and render your document. Asciidoctor implements more syntax, attributes and functions than the legacy AsciiDoc.py processor. Migrating from AsciiDoc Python lists which features are available to the Asciidoctor and AsciiDoc processors.
Introduction to Asciidoctor
|
Discuss and Contribute
Use Issue 433 to drive development of this section. Your contributions make a difference. No contribution is too small.
|
1. What is Asciidoctor?
Asciidoctor is a fast text processor and publishing toolchain for converting AsciiDoc content to HTML5, EPUB3, PDF, DocBook 5 (or 4.5) slidedecks and other formats. Asciidoctor is written in Ruby, packaged as a RubyGem and published to RubyGems.org. The gem is also packaged in several Linux distributions, including Fedora, Debian and Ubuntu. Asciidoctor is open source, hosted on GitHub, and released under the MIT license.
1.1. The Big Picture
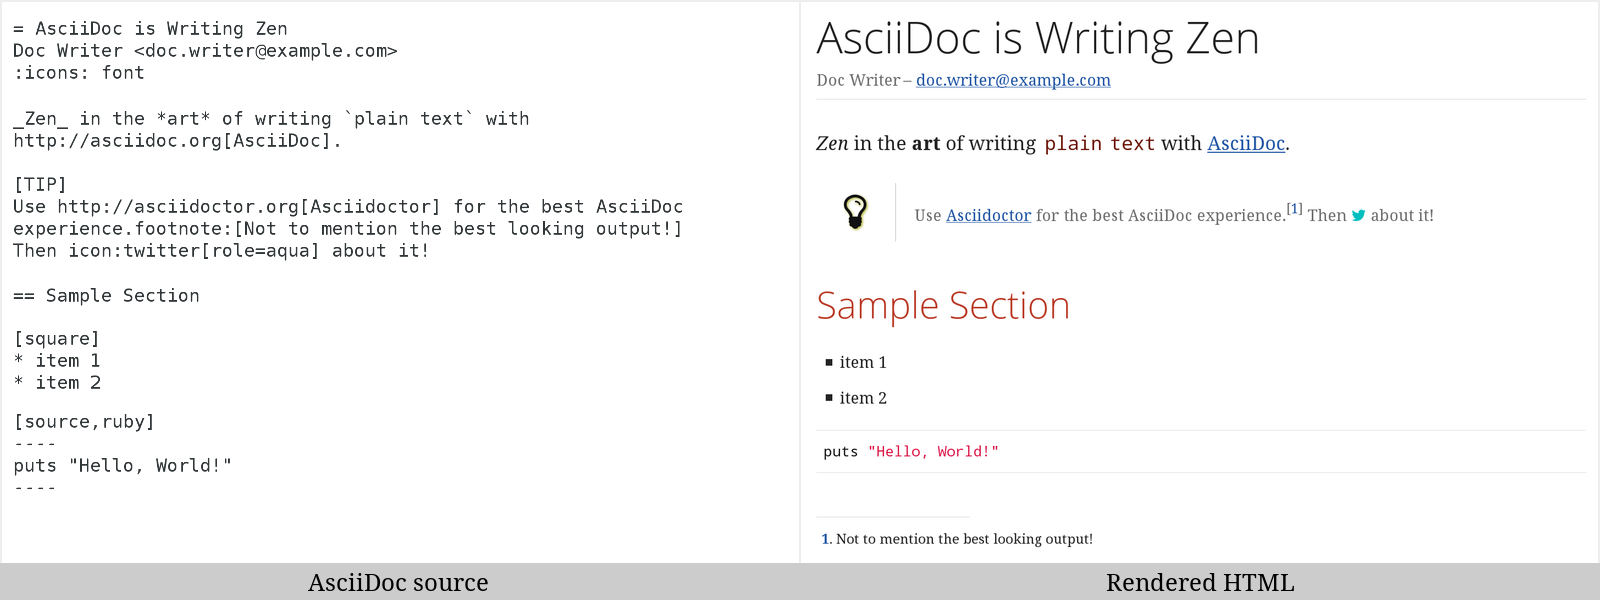
Asciidoctor reads content written in plain text, as shown in the panel on the left in the image below, and converts it to HTML5, as shown rendered in the right panel. Asciidoctor adds a default stylesheet to the HTML5 document, as shown, to provide a pleasant out-of-the-box experience.
1.2. Asciidoctor on the JVM
You can run Asciidoctor on the JVM using JRuby. You can also use AsciidoctorJ to invoke Asciidoctor’s APIs from Java and other JVM languages.
1.3. Asciidoctor.js
Asciidoctor can be used in JavaScript. Opal is used to transcompile the code from Ruby to JavaScript to make Asciidoctor.js, which can be used wherever JavaScript runs, such as in a web browser or on Node.js.
1.4. Asciidoctor’s Most Notable Benefits
While Asciidoctor aims to offer full compliance with the AsciiDoc syntax, it’s more than just a clone.
Asciidoctor uses a set of built-in ERB templates to generate HTML 5 and DocBook output that is structurally equivalent to what AsciiDoc produces. Any of these templates can be replaced by a custom template written in any template language available in the Ruby ecosystem. Custom template rendering is handled by the Tilt template abstraction library. Tilt is one of the most popular gems in the Ruby ecosystem.
Leveraging the Ruby stack isn’t the only benefit of Asciidoctor. Unlike the AsciiDoc Python implementation, Asciidoctor parses and renders the source document in discrete steps. This makes rendering the document optional and gives Ruby programs the opportunity to extract, add or replace information in the document by interacting with the document object model Asciidoctor assembles. Developers can use the full power of the Ruby programming language to play with the content in the document.
No coverage of Asciidoctor would be complete without mention of its speed. Despite not being an original goal of the project, Asciidoctor has proven startlingly fast. It loads, parses and renders documents 25 times as fast as the Python implementation. That’s good news for developer productivity and good news for GitHub or any server-side application that needs to render AsciiDoc markup. Asciidoctor also offers several levels of security, further justifying its suitability for server-side deployments.
Asciidoctor’s usage is not limited to the Ruby community. Thanks to JRuby, a port of Ruby to the JVM, Asciidoctor can be used inside Java applications as well. Plugins are available for Apache Maven, Gradle, and Rewrite. These plugins are based on the AsciidoctorJ for Asciidoctor.
Asciidoctor also ships with a command line interface (CLI).
The Asciidoctor CLI, asciidoctor, is a drop-in replacement for the asciidoc.py script from the AsciiDoc Python distribution.
1.4.1. AsciiDoc Syntax Processing
Asciidoctor reads and parses text written in the AsciiDoc syntax, then feeds the parse tree into a set of built-in templates to produce HTML5, PDF, DocBook 5, etc. You have the option of writing your own converter or providing Tilt-supported templates to customize the generated output or produce alternative formats.
Asciidoctor is a drop-in replacement for the original AsciiDoc Python processor (asciidoc.py).
The Asciidoctor test suite has > 1,500 tests to ensure compatibility with the AsciiDoc syntax.
|
In addition to the standard AsciiDoc syntax, Asciidoctor recognizes additional markup and formatting options, such as font-based icons (e.g., icon:fire[]) and UI elements (e.g., button:[Save]).
Asciidoctor also offers a modern, responsive theme based on Foundation to style the HTML5 output.
1.5. Compared to MarkDown
The most compelling reason to choose a lightweight markup language for writing is to minimize the amount of technical concepts that an author must grasp in order to be immediately productive. In other words, the goal is to write without friction.
A popular choice is Markdown. (At least, that’s what you call it in the beginning). The main advantage of Markdown lies in its primitive syntax: its manual and cheatsheet are one and the same. But this advantage is also its greatest shortcoming.
As soon as authors need something slightly more complex (tables, cross references, footnotes, embedded YouTube videos, etc.), they find themselves diving directly into HTML or seeking out alternate implementations. Markdown has become a maze of different implementations, termed “flavors”, which make a universal definition evasive.
| The IETF has declared “there is no such thing as "invalid" Markdown.” See This Is Markdown! Or: Markup and Its Discontents. |
Here’s how the story inevitably goes. You start out with Markdown. Then it’s Markdown + X. Then Markdown + X + Y. And down the rabbit hole you go. What’s worse, X and Y often take the form of HTML, unnecessarily coupling content with presentation and wrecking portability. Your instinct to choose Markdown is good. There are just better options.
AsciiDoc presents a more sound alternative. The AsciiDoc syntax is more concise than (or at least as concise as) Markdown. At the same time, AsciiDoc offers power and flexibility without requiring the use of HTML or “flavors” for essential syntax such as tables, definition lists, admonitions (tips, notes, warnings, etc.) and table of contents.
It’s important to understand that AsciiDoc was initially designed as a plain-text alternative to the DocBook XML schema. AsciiDoc isn’t stuck in a game of whack-a-mole trying to satisfy publishing needs like Markdown. Rather, the AsciiDoc syntax was explicitly designed with the needs of publishing in mind, both print and web. If the need arises, you can make full use of the huge choice of tools available for a DocBook workflow using Asciidoctor’s DocBook converter. That’s why mapping to an enterprise documentation format like DocBook remains a key use case for AsciiDoc.
And yet, AsciiDoc is simple enough to stand in as a better flavor of Markdown. But what truly makes AsciiDoc the right investment is that its syntax was designed to be extended as a core feature. This extensibility not only means that AsciiDoc has a more to offer, with room to grow, it also fulfills the objective of ensuring your content is maximally reusable.
You can find more links to discussions about the differences between AsciiDoc and Markdown in the comments of issue #34
1.5.1. A basic comparison by example
| Language Feature | Markdown | AsciiDoc |
|---|---|---|
Bold (constrained) |
|
|
Bold (unconstrained) |
|
|
Italic (constrained) |
|
|
Italic (unconstrained) |
n/a |
|
Monospace (constrained) |
|
|
Monospace (unconstrained) |
|
|
Link with label |
|
|
Relative link |
|
|
File link |
|
|
Cross reference |
n/a |
|
Inline Image w/ Alt Text |
|
|
Block Image w/ Alt Text |
n/a |
|
Section heading* |
|
|
Blockquote* |
|
|
Code block* |
|
|
Unordered list |
|
|
Ordered list |
|
|
Thematic break (aka horizontal rule)* |
|
|
Document header |
As front matter
|
|
Admonitions |
n/a |
|
Typographic (aka “Smart”) Quotes |
Enabled through an extension switch, but offer little control in how they are applied. |
|
Includes |
n/a |
|
Custom CSS classes |
n/a |
|
* Asciidoctor also supports the Markdown syntax for this language feature.
You can see that AsciiDoc has the following advantages over Markdown:
-
AsciiDoc uses the same number of markup characters or less when compared to Markdown in nearly all cases.
-
AsciiDoc uses a consistent formatting scheme (i.e., it has consistent patterns).
-
AsciiDoc can handle all permutations of nested inline (and block) formatting, whereas Markdown often falls down.
-
AsciiDoc handles cases that Markdown doesn’t, such as a proper approach to inner-word markup, source code blocks and block-level images.
| Certain Markdown flavors support additional features, such as tables and definition lists. However, since these features don’t appear in plain Markdown, they are not included in the comparison table. |
Asciidoctor, which is used for converting AsciiDoc on GitHub and GitLab, emulates “the good parts” of the Markdown syntax, like headings, blockquotes and fenced code blocks, making migration from Markdown to AsciiDoc fairly simple. For details about migration, see Markdown Compatibility.
To read more about the shortcomings of Markdown, see these opinion pieces:
Quick Starts
| Section Pending |
2. Installation Quick Start
|
Discuss and Contribute
Use Issue 436 to drive development of this section. Your contributions make a difference. No contribution is too small.
|
3. Usage Quick Start
|
Discuss and Contribute
Use Issue 437 to drive development of this section. Your contributions make a difference. No contribution is too small.
|
3.1. Using the Command Line Interface
Asciidoctor’s command line interface (CLI) is a drop-in replacement for the asciidoc.py command from the Python implementation.
If the Asciidoctor gem installed successfully, the asciidoctor command line interface (CLI) will be available on your PATH.
To confirm that Asciidoctor is available, execute:
$ asciidoctor --version
The following information should be output in your terminal:
Asciidoctor 0.1.4 [http://asciidoctor.org]
To invoke Asciidoctor from the CLI and render an .adoc file, execute:
$ asciidoctor <asciidoc_file>
This will use the built-in defaults for options and create a new file in the same directory as the input file, with the same base name, but with the .html extension.
There are many other options available, listed in CLI Options.
Full help is provided via:
$ asciidoctor --help
or in the man page.
There is also an asciidoctor-safe command, which turns on safe mode by default, preventing access to files outside the parent directory of the source file.
This mode is very similar to the safe mode of asciidoc.py.
3.2. Using the Ruby API
In addition to the command line interface, Asciidoctor provides a Ruby API. The API is intended for integration with other software projects and is suitable for server-side applications, such as Rails, Sinatra and GitHub.
Asciidoctor also has a Java API that mirrors the Ruby API. The Java API calls through to the Ruby API using an embedded JRuby runtime. See the AsciidoctorJ project for more information.
To use Asciidoctor in your application, you first need to require the gem:
require 'asciidoctor'With that in place, you can start processing AsciiDoc documents.
To parse a file into an Asciidoctor::Document object:
doc = Asciidoctor.load_file 'mysample.adoc'You can get information about the document:
puts doc.doctitle
puts doc.attributes
More than likely, you will want to render the document. To render a file containing AsciiDoc markup to HTML 5, use:
Asciidoctor.convert_file 'mysample.adoc'The command will output to the file mysample.html in the same directory.
You can render the file to DocBook 5.0 by setting the :backend option to 'docbook':
Asciidoctor.convert_file 'mysample.adoc', backend: 'docbook'The command will output to the file mysample.xml in the same directory.
If you’re on Linux, you can view the file using Yelp.
You can also use the API to render strings and load custom templates.
4. Syntax Quick Start
|
Discuss and Contribute
Use Issue 441 to drive development of this section. Your contributions make a difference. No contribution is too small.
|
5. Custom Output Quick Start
|
Discuss and Contribute
Use Issue 442 to drive development of this section. Your contributions make a difference. No contribution is too small.
|
Getting Started
| Section Pending |
6. System Requirements
Asciidoctor works on Linux, OS X (aka Mac OS X) and Windows.
Asciidoctor requires one of the following implementations of Ruby:
-
Ruby 1.8.7
-
Ruby 1.9.3
-
Ruby 2 (2.0.0 or better)
-
JRuby 1.7 (Ruby 1.8 and 1.9 modes)
-
JRuby 9000
-
Rubinius 2.0 (Ruby 1.8 and 1.9 modes)
-
Opal (Javascript)
We expect Asciidoctor to work with other versions of Ruby as well. We welcome your help testing those versions if you are interested in seeing them supported.
7. Installing the Asciidoctor Ruby Gem
Asciidoctor can be installed using the gem command, Bundler or a Linux package manager.
7.1. Install using gem
To install Asciidoctor using the gem command:
-
Open a terminal
-
Type the following
gemcommand$ gem install asciidoctor
If the Asciidoctor gem installed successfully, the asciidoctor command line interface (CLI) will be available on your PATH.
To confirm that Asciidoctor is available, execute:
$ asciidoctor --version
The following output should appear in your terminal:
Asciidoctor 1.5.4 [http://asciidoctor.org]
Runtime Environment (ruby 2.3.0p0 [x86_64-linux]) (lc:UTF-8 fs:UTF-8 in:- ex:UTF-8)
7.2. Install using Bundler
To install Asciidoctor for a project using Bundler:
-
Open your project’s Gemfile
-
Add the
asciidoctorgem using:gem 'asciidoctor'
-
Save the Gemfile
-
Open a terminal
-
Install the gem using the
bundlecommand:$ bundle
7.3. Install using yum or dnf on Fedora
To install Asciidoctor on Fedora (or RHEL via EPEL) using the rubygem-asciidoctor package:
-
Open a terminal
-
Run the installation command
- On Fedora 21 or earlier
-
$ sudo yum install asciidoctor
- On Fedora 22 or later
-
$ sudo dnf install asciidoctor
The benefit of installing the gem using this method is that the package manager will also install Ruby and RubyGems if not already on your machine.
7.4. Install using apt-get on Debian or Ubuntu
To install Asciidoctor on Debian Sid or Ubuntu Saucy or greater:
-
Open a terminal
-
Type the following
apt-getcommand using sudo:$ sudo apt-get install asciidoctor
The benefit of installing the gem via apt-get is that the package manager will also install Ruby and RubyGems if not already on your machine.
7.5. Install using apk on Alpine Linux
To install Asciidoctor on Alpine Linux using the asciidoctor package:
-
Open a terminal
-
Type the following
apkcommand using sudo:$ sudo apk add asciidoctor
The benefit of installing the gem via apk is that the package manager will also install Ruby and RubyGems if not already on your machine.
8. Upgrading the Asciidoctor Ruby Gem
If you have an earlier version of Asciidoctor installed, you can update the gem using the gem command:
$ gem update asciidoctor
|
If you accidentally use $ gem cleanup asciidoctor |
On Fedora, you can update the package using:
$ sudo yum update asciidoctor
$ sudo dnf update asciidoctor
| Your Fedora system may be configured to automatically update packages, in which case no further action is required by you. Refer to the Fedora docs if you are unsure. |
On Debian or Ubuntu, you can update the package using:
$ sudo apt-get upgrade asciidoctor
On Alpine Linux, you can update the package using:
$ sudo apk add --upgrade asciidoctor
The Linux packages may not be available right away after a release of the gem.
It may take several weeks for the packages to be updated.
If you need to upgrade to the latest version immediately, use the gem install option documented above.
|
9. Extensions and Integrations
See Extensions.
Terms and Concepts
All of the content in an Asciidoctor document, including lines of text, predefined styles, and processing commands, is classified as either a block or an inline element. Within each of these elements are an array of styles, options, and functions that can be applied to your content.
This section will provide you with an overview of what each of these elements and sub-elements are and the basic syntax and rules for using them.
10. Elements
One or more lines of text in a document are defined as a block element. Block elements can be nested within block elements.
A document can include the following block elements:
-
Header
-
Title
-
Author Info
-
First Name
-
Middle Name
-
Last Name
-
Email Address
-
Revision Info
-
Revision Number
-
Revision Date
-
Revision Remark
-
Attribute Entry
-
Preamble
-
Section
-
Title
-
Section Body
-
BlockId
-
Block Title
-
Block Macro
-
Block
-
Paragraph
-
Delimited Block
-
Table
-
List
-
Bulleted List
-
Numbered List
-
Labeled List
-
Callout List
-
List Entry
-
List Label
-
List Item
-
Item Text
-
List Paragraph
-
List Continuation
An inline element performs an operation on a subset of the content within a block element.
Inline elements include:
-
Quotes
-
Replacements
-
Special characters
-
Special words
-
Attribute references
-
Inline macros
11. Macros
|
Discuss and Contribute
Use Issue 443 to drive development of this section. Your contributions make a difference. No contribution is too small.
|
12. Formatting Marks
There are two categories of formatting marks for applying styles (i.e., formatting) to text, constrained and unconstrained. These formatting marks are referred to as quotes in the AsciiDoc syntax. This section covers their purpose, their differences and how to apply them.
12.1. Constrained quotes
In short, “constrained” means around a word or sequence of words.
Constrained quotes are single characters (often symbols) placed around a word. The “around” is defined by the fact that word characters do not appear immediately outside the enclosing marks.
You use this form to format a word that stands alone,
That is *strong* stuff!to format a sequence of words,
That is *really strong* stuff!or to format a word adjacent to punctuation, like an exclamation mark.
This stuff sure is *strong*!12.2. Unconstrained quotes
In short, “unconstrained” means anywhere, including within a word.
Unconstrained quotes are repeated characters (often symbols) placed anywhere in the text, including within a word. The “within” is defined by the fact that a word character may appear directly outside one of the enclosing marks.
She spells her name with an "`h`", as in Sara**h**.12.3. When should I use unconstrained quotes?
Consider the following questions:
-
Is there a letter, number, underscore directly outside the formatting marks (on either side)?
-
Is there a colon or semi-colon directly before the starting formatting mark?
-
Is there a space directly inside of the formatting mark?
If you answered “yes” to any of these questions, you need to switch to unconstrained (double formatting) quotes.
To help you determine whether a particular syntax pattern requires unconstrained quotes, consider the following syntactical situations.
| Syntax | Result | What quote type? |
|---|---|---|
Sara__h__ |
Sarah |
Unconstrained, because of the “a” to the left. |
**B**old |
Bold |
Unconstrained, because of the “o” to the right. |
–**2016** |
–2016 |
Unconstrained, because of the “–” to the left of the emboldened number. |
** bold ** |
bold |
Unconstrained, because there are spaces directly inside the formatting marks. |
*2016*– |
2016– |
Constrained, because the “&” is not a letter, number, underscore, or semi-colon. |
*9*-to-*5* |
9-to-5 |
Constrained, because a hyphen is not a letter, number, underscore, or semi-colon. |
12.4. Unconstrained formatting edge cases
There are cases when it might seem logical to use constrained quotes, however unconstrained quotes are required. This happens because of the way the Asciidoctor parser (and the AsciiDoc Python parser) currently handles substitutions.
Substitutions may be applied by the parser before getting to the formatting marks, in which case the characters adjacent to those marks may not be what you see in the original source.
One such example is enclosing monospaced text inside quotation marks, such as “endpoints”.
"```endpoints```"You might start with the following syntax:
"`endpoints`"That only gives you “endpoints”, since the backticks are contributing to the enclosing smart quotes.
Adding another backtick gets closer, but the parser still ignores the constrained formatting marks and interprets the backticks literally:
"``endpoints``"So you have to double up the marks to coerce it into formatting the text to monospace.
"```endpoints```"| This situation may improve in the future when Asciidoctor is switched to using a parsing expression grammar for inline formatting instead of the current regular expression-based strategy. For details, follow issue #61. |
12.5. Escaping unconstrained quotes
Unconstrained quotes are meant to match anywhere in the text, context free. However, that means you catch them formatting when you don’t intend them to. Admittedly, these symbols are a bit tricky to type literally when the content calls for it. But being able to do so is just a matter of knowing the tricks, which this section will cover.
Let’s assume you are typing the following two lines:
The __kernel qualifier can be used with the __attribute__ keyword...

#`CB###2`# and #`CB###3`#
In the first sentence, you aren’t looking for any text formatting, but you’re certainly going to get it.
Double underscore is an unconstrained formatting mark.
In the second sentence, you might expect CB###2 and CB###3 to be formatted in monospace and highlighted.
However, what you get is a scrambled mess.
The mix of constrained and unconstrained formatting marks in the line is ambiguous.
There are two (reliable) solutions for escaping unconstrained formatting marks:
-
Use an attribute reference to insert the unconstrained formatting mark verbatim
-
Wrap the text you don’t want formatted in an inline passthrough
The attribute reference is preferred because it’s the easiest to read:
:dbl_: __
:3H: ###

The {dbl_}kernel qualifier can be used with the {dbl_}attribute{dbl_} keyword...

#`CB{3H}2`# and #`CB{3H}3`#
This works because attribute expansion is performed after text formatting (i.e., quotes substitution) under normal substitution order. (Recall that backticks around text format the text in monospace but permit the use of attribute references).
Here’s how you’d write these lines using the inline passthrough to escape the unconstrained formatting marks instead:
The +__kernel+ qualifier can be used with the +__attribute__+ keyword...

#`+CB###2+`# and #`+CB###3+`#
Notice the addition of the plus symbols.
That’s the closest thing to a text formatting escape.
Everything between the plus symbols is escaped from interpolation (attribute references, text formatting, etc).
However, the text still receives proper output escaping for HTML (e.g., < becomes <).
The enclosure `+TEXT+` (text enclosed in pluses surrounded by backticks) is a special formatting combination in Asciidoctor.
It means to format TEXT as monospace, but don’t interpolate formatting marks or attribute references in TEXT.
It’s roughly equivalent to Markdown’s backticks.
Since AsciiDoc offers more advanced formatting, the double enclosure is necessary.
The more brute-force solution to the inline passthrough approach is to use the pass:c[] macro, which is a more verbose (and flexible) version of the plus formatting marks.
The pass:c[__kernel] qualifier can be used with the pass:c[__attribute__] keyword...

#`pass:c[CB###2]`# and #`pass:c[CB###3]`#
As you can see, however, the macro is not quite as elegant or concise.
In case you’re wondering, the c in the target slot of the pass:[] macro applies output escaping for HTML.
Though not always required, it’s best to include this flag so you don’t forget to when it is needed.
Backslashes for escaping aren’t very reliable in AsciiDoc. While they can be used, they have to be placed so strategically that they are rather finicky.
13. Attributes
Attributes are one of the features that sets Asciidoctor apart from other lightweight markup languages. Attributes can activate features (behaviors, styles, integrations, etc) or hold replacement content.
In Asciidoctor, attributes are classified as:
13.1. Attribute Restrictions
All attributes have a name and a value.
The attribute name:
-
must be at least one character long,
-
must begin with a word character (A-Z, a-z, 0-9 or _) and
-
must only contain word characters and hyphens.
In other words, the name cannot contain dots or spaces.
Currently, case is ignored when resolving attributes, so URI, Uri and uRI are all the same as uri.
(See issue #509 for a proposed change to this restriction).
A best practice is to only use lower case for letters in the name and avoid starting the name with a number.
The attribute value:
-
can be any inline content and
-
can only contain line breaks if an explicit line continuation is used.
Certain attributes have a restricted range of allowable values. See the entries in the Catalog of Document Attributes for details.
13.2. Attribute Assignment Precedence
By default, the attribute assignment precedence, from highest to lowest, is as follows:
-
Attribute passed to the API or CLI
-
Attribute defined in the document
-
Default value
Let’s use the doctype attribute to show how precedence works.
The default value for the doctype attribute is article.
Therefore, if doctype is not set and assigned a value in the document, API or CLI it will be assigned the article value (i.e. its default value).
However, if doctype is set in the document and assigned a new value, such as book, the book value will override the default value.
Finally, a value assigned to doctype via the API or CLI, will overrule the value in the document.
You can adjust the precedence of attribute values passed to the API or CLI.
By adding an @ symbol to the end of an attribute value passed to the API or CLI, it makes that assignment have a lower precedence than an assignment in the document.
Let’s add that to the precedence list defined earlier.
-
Attribute passed to the API or CLI that does not end in
@ -
Attribute defined in the document
-
Attribute passed to the API or CLI that ends in
@ -
Default value
13.3. Using Attributes: Set, Assign, and Reference
Before you can use an attribute in your document, it must be set. (Sometimes referred to as “toggling on” the attribute).
Some attributes are automatically set when Asciidoctor processes a document. You can also set (or override) an attribute for a document by declaring an attribute entry. For example:
:sectnums:
Many attributes can be assigned a value at the same time:
:leveloffset: 3
The value may be empty, a string (of characters) or a number. A string value may include references to other attributes.
Attributes can be unset using the bang symbol (!).
The ! can be placed either before or after the attribute’s name.
For example, both:
:sectnums!:
and
:!sectnums:
mean unset the sectnums attribute.
In this case, it tells Asciidoctor to not number the sections.
An attribute reference is an inline element composed of the name of the attribute enclosed in curly brackets. For example:
The value of leveloffset is {leveloffset}.
The attribute reference is replaced by the attribute’s value when Asciidoctor processes the document. Referencing an attribute that is not set is considered an error and is handled specially by the processor.
The following sections will show you how to use attributes on your whole document, individual blocks, and inline elements.
13.4. Setting Attributes on a Document
An attribute entry is the primary mechanism used to define an attribute in a document.
:name: value
An attribute entry consists of the attribute’s name and its value. The attribute’s name comes first and must be surrounded by colons. The attribute’s value is offset from the name part by at least one space. The value is optional.
Once set, an attribute (and its value) are available for use throughout the remainder of the document. Attribute entries are used to toggle settings on and off or to set configuration variables that control the output generated by the AsciiDoc processor.
Attributes are typically defined in the document header, though they may also be defined in the body of the document. Many of the built-in attributes only take effect when defined in the document header.
For example, to enable the table of contents, you can define (i.e., set) the toc attribute using an attribute entry in the document header as follows:
:toc:
When the value following an attribute is left empty, as it is in the example above, the default value will be assigned.
The default value for toc is auto; therefore, the table of contents will be placed in the default location (below the document’s title) when the document is rendered.
If you want the table of contents to be placed on the right side of the document, you must assign the attribute a new value.
:toc: right
The right value will override the default value.
The value assigned to an attribute in the document header will replace the intrinsic value (assuming the attribute is not locked).
Attributes are also used to store URLs.
:uri-fedpkg: https://apps.fedoraproject.org/packages/asciidoc
Now you can refer to this attribute entry anywhere in the document (where attribute substitution is performed) by surrounding its name in curly braces:
Information about the AsciiDoc package in Fedora is found at {uri-fedpkg}.
You can also set the base path to images (default: empty), icons (default: ./images/icons), stylesheets (default: ./stylesheets) and JavaScript files (default: ./javascripts).
:imagesdir: ./images
:iconsdir: ./icons
:stylesdir: ./styles
:scriptsdir: ./js
When you find yourself typing the same text repeatedly, or text that often needs to be updated, consider assigning it to a document attribute and use that instead.
| If you’re familiar with writing in XML, you’ll recognize document attributes as user-defined entities. |
Attribute entries have the following characteristics:
- Attributes entries can
-
-
be assigned to a document:
-
through the CLI or API
-
in the document’s header
-
in the document’s body
-
-
be unset (turned off) with a leading (or trailing)
!added to the name -
have default values (in the case of a built-in attribute)
-
have alternate values (in the case of a built-in attribute)
-
span multiple, contiguous lines
-
include inline AsciiDoc content
-
- Attribute entries can not
-
-
override locked attributes assigned from the command line
-
include AsciiDoc block content (such as, bulleted lists or other types of whitespace-dependent markup)
-
13.4.1. Substitutions in an attribute entry
The header substitution group is applied to the header of your document.
Text substitution elements replace characters, markup, attribute references, and macros with converter specific styles and values.
When Asciidoctor processes a document it uses a set of six text substitution elements.
In the header, only special characters and attribute references are replaced.
However, if you require other substitutions to be applied to an attribute’s value, use the pass inline macro. This macro has special meaning in an attribute entry. It allows the substitutions to be applied at the time the attribute is defined.
The pass inline macro accepts a list of substitutions in the target slot.
In the next example, we’ll apply the quotes substitution to an attribute entry’s value.
:app-name: pass:quotes[MyApp^(C)^]
You can also specify the substitution using the single-character alias, q.
:app-name: pass:q[MyApp^(C)^]
Another approach is to change the order of substitutions that are applied where the attribute is referenced.
:app-name: MyApp^(C)^

[subs="specialchars,attributes,quotes,replacements,macros,post_replacements"]
The application is called {app-name}.
13.4.2. Splitting attribute values over multiple lines
When an attribute value is very long, it’s possible to split it (i.e., soft-wrap) across multiple lines.
Let’s assume we are working with the following attribute entry:
:long-value: If you have a very long line of text that you need to substitute regularly in a document, you may find it easier to split it neatly in the header so it remains readable to the next person reading your docs code.
You can split the value over multiple lines to make it more readable by inserting a space followed by a backslash (i.e., \) at the end of each continuing line.
:long-value: If you have a very long line of text \
that you need to substitute regularly in a document, \
you may find it easier to split it neatly in the header \
so it remains readable to folks reading your docs code.
The backslash and the newline that follows will be removed from the attribute value when the attribute entry is parsed, making this second example effectively the same as the first. The space before the backslash is preserved, so you have to use this technique at a natural break point in the content.
You can force an attribute value to hard wrap by adding a plus surrounded by spaces before the backslash.
:haiku: Write your docs in text, + \
AsciiDoc makes it easy, + \
Now get back to work!
This syntax ensures that the newlines are preserved in the output document as hard line breaks.
13.4.3. Attribute limitations
Attributes let you do a surprising amount of formatting for what is fundamentally a text replacement tool.
It may be tempting to try and extend attributes to be used for complex replaceable markup.
- Supported
-
Basic in-line AsciiDoc markup is permitted in attribute values, such as:
-
attribute references
-
text formatting (usually wrapped in a pass macro)
-
inline macros (usually wrapped in a pass macro)
-
- Unsupported
-
Complex AsciiDoc markup is not permitted in attribute values, such as:
-
lists
-
multiple paragraphs
-
other whitespace-dependent markup types
-
13.5. Setting Attributes on an Element
An attribute list can apply to blocks, inline quotes text, and macros. The attributes and their values contained in the list will take precedence over attribute entries.
[positional attribute,positional attribute,named attribute="value"]
Attribute lists:
-
apply to blocks as well as macros and inline quoted text
-
can contain positional and named attributes
-
take precedence over global attributes
13.5.1. Positional Attribute
in an attribute list
not named
the first positional attribute in the list on inline quoted text is referred to as the role attribute
the first positional attribute in the list on blocks and macros is known as the style attribute
13.5.2. Named Attribute
Named attributes are assigned a value with an = in an attribute list.
To undefine a named attribute, set the value to none.
13.5.3. Style
The style attribute is the first positional attribute in an attribute list. It specifies a predefined set of characteristics that should apply to a block element or macro.
For example, a paragraph block can be assigned one of the following built-in style attributes:
-
normal (default, so does not need to be set)
-
literal
-
verse
-
quote
-
listing
-
TIP
-
NOTE
-
IMPORTANT
-
WARNING
-
CAUTION
-
abstract
-
partintro
-
comment
-
example
-
sidebar
-
source
13.5.4. Id
The id attribute specifies a unique name for an element. That name can only be used once in a document.
An id has two purposes:
-
to provide an internal link or cross reference anchor for the element
-
to reference a style or script used by the output processor
Block Assignment
In an attribute list, there are two ways to assign an id attribute to a block element.
-
Prefixing the name with a hash (
#). -
Specifying the name with
id=<name>.
[#goals]
* Goal 1
* Goal 2
Let’s say you want to create a blockquote from an open block and assign it an ID and role.
You add quote (the block style) in front of the # (the ID) in the first attribute position, as this example shows:
[quote#roads, Dr. Emmett Brown]
____
Roads? Where we're going, we don't need roads.
____| The order of ID and role values in the shorthand syntax does not matter. |
13.5.5. Role
| Section introduction pending |
An element can be assigned numerous roles.
Block Assignment
In an attribute list, there are two ways to assign a role attribute to a block element.
-
Prefixing the name with a dot (
.). -
Specifying the name with
role=<name>.
[.summary]
* Review 1
* Review 2
[role="summary"]
* Review 1
* Review 2To specify multiple roles using the shorthand syntax, separate them by dots.
[.summary.incremental]
* Review 1
* Review 2
[role="summary,incremental"]
* Review 1
* Review 2Inline Assignment
The role (.) shorthand can be used on inline quoted text.
[big goal]*free the world*
[.big.goal]*free the world*
The attribute list preceding formatted text can be escaped using a backslash (e.g., [role]*bold*).
In this case, the text will still be formatted, but the attribute list will be unescaped and output verbatim.
|
To align with other formatted (i.e., quoted) text in AsciiDoc, roles can now be assigned to text enclosed in backticks.
Given:
[rolename]`monospace text`the following HTML is produced:
<code class="rolename">monospace text</code>Using the shorthand notation, an id (i.e., anchor) can also be specified:
[#idname.rolename]`monospace text`which produces:
<a id="idname"></a><code class="rolename">monospace text</code>13.5.6. Options
The options attribute is a versatile named attribute that can contain a comma separated list of values.
It can also be defined globally with an attribute entry.
Block Assignment
In an attribute list, there are three ways to assign an options attribute to a block element.
-
Prefixing the value with a percent sign (
%). -
Specifying the value with
opts=<name> -
Specifying the value with
options=<name>.
Consider a table block with the three option values header, footer, and autowidth.
Here’s how the options are assigned to the table using the shorthand notation (%).
[%header%footer%autowidth]
|===
| Cell A | Cell B
|===
Here’s how the options are assigned to the table using options.
[options="header,footer,autowidth"]
|===
| Cell A | Cell B
|===
Let’s consider the options when combined with other attributes.
[horizontal.properties%step]
property 1:: does stuff
property 2:: does different stuff
[horizontal, role="properties", options="step"]
property 1:: does stuff
property 2:: does different stuff
13.6. Assigning Document Attributes Inline
Document attributes can be assigned using the following syntax:
{set:<attrname>[!][:<value>]}
For example:
{set:sourcedir:src/main/java}is effectively the same as:
:sourcedir: src/main/java
This is important for being able to assign document attributes in places where attribute entry lines are not normally processed, such as in a table cell.
13.7. Attribute Conventions
|
Discuss and Contribute
Use Issue 444 to drive development of this section. Your contributions make a difference. No contribution is too small.
|
13.7.1. Catch a Missing or Undefined Attribute
By default, the original AsciiDoc processor drops the entire line if it contains a reference to a missing attribute (e.g., {bogus}).
This "feature" was added for use in templates written for the original processor, which also used the AsciiDoc syntax.
This behavior is not needed in Asciidoctor since templates are written in a dedicated template language (e.g., ERB, Haml, Slim, etc). More critically, the behavior is frustrating for the author, editor or reader. To them, it’s not immediately apparent when a line goes missing. Discovering its absence often requires a full (and tedious) read-through of the document or section.
Asciidoctor has two attributes to alleviate this inconvenience: attribute-missing and attribute-undefined.
The attribute attribute-missing controls how missing references are handled. By default, missing references are left intact so it’s clear to the author when one hasn’t been satisfied since, likely, the intent is for it to be replaced.
This attribute has four possible values:
skip-
leave the reference in place (default setting)
drop-
drop the reference, but not the line
drop-line-
drop the line on which the reference occurs (compliant behavior)
warn-
print a warning about the missing attribute
Consider the following line of AsciiDoc:
Hello, {name}!Here’s how the line is handled in each case, assuming the name attribute is not defined:
skip
|
Hello, {name}! |
drop
|
Hello, ! |
drop-line
|
|
warn
|
WARNING: skipping reference to missing attribute: XYZ |
The attribute attribute-undefined controls how expressions that undefine an attribute are handled. By default, the line is dropped since the expression is a statement, not content.
This attribute has two possible values:
drop-
substitute the expression with an empty string after processing it
drop-line-
drop the line that contains this expression (default setting and compliant behavior)
The option skip doesn’t make sense here since the statement is not intended to produce content.
Consider the following declaration:
{set:name!}Depending on whether attribute-undefined is drop or drop-line, either the statement or the line that contains it will be discarded.
It’s reasonable to stick with the compliant behavior, drop-line, in this case.
| We recommend putting any statement that undefines an attribute on a line by itself. |
Building a Document
| Introduction Pending |
14. Text Editor
Since AsciiDoc syntax is just plain text, you can write an AsciiDoc document using any text editor.
You don’t need complex word processing programs like Microsoft Word, OpenOffice Writer or Google Docs.
In fact, you shouldn’t use these programs because they add cruft to your document that you can’t see that makes conversion tedious.
While it’s true any text editor will do, an editor that supports syntax highlighting for AsciiDoc may be more helpful. The color brings contrast to the text, making it easier to read. The highlighting also confirms when you’ve entered the correct syntax for an inline or block element.
The most popular application for editing plain text on OS X is TextMate. A similar choice on Linux is GEdit. On Windows, stay away from Notepad and Wordpad because they produce plain text which is not cross-platform friendly. Opt instead for a competent text editor like Notepad++. If you’re a programmer (or a writer with an inner geek), you’ll likely prefer Vim, Emacs, or Sublime Text, all of which are available cross-platform. For those that work on multiple platforms, Atom is a consistent choice with many add-on packages for working with AsciiDoc files. The key feature all these editors share is syntax highlighting for AsciiDoc.
| Previewing the output of the document while editing can be helpful. To learn how to setup instant preview, check out the Editing AsciiDoc with Live Preview tutorial. |
15. Document Types
- Article (keyword:
article) -
The default doctype. In DocBook, includes the appendix, abstract, bibliography, glossary, and index sections.
- Book (keyword:
book) -
Builds on the article doctype with the additional ability to use a top-level title as part titles, includes the appendix, dedication, preface, bibliography, glossary, index, and colophon. There’s also the concept of a multi-part book, but the distinction from a regular book is determined by the content. A book only has chapters and special sections, whereas a multi-part book is divided by parts that each contain one or more chapters or special sections.
- Man page (keyword:
manpage) -
Used for producing a roff or HTML-formatted man page (short for manual page) for Unix and Unix-like operating systems. This doctype instructs the parser to recognize a special document header and section naming conventions for organizing the AsciiDoc content as a manual page. Refer to Man Pages for details on how to compose AsciiDoc for this purpose.
- Inline (keyword:
inline) -
Asciidoctor only. There may be cases when you only want to apply inline AsciiDoc formatting to input text without wrapping it in a block element. For example, in the Asciidoclet project (AsciiDoc in Javadoc), only the inline formatting is needed for the text in Javadoc tags.
15.1. Inline doctype
The rules for the inline doctype are as follows:
-
Only a single paragraph is read from the AsciiDoc source.
-
Inline formatting is applied.
-
The output is not wrapped in the normal paragraph tags.
Given the following input:
http://asciidoc.org[AsciiDoc] is a _lightweight_ markup language...Processing it with the options doctype=inline and backend=html5 produces:
<a href="http://asciidoc.org">AsciiDoc</a> is a <em>lightweight</em> markup language…The inline doctype allows the Asciidoctor processor to cover the full range of applications, from unstructured (inline) text to full, standalone documents!
16. Basic Document Anatomy
|
Discuss and Contribute
Use Issue 445 to drive development of this section. Your contributions make a difference. No contribution is too small.
|
17. Header
The document header is a special group of contiguous lines at the start of the document that encapsulates the document title, author attribution, revision information, and document-wide attributes configured or defined by the user.
The header typically begins with a document title, though this element is optional. If a document title is specified, it may be immediately followed by two optional lines of text that set the author attribution and revision information. Finally, any document-wide settings are declared using attribute entries. These attributes may proceed the document title as well. A header may even consist of attribute entries only. The first blank line marks the end of the header.
The document header must not contain any blank lines!
Comment lines may be included in the header, as long as those lines are directly adjacent to the other lines in the header.
The header is not required when the doctype is article or book.
However, a header must be present when the document type is manpage.
The requirements for a manual page (man page) are described in the man pages section.
The header is included by default when converting to a standalone document.
If you do not want the header of a document to be displayed, set the noheader attribute in the document’s header (or set the attribute using the API or CLI).
Now let’s explore the document title in detail.
17.1. Document Title
The document title resembles a level-0 section title, which is written using a single equal sign followed by at least one space (i.e., = ), then the text of the title.
The document title must be the first level-0 section title in the document.
The only content permitted above the document title are blank lines, comment lines and document-wide attribute entries.
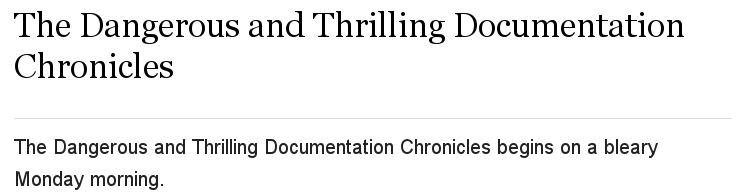
Here’s an example of a document title followed by a short paragraph. Notice the blank line between the document title and the first line of prose. That blank line is what offsets the document header from the body.
= The Dangerous and Thrilling Documentation Chronicles

This journey begins on a bleary Monday morning.

When the doctype is article or manpage, the document can only have one level-0 section title.
In contrast, the book document type permits multiple level-0 section titles.
When the doctype is book, the first level-0 section title, located in the header, is the document’s title and subsequent level-0 section titles are the part titles.
17.1.1. doctitle attribute
A document’s title is assigned to the built-in doctitle attribute.
The doctitle attribute can be referenced anywhere in a document and resolves to the document’s title when displayed.
= The Dangerous and Thrilling Documentation Chronicles

{doctitle} begins on a bleary Monday morning.
The doctitle attribute can also be used to set the document title instead of using a level-0 section title.
However, the attribute must still be set in the document header.
17.1.2. Document subtitle
Asciidoctor recognizes a subtitle in the primary level-0 heading.
If the primary title contains at least one colon followed by a space (i.e, : ), Asciidoctor treats the text after the final colon-space sequence as the subtitle.
The subtitle is not distinguished from the main title in the html5 output.
It’s only distinguished from the main title when using the docbook, epub3, and pdf converters.
|
= The Dangerous and Thrilling Documentation Chronicles: A Tale of Caffeine and Words

It began on a bleary Monday morning.
In this example, the following is true:
| Main title |
The Dangerous and Thrilling Documentation Chronicles |
| Subtitle |
A Tale of Caffeine and Words |
= A Cautionary Tale: The Dangerous and Thrilling Documentation Chronicles: A Tale of Caffeine and Words

It began on a bleary Monday morning.
In this example, the following is true:
| Main title |
A Cautionary Tale: The Dangerous and Thrilling Documentation Chronicles |
| Subtitle |
A Tale of Caffeine and Words |
Instead of using a colon followed by a space as the separator characters between the main title and the subtitle, you can specify a custom separator using the title-separator attribute.
= A Cautionary Tale: The Dangerous and Thrilling Documentation Chronicles: A Tale of Caffeine and Words

It began on a bleary Monday morning.
Note that a space is always appended to the value of the title-separator (making the default value of the title-separator effectively a single colon).
Asciidoctor also provides an API for extracting the title and subtitle. See the API docs for the Document::Title for more information. Support for subtitle functionality for other sections is being considered. Refer to issue #1493.
17.1.3. Document title visibility
You can control whether or not the document title is shown in the rendered document using the showtitle attribute.
When converting a standalone document, the document title is shown by default.
If you don’t want the title to be shown in this case, unset the showtitle attribute using showtitle! in the document header or via the CLI or API.
When converted to an embeddable document, the document title is not shown by default.
If you want the title to be shown, set the showtitle attribute in the document header or via the CLI or API.
The author and revision information is not shown below the document title in the embeddable version of the document like it is in the standalone document, even when the showtitle attribute is set.
Let’s look at how to add additional metadata to the document header, including an author and her email address.
17.2. Author and Email
The author of a document is listed on the line beneath the document’s title. An optional email address or URL can follow an author’s name inside angle brackets.
Let’s add an author with her email address to the document below.
= The Dangerous and Thrilling Documentation Chronicles
Kismet Rainbow Chameleon <kismet@asciidoctor.org>

This journey begins...

== About the Author

You can contact {author} at {email}.
{firstname} loves to hear from other chroniclers.

P.S. And yes, my middle name really is {middlename}.
What else would you expect from a member of the Rocky Mountain {lastname} Clan?

{authorinitials}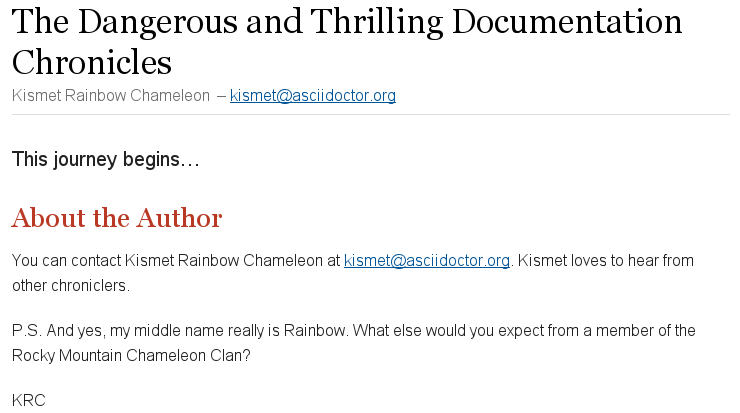
As you can see in the example above, Asciidoctor uses the author’s name and email to assign values to a number of built-in attributes that can be used throughout the document’s body. These attributes include:
author
|
The author’s full name, which includes all of the characters or words prior to a semicolon ( |
firstname
|
The first word in the author attribute. |
lastname
|
The last word in the author attribute. |
middlename
|
If a firstname and lastname are present, any remaining words or characters found between these attributes are assigned to the middlename attribute. |
authorinitials
|
The first character of the firstname, middlename, and lastname attributes. |
email
|
An email address, delimited by angle brackets ( |
If one or more of the author’s names consists of more than one word, use an underscore (_) between the words you want to adjoin.
For example, the author of the following document has a compound last name.
= The Unbearable Lightness of Nomenclature
Jan Hendrik van_den_Berg

My first name is {firstname}.

My middle name is {middlename}.

My last name is {lastname}.

My initials are {authorinitials}.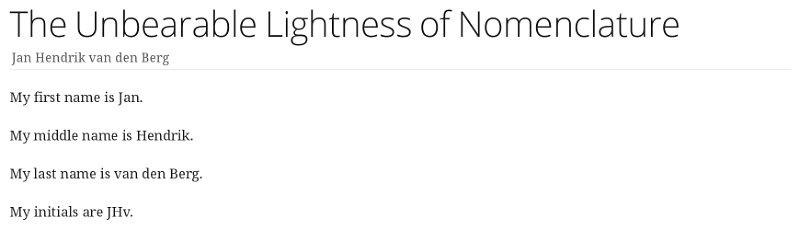
Alternatively, the author and email attributes can be set explicitly in the header.
= The Dangerous and Thrilling Documentation Chronicles
:author: Kismet Rainbow Chameleon
:email: kismet@asciidoctor.org

This journey begins...

== About the Author

You can contact {author} at {email}.
{firstname} loves to hear from other chroniclers.

P.S. And yes, my middle name really is {middlename}.
What else would you expect from a member of the Rocky Mountain {lastname} Clan?

{authorinitials}
The html5 and docbook converters can render documents with multiple authors.
Multiple authors and their emails are separated by semicolons (;) when they’re listed on the same line.
= The Dangerous and Thrilling Documentation Chronicles
Kismet Rainbow Chameleon <kismet@asciidoctor.org>; Lazarus het_Draeke <lazarus@asciidoctor.org>

This journey begins...

== About the Authors

You can contact {author} at {email}.
{firstname} loves to hear from other chroniclers.

{author_2} specializes in burning down automation obstacles. (1)
Email {lastname_2} at {email_2}.

Until our next adventure!

{authorinitials} & {authorinitials_2}| 1 | To reference the additional authors in the document body, the author attributes are appended with an underscore (_) followed by the position of the author in the author information list (i.e. Lazarus het Draeke is the second author in the list so his author attributes are appended with a 2). |
17.3. Revision Number, Date and Remark
A document’s revision information contains three optional attributes.
revnumber
|
The document’s version number which must contain at least one numeric character.
Any letters or symbols preceding the numeric character will not be rendered.
If the |
revdate
|
The date the document version was completed.
When the |
revremark
|
Information about this version of the document. |
The revision information is listed on the third line of the header, beneath the author information line.
= The Dangerous and Thrilling Documentation Chronicles
Kismet Chameleon <kismet@asciidoctor.org>
v1.0, October 2, 2013: First incarnation   (1) (2) (3)

This journey begins...

== Colophon

Version: {revnumber}

Version Date: {revdate}

Version Notes: {revremark}| 1 | revnumber and revdate must be separated by a comma (,). |
| 2 | revdate can contain words, letters, numbers, and symbols. |
| 3 | The revremark attribute must be preceded by a colon (:), regardless of whether revnumber or revdate are set. |

When rendered, the revnumber in the byline is preceded by the word Version; however, when referenced in the body of the document, only the numerical value is displayed.
The version-label attribute controls the version number label in the byline.
The revision information attributes can also be explicitly set in the header.
= The Dangerous and Thrilling Documentation Chronicles
Kismet Chameleon <kismet@asciidoctor.org>
:revnumber: 1.0 (1)
:revdate: 10-02-2013
:revremark: The first incarnation of {doctitle} (2)
:version-label!: (3)

This journey begins...

== Colophon

Version: {revnumber}

Version Date: {revdate}

Version Notes: {revremark}| 1 | When explicitly set, any characters preceding the version number are not dropped. |
| 2 | The revremark can contain attribute references. |
| 3 | The version-label attribute is unset so that the word Version does not precede the revnumber in the byline. |
In the rendered document, notice that the V preceding the revnumber is capitalized in the byline but not when the attribute is referenced in the body of the document.
| Revision extraction information and an extraction example are pending. |
17.4. Subtitle Partitioning
By default, the document title is separated into a main title and subtitle using the industry standard, a colon followed by a space.
| As of Asciidoctor 1.5.2, subtitle partitioning is not implemented in the HTML 5 backend. |
= Main Title: SubtitleThe separator is searched from the end of the text. Therefore, only the last occurrence of the separator is used for partitioning the title.
= Main Title: Main Title Continued: SubtitleYou can modify the title separator by specifying the separator block attribute explicitly above the document title (since Asciidoctor 1.5.3).
Note that a space will automatically be appended to the separator value.
[separator=::]
= Main Title:: Subtitle
You can also set the separator using a document attribute, either in the document:
= Main Title:: Subtitle
:title-separator: ::
or from the API or CLI (shown here):
$ asciidoctor -a title-separator=:: document.adoc
You can partition the title from the API when calling the doctitle method on Document:
title_parts = document.doctitle partition: true
puts title_parts.title
puts title_parts.subtitle
You can partition the title in an arbitrary way by passing the separator as a value to the partition option. In this case, the partition option both activates subtitle partitioning and passes in a custom separator.
title_parts = document.doctitle partition: '::'
puts title_parts.title
puts title_parts.subtitle
17.5. Metadata
Document metadata, such as a description of the document, keywords, and an alternate title, can be assigned to attributes in the header.
When rendered to HTML, the values of these attributes will correspond to tags contained in the <head> section of an HTML document.
17.5.1. Description
You can include a description of the document using the description attribute.
= The Dangerous and Thrilling Documentation Chronicles
Kismet Rainbow Chameleon <kismet@asciidoctor.org>; Lazarus het_Draeke <lazarus@asciidoctor.org>
:description: A story chronicling the inexplicable hazards and vicious beasts a \ (1)
documentation team must surmount and vanquish on their journey to finding an \
open source project's true power.

This journey begins on a bleary Monday morning.| 1 | If the document’s description is long, you can break the attribute’s value across several lines by ending each line with a backslash \ that is preceded by a space. |
When rendered to HTML, the document description value is assigned to the HTML <meta> tag.
<!DOCTYPE html>
<html lang="en">
<head>
<meta http-equiv="Content-Type" content="text/html; charset=UTF-8">
<meta name="generator" content="Asciidoctor 0.1.4">
<meta name="viewport" content="width=device-width, initial-scale=1.0">
<meta name="description" content="A story chronicling the inexplicable hazards and vicious beasts a documentation team must surmount and vanquish on their journey to finding an open source project's true power.">
<title>The Dangerous and Thrilling Documentation Chronicles</title>
<style>
17.5.2. Keywords
The keywords attribute contains a list of comma separated values that are assigned to the HTML <meta> tag.
= The Dangerous and Thrilling Documentation Chronicles
Kismet Rainbow Chameleon <kismet@asciidoctor.org>; Lazarus het_Draeke <lazarus@asciidoctor.org>
:keywords: documentation, team, obstacles, journey, victory

This journey begins on a bleary Monday morning.<!DOCTYPE html>
<html lang="en">
<head>
<meta http-equiv="Content-Type" content="text/html; charset=UTF-8">
<meta name="generator" content="Asciidoctor 0.1.4">
<meta name="viewport" content="width=device-width, initial-scale=1.0">
<meta name="keywords" content="documentation, team, obstacles, journey, victory">
<title>The Dangerous and Thrilling Documentation Chronicles</title>
<style>17.5.3. Alternate Title
By default, the document title is used as the HTML <title> tag value.
However, you can set the title attribute in the document’s header to override this behavior.
17.5.4. Custom Metadata, Styles and Functions
You can add content, such as custom metadata, stylesheet, and script information, to the header of a rendered document with document information (docinfo) files.
The docinfo file section details what these files can contain and how to use them.
17.6. Header Summary
| Attribute | Values | Description | Notes | Converters |
|---|---|---|---|---|
|
Author’s full name |
all |
||
|
First character of each word in the |
all |
||
|
Text describing the document |
html |
||
|
Adds content from a docinfo file to header |
html, docbook |
||
|
Text entered by user |
Title of document |
Identical to the value returned by |
all |
|
Email address |
all |
||
|
First word of |
all |
||
|
A list of comma-separated values that describe the document |
html |
||
|
Last word of |
all |
||
|
Middle word of |
all |
||
|
Suppresses the rendering of the header and footer |
all |
||
|
Suppresses the rendering of the header |
all |
||
|
Toggles the display of a document’s title |
all |
||
|
Date of document version |
all |
||
|
Version number of the document |
all |
||
|
Version comments |
all |
||
|
Toggles the display of an embedded document’s title |
all |
||
|
Alternative title of the document |
html |
||
|
|
The label preceding the |
html |
18. Preamble
Content between the document header and the first section title is called the preamble. The preamble is optional.
= The Dangerous and Thrilling Documentation Chronicles
Kismet Chameleon

This journey begins on a bleary Monday morning.
Our intrepid team is in desperate need of double shot mochas, but the milk expired eight days ago.
A trip to the dairy was out of the question.
On Friday night, a mutant, script-injecting warlock had infected the Shetland cattle herd with a ravenous craving for tags and annotations.
The security wolves were at a trust building retreat in Katchanga, and no one in the village could locate their defensive operations manual.

Weak daylight trickled across the stripped pasture, chased by distant bovine screams...

== Cavern Glow

The river rages through the cavern, rattling its content...
When using the default Asciidoctor stylesheet, the lead attribute is applied to the first paragraph of the preamble.
19. Sections
Sections partition the document into a content hierarchy. In Asciidoctor, sections are defined using section titles.
A section title represents the heading for a section. Section title levels are specified by two to six equal signs. The number of equal signs represents the nesting level (using a 0-based index) of the title.
= Document Title (Level 0)

== Level 1 Section Title

=== Level 2 Section Title

==== Level 3 Section Title

===== Level 4 Section Title

====== Level 5 Section Title

== Another Level 1 Section TitleDocument Title (Level 0)
Level 1 Section Title
Level 2 Section Title
Level 3 Section Title
Level 4 Section Title
Level 5 Section Title
Another Level 1 Section Title
In addition to the equals sign marker used for defining single-line section titles, Asciidoctor recognizes the hash symbol (#) from Markdown.
That means the outline of a Markdown document will render just fine as an AsciiDoc document.
|
Section levels must be nested logically. There are two rules you must follow:
-
A document can only have multiple level 0 sections if the
doctypeis set tobook. -
Section levels cannot be skipped when nesting sections (i.e., you can’t nest a level 5 section directly in a level 3 section)
For example, the following syntax is illegal:
= Document Title

= Illegal Level 0 Section (violates rule #1)

== First Section

==== Illegal Nested Section (violates rule #2)
Content above the first section title is designated as the document’s preamble. Once the first section title is reached, content is associated with the section it is nested in.
== First Section

Content of first section

=== Nested Section

Content of nested section

== Second Section

Content of second section
19.1. Titles as HTML Headings
When the document is rendered as HTML 5 (using the built-in html5 backend), each section title becomes a heading element where the heading level matches the number of equal signs.
For example, a level 1 section (==) maps to an <h2> element.
19.2. Auto-generated IDs
Section IDs are generated from the section title.
By default, the ID is prefixed with an underscore (_) and each word in the title is separated by an underscore.
You can change the prefix using the idprefix attribute.
:idprefix: -If you want to remove the prefix, assign it to an empty value:
:idprefix:You can change the word separator by using the idseparator attribute.
:idseparator: -To disable the auto-generation of section IDs, unset the sectids attribute:
:sectids!:
Asciidoctor permits all valid UTF-8 characters in section IDs.
If you are generating a PDF from AsciiDoc using a2x and dblatex, see Using UTF-8 titles with a2x to learn about the required latex.encoding=utf8 switch.
|
19.3. Custom IDs
You can also assign a custom ID and reference text label to a section (see Defining an Anchor). This can be useful when you define a cross reference pointing to the section.
[[tigers-section, Tigers]]
=== Subspecies of Tiger
19.4. Links
To turn section titles into links, enable the sectlinks attribute.
The default Asciidoctor stylesheet displays linked section titles with the same color and styles as unlinked section titles.
19.5. Anchors
When the sectanchors attribute is enabled on a document, an anchor (empty link) is added before the section title.
The default Asciidoctor stylesheet renders the anchor as a section entity (§) that floats to the left of the section title.
19.6. Numbering
Asciidoctor allows section numbering to be toggled on and off throughout a document.
You can enable section numbers using the sectnums attribute.
:sectnums:
Asciidoctor still supports the attribute name numbered to number sections for backward compatibility with AsciiDoc Python, but the name sectnums is preferred.
|
You can also use this attribute entry above any section title in the document to toggle the auto-numbering setting. When you want to turn off the numbering, add an exclamation point to the end of the attribute name:
:sectnums!:

== Unnumbered Section
For regions of the document where section numbering is turned off, the section numbering will not be incremented.
Given:
= Document Title

:sectnums!:

== Colophon Section

== Another Colophon Section

== Last Colophon Section

:sectnums:

== Section One

== Section Two

== Section Three
The sections will be numbered as follows:
Colophon Section

Another Colophon Section

Last Colophon Section

1. Section One

2. Section Two

3. Section Three
Asciidoctor will always curtail incrementing the section number in regions of the document where section numbers are off.
If sectnums is set on the command line (or API), that overrides the value set in the document header, but it does not prevent the document from toggling the value for regions of the document.
If sectnums! is set on the command line (or API), then the numbers are disabled regardless of the setting within the document.
|
Flexible attributes
The sectnums attribute is referred to as a “flexible attribute”, which means it can always be changed midstream in the document, even if it is enabled through the API or CLI.
At the time of writing, sectnums is unique in this way, though other attributes may receive this special status in the future.
|
19.6.1. Numbering depth
You can restrict section numbering depth by defining the sectnumlevels (document header-only) attribute.
:sectnumlevels: 2 (1)| 1 | When the sectnumlevels attribute is assigned a value of 2, section titles with levels 3 through 5 are not numbered (i.e., not prefixed with a number). |
Assigning sectnumlevels a value of 0 is effectively the same as disabling section numbering (i.e., sectnums!).
19.7. Discrete or Floating Section Titles
The discrete attribute can be applied to any section titles that start with two to six equal signs (==).
A discrete title is styled like a section title but is not part of the content hierarchy (i.e., it ignores section nesting rules).
Nor will it be included in the ToC.
[discrete] (1)
== Discrete Title for a Sidebar (2)

**** (3)
Discrete titles are useful for labeling large sidebar and admonition blocks.
****| 1 | Set the discrete attribute above the title |
| 2 | The title must be designated by two to six equal signs |
| 3 | Delimiter specifying the beginning of a sidebar block |
You can also use the float attribute to create a discrete title.
However, the content in the discrete section will not be repositioned (i.e., float) to the left or right of other content blocks.
|
19.8. Section Styles
Asciidoctor provides styles for the frontmatter and backmatter sections commonly found in journal articles, academic papers, and books. The styles are:
-
colophon
-
abstract
-
preface
-
dedication
-
part introduction
-
appendix
-
glossary
-
bibliography
-
index
These styles are available to the article and book document types, with the exception of the part introduction style which is exclusive to books.
In general, the section style attribute is set above a level 1 section title or block of text. For instance, the example below shows how to label a section as an abstract.
[abstract]
== Documentation Abstract

Documentation is a distillation of many long, squiggly adventures.
The structure and usage rules for each section style is explained in Structuring, Navigating, and Referencing Your Content.
19.9. Sections Summary
| Attribute | Value(s) | Example Syntax | Comments |
|---|---|---|---|
|
N/A |
|
Set to autogenerate by default |
|
|
|
Set to autogenerate a |
|
N/A |
|
Asciidoctor only |
|
N/A |
|
Asciidoctor only |
|
N/A |
|
Section numbering is off by default. Can be toggled on or off through document. |
|
0-5 |
|
Set to autogenerate section numbers up to level three by default.
Setting a value of |
20. Blocks
| Section Pending |
20.1. Title
You can assign a title to any paragraph, list, delimited block, or block macro. In most cases, the title is displayed immediately above the content. If the content is a figure or image, the title is displayed below the content.
A block title is defined on a line above the element.
The line must begin with a dot (.) and be followed immediately by the title text.
Here’s an example of a list with a title:
.TODO list
- Learn the AsciiDoc syntax
- Install Asciidoctor
- Write my document
20.2. Metadata
In addition to a title, a block can be assigned additional metadata including:
-
Id (i.e., anchor)
-
Block name (first positional attribute)
-
Block attributes
Here’s an example of a quote block with metadata:
.Gettysburg Address (1)
[[gettysburg]] (2)
[quote, Abraham Lincoln, Address delivered at the dedication of the Cemetery at Gettysburg]   (3) (4) (5)
____
Four score and seven years ago our fathers brought forth
on this continent a new nation...

Now we are engaged in a great civil war, testing whether
that nation, or any nation so conceived and so dedicated,
can long endure. ...
____| 1 | Title: Gettysburg Address |
| 2 | ID: gettysburg, see Defining an Anchor |
| 3 | Block name: quote |
| 4 | attribution: Abraham Lincoln (Named block attribute) |
| 5 | citetitle: Address delivered at the dedication of the Cemetery at Gettysburg (Named block attribute) |
| A block can have multiple block attribute lines. The attributes will be aggregated. If there is a name conflict, the last attribute defined wins. |
Some metadata is used as supplementary content, such as the title, whereas other metadata controls how the block is rendered, such as the block name.
20.3. Delimited blocks
The AsciiDoc syntax provides a set of components for including non-paragraph text, such as block quotes, source code listings, sidebars and tables, in your document.
These components are referred to as delimited blocks because they are surrounded by delimiter lines (e.g., ****).
Here’s an example of a sidebar block:
****
sidebar block
****
Within the boundaries of a delimited block, you can enter any content or blank lines. The block doesn’t end until the ending delimiter is found. The delimiters around the block determine the type of block, how the content is processed and rendered and what elements are used to wrap the content in the output.
20.3.1. Delimiter lines
The boundaries of a delimited block must be balanced. In other words, the opening delimiter line must be the same length as the closing delimiter line.
For example, the following delimited block is not balanced and therefore invalid:
********
invalid sidebar block
****
When the processor encounters the previous example, it will put the remainder of the content in the document inside the delimited block (without warning, currently). As far as the processor is concerned, the closing delimiter is just a line of content. If you want the closing delimiter to be matched, it must be the same length as the opening delimiter.
****
valid sidebar block
****
The AsciiDoc Python processor did not require the delimiters to be balanced, but also never documented that this was permissible. We view AsciiDoc Python’s behavior of matching unbalanced delimited blocks to be a bug and therefore do not allow it in Asciidoctor.
20.3.2. Optional delimiters
If the content is contiguous (not interrupted by blank lines), you can forgo the use of the block delimiters and instead use the block name above a paragraph to repurpose it as one of the delimited block types.
This format is often used for single-line listings:
[listing]
sudo dnf install asciidoc
or single-line quotes:
[quote]
Never do today what you can put off `'til tomorrow.20.4. Built-in blocks summary
The following table identifies the built-in block names and delimited blocks syntax, their purposes, and the substitutions performed on their contents.
| Block | Block Name | Delimiter | Purpose | Substitutions |
|---|---|---|---|---|
Admonition |
|
Any delimiter |
Content labeled with a tag or icon, can masquerade as any delimited block type |
Varies |
Comment |
N/A |
|
Private notes that are not displayed in the output |
None |
Example |
|
|
Designates example content or defines an admonition block |
Normal |
Fenced |
N/A |
|
Source code or keyboard input is displayed as entered |
Verbatim |
Listing |
|
|
Source code or keyboard input is displayed as entered |
Verbatim |
Literal |
|
|
Output text is displayed exactly as entered |
Verbatim |
Open |
Most block names |
|
Anonymous block that can act as any block except passthrough or table blocks |
Varies |
Passthrough |
|
|
Unprocessed content that is sent directly to the output |
None |
Quote |
|
|
A quotation with optional attribution |
Normal |
Sidebar |
|
|
Aside text and content rendered outside the flow of the document |
Normal |
Source |
|
|
Source code or keyboard input to be displayed as entered |
Verbatim |
Stem |
|
|
Unprocessed content that is sent directly to an interpreter (such as AsciiMath or LaTeX math) |
None |
Table |
N/A |
|
Displays tabular content |
Varies |
Verse |
|
|
A verse with optional attribution |
Normal |
This table shows the substitutions performed by each substitution group referenced in the previous table.
| Group | Special characters | Quotes | Attributes | Replacements | Macros | Post replacements |
|---|---|---|---|---|---|---|
Header |
||||||
None |
||||||
Normal |
||||||
Pass |
||||||
Verbatim |
| Surround an attribute value with single quotes in order to apply normal substitutions. |
21. Paragraph
The bulk of the content in a document is paragraph text. This is why Asciidoctor doesn’t require any special markup or attributes to specify paragraph content. You can just start typing.
In Asciidoctor, adjacent or consecutive lines of text form a paragraph element. To start a new paragraph after another element, such as a section title or table, hit the RETURN key twice to insert a blank line, and then continue typing your content.
This journey begins one late Monday afternoon in Antwerp.
Our team desperately needs coffee, but none of us dare open the office door.

To leave means code dismemberment and certain death.This journey begins one late Monday afternoon in Antwerp. Our team desperately needs coffee, but none of us dare open the office door.
To leave means code dismemberment and certain death.
21.1. Line Breaks
Since adjacent lines of text are combined into a single paragraph when Asciidoctor renders a document, that means you can wrap paragraph text or put each sentence or phrase on a separate line. The line breaks won’t appear in the output.
However, if you want the line breaks in a paragraph to be preserved, you can either use a plus sign (+) or the hardbreaks attribute.
This results in a visible line break (e.g., <br>) following each line.
Rubies are red, +
Topazes are blue.
Rubies are red,
Topazes are blue.
[%hardbreaks]
Ruby is red.
Java is black.
Ruby is red.
Java is black.
Alternatively, you can preserve line breaks throughout your whole document by adding the hardbreaks attribute to the document’s header.
= Line Break Doc Title
:hardbreaks:

Rubies are red,
Topazes are blue.
You can also preserve line breaks using literal blocks, listing blocks, and verses.
21.2. Lead Style
Apply the lead style to any paragraph, and it will render using a larger font size.
The lead style is assigned to the role attribute.
You can set role using the long- or shorthand method.
.) and assigning it the lead value[.lead]
This is the ultimate paragraph.This is the ultimate paragraph.
When you render a document using the default backend and stylesheet, the first paragraph of the preamble is automatically styled as a lead paragraph.
22. Text Formatting
Just as we emphasize certain words and phrases when we speak, we can emphasize them in text with formatting. This formatting, such as bold or monospace, is indicated by surrounding letters, words, or phrases with simple markup. When Asciidoctor processes text enclosed by formatting markup, the markup is replaced by the corresponding HTML or XML tags, depending on your backend, during the quotes substitution phase.
Continue reading to learn how to format letters, words or phrases with the following styles:
-
bold
-
italic
-
curved (smart) quotation marks and apostrophes
-
subscript and superscript
-
monospace
-
highlighted, built-in and custom CSS styles
| You may not always want these symbols to indicate text formatting. In those cases, you’ll need to use additional markup to escape the text formatting markup. |
22.1. Bold and Italic
The two most common ways of emphasizing a word is to format it as bold or italic.
To render a word or phrase with bold styling, place an asterisk (*) at the beginning and end of the text you wish to format.
To bold a letter or letters in a string of text, place two asterisks (**) before and after the letter or letters.
Letters and words are italicized using one (_) or two (__) underscores.
When you want to bold and italicize a letter or word, the bold markup must be the outermost markup.
_To tame_ the wild wolpertingers we needed to build a *charm*.
But **u**ltimate victory could only be won if we divined the *_true name_* of the __war__lock.To tame the wild wolpertingers we needed to build a charm. But ultimate victory could only be won if we divined the true name of the warlock.
22.2. Quotation Marks and Apostrophes
Single and double quotation marks are not rendered as curved quotation marks (also known as smart, curly, typographic or book quotation marks).
When entered using the ' and " key, Asciidoctor outputs straight (dumb, vertical, typewriter)
quotation marks.
However, by creating a set of backticks (`) contained within a set of single quotes (') or double quotes ("), you can tell Asciidoctor where to output curved quotation marks.
"`What kind of charm?`" Lazarus asked. "`An odoriferous one or a mineral one?`" (1)

Kizmet shrugged. "`The note from Olaf's desk says '`wormwood and licorice,`' but these could be normal groceries for werewolves.`" (2)| 1 | To output double curved quotes, enclose a word or phrase in a set of double quotes (") and a set of backticks (`). |
| 2 | To output single curved quotes, enclose a word or phrase in a set of single quotes (') and a set of backticks (`). In this example, the phrase wormwood and licorice should be enclosed in curved single quotes when the document is rendered. |
“What kind of charm?” Lazarus asked. “An odoriferous one or a mineral one?”
Kizmet shrugged. “The note from Olaf’s desk says ‘wormwood and licorice,’ but these could be normal groceries for werewolves.”
When entered with the ' key, Asciidoctor renders an apostrophe that is directly preceded and followed by a character, such as in contractions and possessive singular forms, as a curved apostrophe. This inconsistent handling of apostrophes and quotation marks is a hold over from the original AsciiDoc processor. An apostrophe directly bounded by two characters is processed during the replacements substitution phase, not the quotes phase. This is why an apostrophe directly followed by white space, such as the possessive plural form, is not curved by default.
To render an apostrophe as curved when it is not bound by two characters, mark it as you would a single curved quote.
Olaf had been with the company since the `'60s.
His desk overflowed with heaps of paper, apple cores and squeaky toys.
We couldn't find Olaf's keyboard.
The state of his desk was replicated, in triplicate, across all of the werewolves`' desks.
In the rendered output, note that the plural possessive apostrophe, seen trailing werewolves, is curved, as is the omission apostrophe before 60s.
Olaf had been with the company since the ’60s. His desk overflowed with heaps of paper, apple cores and squeaky toys. We couldn’t find Olaf’s keyboard. The state of his desk was replicated, in triplicate, across all of the werewolves’ desks.
If you don’t want an apostrophe that is bound by two characters to be rendered as curved, escape it by preceding it with a backslash (\).
The preventing substitutions and passthrough sections detail additional ways to prevent punctuation substitutions.
Olaf\'s desk ...
Olaf's desk …
22.3. Subscript and Superscript
Subscript and superscript text is common in mathematical expressions and chemical formulas. When rendered, the size of subscripted and superscripted text is reduced. Subscripted text is placed at the baseline and superscripted text above the baseline. The size and precise placement of the text depends on the font and other stylesheet parameters applied to the rendered document.
Text is subscripted when you enclose it in a set of tildes (~) and superscripted with a set of carets (^)
- Subscript
-
One tilde (
~) on either side of a word or phrase makes it subscript. - Superscript
-
One caret (
^) on either side of a word or phrase makes it superscript.
"`Well the H~2~O formula written on their whiteboard could be part of a shopping list, but I don't think the local bodega sells E=mc^2^,`" Lazarus replied.“Well the H2O formula written on their whiteboard could be part of a shopping list, but I don’t think the local bodega sells E=mc2,” Lazarus replied.
| You can write and render equations and formulas in AsciiDoc documents using MathJax. |
22.4. Monospace
Monospace text formatting is often used to emulate how source code appears in computer terminals, simple text editors, and integrated development environments (IDEs).
In Asciidoctor 1.5, inline content is rendered using a fixed-width font, i.e. monospaced font, when it is enclosed in a single set of backticks (`).
A character bounded by other characters must be enclosed in a double set of backticks (``).
"`Wait!`" Indigo plucked a small vial from her desk's top drawer and held it toward us.
The vial's label read: E=mc^2^; `the scent of science`; `_smell like a genius_`.
Monospaced text can be bold and italicized, as long as the markup sets are entered in the right order. The monospace markup must be the outermost set, then the bold set, and the italic markup must always be the innermost set.
“Wait!” Indigo plucked a small vial from her desk’s top drawer and held it toward us.
The vial’s label read: E=mc2; the scent of science; smell like a genius.
22.5. Custom Styling With Attributes
When text is enclosed in a set of single or double hash symbols (#), and no style is assigned to it, the text will be rendered as highlighted (<marked>).
Werewolves are #allergic to cinnamon#.<mark>mark element</mark>Werewolves are allergic to cinnamon.
Additionally, text marked with hash symbols can be assigned built-in styles, such as big and green.
Do werewolves believe in [small]#small print#? (1)

[big]##O##nce upon an infinite loop.| 1 | The first positional attribute is treated as a role. You can assign it a custom or built-in CSS class. |
Do werewolves believe in small print?
Once upon an infinite loop.
You can format text with custom styles that you define as well.
Type the word [userinput]#asciidoctor# into the search bar.When rendered to HTML, the word asciidoctor is wrapped in <span> tags and the role userinput is used as the element’s CSS class.
<span class="userinput">asciidoctor</span>23. Unordered Lists
If you were to create a list in an e-mail, how would you do it? Chances are, you’d mark list items using the same characters that Asciidoctor uses to find list items.
In the example below, each list item is marked using an asterisk (*), the AsciiDoc syntax specifying an unordered list item.
* Edgar Allen Poe
* Sheri S. Tepper
* Bill Bryson
A list item’s first line of text must be offset from the marker (*) by at least one space.
If you prefer, you can indent list items.
Blank lines are required before and after a list.
Additionally, blank lines are permitted, but not required, between list items.
-
Edgar Allen Poe
-
Sheri S. Tepper
-
Bill Bryson
You can add a title to a list by prefixing the title with a period (.).
.Kizmet's Favorite Authors
* Edgar Allen Poe
* Sheri S. Tepper
* Bill Bryson-
Edgar Allen Poe
-
Sheri S. Tepper
-
Bill Bryson
Was your instinct to use a hyphen (-) instead of an asterisk to mark list items?
Guess what?
That works too!
- Edgar Allen Poe
- Sheri S. Tepper
- Bill Bryson
You should reserve the hyphen for lists that only have a single level because the hyphen marker (-) doesn’t work for nested lists.
Now that we’ve mentioned nested lists, let’s go to the next section and learn how to create lists with multiple levels.
23.1. Nested
To nest an item, just add another asterisk (*) in front of it.
.Possible DefOps manual locations
* West wood maze
** Maze heart
*** Reflection pool
** Secret exit
* Untracked file in git repository-
West wood maze
-
Maze heart
-
Reflection pool
-
-
Secret exit
-
-
Untracked file in git repository
You can have up to five levels of nesting.
* level 1
** level 2
*** level 3
**** level 4
***** level 5
* level 1-
level 1
-
level 2
-
level 3
-
level 4
-
level 5
-
-
-
-
-
level 1
While it would seem as though the number of asterisks represents the nesting level, that’s not how depth is determined. A new level is created for each unique marker encountered. However, it’s much more intuitive to follow the convention that the number of asterisks equals the level of nesting. After all, we are shooting for plain text markup that is readable as is.
23.2. Complex List Content
Aside from nested lists, all of the list items you’ve seen only have one line of text. A list item can hold any type of AsciiDoc content, including paragraphs, listing blocks and even tables. You just need to attach them to the list item.
Like with regular paragraph text, the text in a list item can wrap across any number of lines, as long as all the lines are adjacent. The wrapped lines can be indented and they will still be treated as normal paragraph text. For example:
* The header in AsciiDoc is optional, but if
it is used it must start with a document title.

* Optional Author and Revision information
immediately follows the header title.

* The document header must be separated from
  the remainder of the document by one or more
blank lines and cannot contain blank lines.-
The header in AsciiDoc is optional, but if it is used it must start with a document title.
-
Optional Author and Revision information immediately follows the header title.
-
The document header must be separated from the remainder of the document by one or more blank lines and cannot contain blank lines.
| When items contain more than one line of text, leave a blank line before the next item to make the list easier to read. |
If you want to attach additional paragraphs to a list item, you “add” them together using a list continuation.
A list continuation is a + symbol on a line by itself, immediately adjacent to the two blocks it’s connecting.
Here’s an example:
* The header in AsciiDoc must start with a
  document title.
+
The header is optional.

* Optional Author and Revision information
immediately follows the header title.-
The header in AsciiDoc must start with a document title.
The header is optional.
-
Optional Author and Revision information immediately follows the header title.
Using the list continuation, you can attach any type of block element and you can use the list continuation any number of times in a single list item.
Here’s an example that attaches both a listing block and an admonition paragraph to the first item:
* The header in AsciiDoc must start with a
  document title.
+
----
= Document Title
----
+
NOTE: The header is optional.

* Optional Author and Revision information
  immediately follows the header title.
+
----
= Document Title
Doc Writer <doc.writer@asciidoc.org>
v1.0, 2013-01-01
----
Here’s how the source is rendered:
-
The header in AsciiDoc must start with a document title.
= Document Title
The header is optional. -
Optional Author and Revision information immediately follows the header title.
= Document Title
Doc Writer <doc.writer@asciidoc.org>
v1.0, 2013-01-01
If the principle text of a list item is blank, the node for the principle text is dropped.
This is how you can get the first block (such as a listing block) to line up with the list marker.
You can make the principle text blank by using the {blank} attribute reference.
Here’s an example of a list that has items with only complex content.
. {blank}
+
----
print("one")
----
. {blank}
+
----
print("one")
----
Here’s how the source is rendered:
-
print("one") -
print("one")
23.3. Custom Markers
Asciidoctor offers numerous bullet styles for lists. The list marker (bullet) is set using the list’s block style.
The unordered list marker can be set using any of the following block styles:
-
square
-
circle
-
disc
-
none or no-bullet (indented, but no bullet)
-
unstyled (no indentation or bullet) (HTML only)
| These styles are supported by the default Asciidoctor stylesheet. |
When present, the style name is assigned to the unordered list element as follows:
- For HTML
-
the style name is assigned to the
classattribute on the<ul>element. - For DocBook
-
the style name is assigned to the
markattribute on the<itemizedlist>element.
Here’s an unordered list that has square bullets:
[square]
* one
* two
* three-
one
-
two
-
three
23.4. Checklist
List items can be marked complete using checklists.
Checklists (i.e., task lists) are unordered lists that have items marked as checked ([*] or [x]) or unchecked ([ ]).
Here’s an example:
- [*] checked
- [x] also checked
- [ ] not checked
- normal list item-
checked
-
also checked
-
not checked
-
normal list item
| Not all items in the list have to be checklist items, as the previous example shows. |
When checklists are rendered to HTML, the checkbox markup is transformed into an HTML checkbox with the appropriate checked state.
The data-item-complete attribute on the checkbox is set to 1 if the item is checked, 0 if not.
The checkbox is used in place of the item’s bullet.
Since HTML generated by Asciidoctor is usually static, the checkbox is set as disabled to make it appear as a simple mark.
If you want to make the checkbox interactive (i.e., clickable), add the interactive option to the checklist (shown here using the shorthand syntax for Options):
[%interactive]
- [*] checked
- [x] also checked
- [ ] not checked
- normal list item-
checked
-
also checked
-
not checked
-
normal list item
As a bonus, if you enable font-based icons, the checkbox markup (in non-interactive lists) is transformed into a font-based icon!
[%interactive]
- [*] checked
- [x] also checked
- [ ] not checked
-     normal list item
23.5. Summary
|
Discuss and Contribute
Use Issue 466 to drive development of this section. Your contributions make a difference. No contribution is too small.
|
24. Ordered Lists
Sometimes, we need to number the items in a list. Instinct might tell you to prefix each item with a number, like in this next list:
1. Protons
2. Electrons
3. Neutrons
The above works, but since the numbering is obvious, the AsciiDoc processor will insert the numbers for you if you omit them:
. Protons
. Electrons
. Neutrons-
Protons
-
Electrons
-
Neutrons
If you decide to use number for your ordered list, you have to keep them sequential. This differs from other lightweight markup languages. It’s one way to adjust the numbering offset of a list. For instance, you can type:
4. Step four
5. Step five
6. Step six
However, in general the best practice is to use the start attribute to configure this sort of thing:
[start=4]
 . Step four
 . Step five
 . Step six
To present the items in reverse order, add the reversed option:
[%reversed]
.Parts of an atom
. Protons
. Electrons
. Neutrons-
Protons
-
Electrons
-
Neutrons
You can give a list a title by prefixing the line with a dot immediately followed by the text (without leaving any space after the dot).
Here’s an example of a list with a title:
.Parts of an atom
. Protons
. Electrons
. Neutrons-
Protons
-
Electrons
-
Neutrons
24.1. Nested
You create a nested item by using one or more dots in front of each the item.
. Step 1
. Step 2
.. Step 2a
.. Step 2b
. Step 3
AsciiDoc selects a different number scheme for each level of nesting. Here’s how the previous list renders:
-
Step 1
-
Step 2
-
Step 2a
-
Step 2b
-
-
Step 3
|
Like with the asterisks in an unordered list, the number of dots in an ordered list doesn’t represent the nesting level. However, it’s much more intuitive to follow this convention: # of dots = level of nesting Again, we are shooting for plain text markup that is readable as is. |
You can mix and match the three list types, ordered, unordered, and labeled, within a single hybrid list. Asciidoctor works hard to infer the relationships between the items that are most intuitive to us humans.
Here’s an example of nesting an unordered list inside of an ordered list:
. Linux
* Fedora
* Ubuntu
* Slackware
. BSD
* FreeBSD
* NetBSD-
Linux
-
Fedora
-
Ubuntu
-
Slackware
-
-
BSD
-
FreeBSD
-
NetBSD
-
You can spread the items out and indent the nested lists if that makes it more readable for you:
. Linux

  * Fedora
  * Ubuntu
  * Slackware

. BSD

  * FreeBSD
  * NetBSD
The labeled list section demonstrates how to combine all three list types.
24.2. Numbering Styles
For ordered lists, Asciidoctor supports the numeration styles such as lowergreek and decimal-leading-zero.
The full list of numeration styles that can be applied to an ordered list are as follows:
| Block style | CSS list-style-type |
|---|---|
arabic |
decimal |
decimal* |
decimal-leading-zero |
loweralpha |
lower-alpha |
upperalpha |
upper-alpha |
lowerroman |
lower-roman |
upperroman |
upper-roman |
lowergreek* |
lower-greek |
* These styles are only supported by the HTML converters.
Here are a few examples showing various numeration styles as defined by the block style shown in the header row:
| [arabic]* | [decimal] | [loweralpha] | [lowergreek] |
|---|---|---|---|
|
|
|
|
* Default numeration if block style is not specified
Custom numeration styles can be implemented using a custom role.
Define a new class selector (e.g., .custom) in your stylesheet that sets the list-style-type property to the value of your choice.
Then, assign the name of that class as a role on any list to which you want that numeration applied.
|
When the role shorthand (.custom) is used on an ordered list, the numeration style is no longer omitted.
You can override the number scheme for any level by setting its style (the first positional entry in a block attribute list).
You can also set the starting number using the start attribute:
["lowerroman", start=5]
. Five
. Six
[loweralpha]
.. a
.. b
.. c
. Seven-
Five
-
Six
-
a
-
b
-
c
-
-
Seven
| The start attribute must be a number, even when using a different numeration style. For instance, to start an alphabetic list at letter "c", set the numeration style to loweralpha and the start attribute to 3. |
24.3. Summary
|
Discuss and Contribute
Use Issue 446 to drive development of this section. Your contributions make a difference. No contribution is too small.
|
25. Labeled List
Labeled lists are useful when you need to include a description or supporting text for each item in a list. Each item in a labeled list consists of a term or phrase followed by:
-
a separator (typically a double colon,
::) -
at least one space or endline
-
the item’s content
Here’s an example of a labeled list that identifies parts of a computer:
CPU:: The brain of the computer.
Hard drive:: Permanent storage for operating system and/or user files.
RAM:: Temporarily stores information the CPU uses during operation.
Keyboard:: Used to enter text or control items on the screen.
Mouse:: Used to point to and select items on your computer screen.
Monitor:: Displays information in visual form using text and graphics.
By default, the content of each item is displayed below the label when rendered. Here’s a preview of how this list is rendered:
- CPU
-
The brain of the computer.
- Hard drive
-
Permanent storage for operating system and/or user files.
- RAM
-
Temporarily stores information the CPU uses during operation.
- Keyboard
-
Used to enter text or control items on the screen.
- Mouse
-
Used to point to and select items on your computer screen.
- Monitor
-
Displays information in visual form using text and graphics.
If you want the label and content to appear on the same line, add the horizontal style to the list.
[horizontal]
CPU:: The brain of the computer.
Hard drive:: Permanent storage for operating system and/or user files.
RAM:: Temporarily stores information the CPU uses during operation.| CPU |
The brain of the computer. |
| Hard drive |
Permanent storage for operating system and/or user files. |
| RAM |
Temporarily stores information the CPU uses during operation. |
The content of a labeled list can be any AsciiDoc element. For instance, we could rewrite the grocery list from above so that each aisle is a label rather than a parent outline list item.
Dairy::
* Milk
* Eggs
Bakery::
* Bread
Produce::
* Bananas- Dairy
-
-
Milk
-
Eggs
-
- Bakery
-
-
Bread
-
- Produce
-
-
Bananas
-
Labeled lists are quite lenient about whitespace, so you can spread the items out and even indent the content if that makes it more readable for you:
Dairy::

  * Milk
  * Eggs

Bakery::

  * Bread

Produce::

  * Bananas
Finally, you can mix and match the three list types within a single hybrid list. Asciidoctor works hard to infer the relationships between the items that are most intuitive to us humans.
Here’s a list that mixes labeled, ordered, and unordered list items:
Operating Systems::
  Linux:::
    . Fedora
      * Desktop
    . Ubuntu
      * Desktop
      * Server
  BSD:::
    . FreeBSD
    . NetBSD

Cloud Providers::
  PaaS:::
    . OpenShift
    . CloudBees
  IaaS:::
    . Amazon EC2
    . Rackspace
Here’s how the list is rendered:
- Operating Systems
-
- Linux
-
-
Fedora
-
Desktop
-
-
Ubuntu
-
Desktop
-
Server
-
-
- BSD
-
-
FreeBSD
-
NetBSD
-
- Cloud Providers
-
- PaaS
-
-
OpenShift
-
CloudBees
-
- IaaS
-
-
Amazon EC2
-
Rackspace
-
You can include more complex content in a list item as well.
25.1. Question and Answer Style List
[qanda]
What is Asciidoctor?::
  An implementation of the AsciiDoc processor in Ruby.
What is the answer to the Ultimate Question?:: 42
-
What is Asciidoctor?
An implementation of the AsciiDoc processor in Ruby.
-
What is the answer to the Ultimate Question?
42
25.2. Summary
|
Discuss and Contribute
Use Issue 447 to drive development of this section. Your contributions make a difference. No contribution is too small.
|
26. Tables
Tables are one of the most intricate, yet refined areas of the AsciiDoc syntax. Armed with a bit of knowledge, you should discover that they are both easy to create and easy to read in raw form. Yet, under all that simplicity, they are remarkably sophisticated.
Tables are delimited by |=== and made up of cells.
The default table data format is PSV (Prefix Separated Values), which means that the processor creates a new cell each time it encounters a vertical bar (|).
Cells are grouped into rows.
Each row must share the same number of cells, taking into account any column or row spans.
Then, each consecutive cell in a row is placed in a separate column.
The simple table example below consists of two columns and three rows.
|=== (1)
(2)
| Cell in column 1, row 1 | Cell in column 2, row 1  (3)
(4)
| Cell in column 1, row 2 | Cell in column 2, row 2

| Cell in column 1, row 3 | Cell in column 2, row 3

|=== (1)| 1 | The table’s content boundaries are defined by a vertical bar followed by three equal signs (|===). |
| 2 | A blank line separates the table delimiter and the first row so the first row is not styled as the table’s header. |
| 3 | The new cell is marked by a vertical bar (|). |
| 4 | Rows are separated by blank lines. |
Cell in column 1, row 1 |
Cell in column 2, row 1 |
Cell in column 1, row 2 |
Cell in column 2, row 2 |
Cell in column 1, row 3 |
Cell in column 2, row 3 |
Like with all blocks, you can add a role to a table using the role attribute.
The role attribute becomes a CSS class when converted to HTML.
The preferred shorthand for assigning the role attribute is to put the role name in the first position of the block attribute list prefixed with a . character, as shown here:
[.rolename]
|===

| Cell in column 1, row 1 | Cell in column 2, row 1 | Cell in column 3, row 1

| Cell in column 1, row 2 | Cell in column 2, row 2 | Cell in column 3, row 2

|===
Leading and trailing spaces around cell content is stripped and, therefore, don’t affect the table’s layout when rendered. The two examples below illustrate how leading and trailing spaces don’t change the rendered table’s layout.
|===

|Cell in column 1, row 1|Cell in column 2, row 1

|===Cell in column 1, row 1 |
Cell in column 2, row 1 |
|===

| Cell in column 1, row 1        |          Cell in column 2, row 1

|===Cell in column 1, row 1 |
Cell in column 2, row 1 |
There are multiple ways to group cells into a row. The cells in a row can be placed on:
-
the same line
-
consecutive, individual lines
-
a combination of a and b
|===

|Cell in column 1, row 1 |Cell in column 2, row 1 |Cell in column 3, row 1

|Cell in column 1, row 2 |Cell in column 2, row 2 |Cell in column 3, row 2

|===Cell in column 1, row 1 |
Cell in column 2, row 1 |
Cell in column 3, row 1 |
Cell in column 1, row 2 |
Cell in column 2, row 2 |
Cell in column 3, row 2 |
When the cells of a row are individually entered on consecutive lines, the cols attribute is needed to specify the number of columns in the table.
If the cols attribute is not set, the first non-blank line inside the block delimiter (|===) determines the number of columns.
[cols="3*"] (1)
|===
|Cell in column 1, row 1
|Cell in column 2, row 1
|Cell in column 3, row 1

|Cell in column 1, row 2
|Cell in column 2, row 2
|Cell in column 3, row 2
|===| 1 | The cols attribute states that this table has three columns. The * is a repeat operator which is explained in the column specifiers section. |
Cell in column 1, row 1 |
Cell in column 2, row 1 |
Cell in column 3, row 1 |
Cell in column 1, row 2 |
Cell in column 2, row 2 |
Cell in column 3, row 2 |
Rows can be formed from adjacent lines of individual cells and cells listed on the same line.
[cols="3*"]
|===
|Cell in column 1, row 1 |Cell in column 2, row 1
|Cell in column 3, row 1

|Cell in column 1, row 2
|Cell in column 2, row 2 |Cell in column 3, row 2
|===Cell in column 1, row 1 |
Cell in column 2, row 1 |
Cell in column 3, row 1 |
Cell in column 1, row 2 |
Cell in column 2, row 2 |
Cell in column 3, row 2 |
The next sections describe and demonstrate the variety of ways you can customize table cells, rows and columns.
26.1. Columns
The number of columns in a table is determined by the number of cells found in the first non-blank line after the table delimiter (|===) or by the values assigned to the cols attribute.
For example, the syntax in the two examples below will both render a table with two columns.
|===

|Cell in column 1, row 1 |Cell in column 2, row 1

|Cell in column 1, row 2
|Cell in column 2, row 2

|===Cell in column 1, row 1 |
Cell in column 2, row 1 |
Cell in column 1, row 2 |
Cell in column 2, row 2 |
[cols="2*"]
|===

|Cell in column 1, row 1
|Cell in column 2, row 1

|Cell in column 1, row 2
|Cell in column 2, row 2

|===Cell in column 1, row 1 |
Cell in column 2, row 1 |
Cell in column 1, row 2 |
Cell in column 2, row 2 |
When a single number is assigned to the cols attribute, its value indicates the number of columns. Each column will be the same width. However, the number of columns can also be assigned as a comma delimited list. The number of entries in the list determines the number of columns.
The comma delimited list below creates a table with four columns of equal width.
[cols="1,1,1,1"]This syntax provides that same result:
[cols="4*"]Now, let’s talk about that asterisk in the syntax above.
26.2. Column formatting
The AsciiDoc syntax provides a variety of ways to control the size, style and layout of content within columns. These specifiers can be applied to whole columns.
To apply a specifier to a column, you must set the cols attribute and assign it a value.
A column specifier can contain any of the following components:
-
multiplier
-
align
-
width
-
style
Each component is optional.
The multiplier operator (*) is used when you want a specifier to apply to more than one consecutive column.
If used, the multiplier must always be placed at the beginning of the specifier.
For example:
[cols="3*"] (1)
|===
|Cell in column 1, row 1
|Cell in column 2, row 1
|Cell in column 3, row 1

|Cell in column 1, row 2
|Cell in column 2, row 2
|Cell in column 3, row 2
|===
| 1 | The table will consist of three columns, as indicated by the 3. The * operator ensures that the default layout and style will be applied to all of the columns. |
Cell in column 1, row 1 |
Cell in column 2, row 1 |
Cell in column 3, row 1 |
Cell in column 1, row 2 |
Cell in column 2, row 2 |
Cell in column 3, row 2 |
The alignment component allows you to horizontally or vertically align a column’s content.
Content can be horizontally aligned left (<), center (^), or right (>).
To horizontally center the content in all of the columns, add the ^ operator after the multiplier.
[cols="3*^"]
|===
|Cell in column 1, row 1
|Cell in column 2, row 1
|Cell in column 3, row 1

|Cell in column 1, row 2
|Cell in column 2, row 2
|Cell in column 3, row 2
|===
Cell in column 1, row 1 |
Cell in column 2, row 1 |
Cell in column 3, row 1 |
Cell in column 1, row 2 |
Cell in column 2, row 2 |
Cell in column 3, row 2 |
What if you only want to center the content in the last column?
Assign the default styles to the preceding columns, and ^ to the last column in a comma separated list.
[cols="2*,^"]
|===
|Cell in column 1, row 1
|Cell in column 2, row 1
|Cell in column 3, row 1

|Cell in column 1, row 2
|Cell in column 2, row 2
|Cell in column 3, row 2
|===
Cell in column 1, row 1 |
Cell in column 2, row 1 |
Cell in column 3, row 1 |
Cell in column 1, row 2 |
Cell in column 2, row 2 |
Cell in column 3, row 2 |
Let’s specify a different horizontal alignment for each column.
[cols="<,^,>"]
|===
|Cell in column 1, row 1
|Cell in column 2, row 1
|Cell in column 3, row 1

|Cell in column 1, row 2
|Cell in column 2, row 2
|Cell in column 3, row 2
|===
Cell in column 1, row 1 |
Cell in column 2, row 1 |
Cell in column 3, row 1 |
Cell in column 1, row 2 |
Cell in column 2, row 2 |
Cell in column 3, row 2 |
You’ll notice that the content in the examples above is only centered on the horizontal.
It can also be aligned vertically when the alignment operator is prefixed with a dot (.).
Content can be vertically aligned to the top (<), middle (^), or bottom (>) of a cell.
To vertically align the content to the middle of the cells in all of the columns, add a . and then the ^ operator after the multiplier.
[cols="3*.^"]
|===
|Cell in column 1, row 1
|Cell in column 2, row 1
|Cell in column 3, row 1

|Cell in column 1, row 2
|Cell in column 2, row 2
|Cell in column 3, row 2
|===
Cell in column 1, row 1 |
Cell in column 2, row 1 |
Cell in column 3, row 1 |
Cell in column 1, row 2 |
Cell in column 2, row 2 |
Cell in column 3, row 2 |
If you only want to align the content to the bottom of each cell in the last column, you’d assign the default styles to the preceding columns, and > to the last column in a comma separated list.
[cols="2*,.>"]
|===
|Cell in column 1, row 1
|Cell in column 2, row 1
|Cell in column 3, row 1

|Cell in column 1, row 2
|Cell in column 2, row 2
|Cell in column 3, row 2
|===
Cell in column 1, row 1 |
Cell in column 2, row 1 |
Cell in column 3, row 1 |
Cell in column 1, row 2 |
Cell in column 2, row 2 |
Cell in column 3, row 2 |
Let’s specify a different vertical alignment for each column.
[cols=".<,.^,.>"]
|===
|Cell in column 1, row 1
|Cell in column 2, row 1
|Cell in column 3, row 1

|Cell in column 1, row 2
|Cell in column 2, row 2
|Cell in column 3, row 2
|===
Cell in column 1, row 1 |
Cell in column 2, row 1 |
Cell in column 3, row 1 |
Cell in column 1, row 2 |
Cell in column 2, row 2 |
Cell in column 3, row 2 |
Finally, we’ll also horizontally center the content in the last column.
[cols=".<,.^,^.>"]
|===
|Cell in column 1, row 1
|Cell in column 2, row 1
|Cell in column 3, row 1

|Cell in column 1, row 2
|Cell in column 2, row 2
|Cell in column 3, row 2
|===
Cell in column 1, row 1 |
Cell in column 2, row 1 |
Cell in column 3, row 1 |
Cell in column 1, row 2 |
Cell in column 2, row 2 |
Cell in column 3, row 2 |
When both a horizontal and vertical alignment is assigned to a column, the horizontal alignment operator must precede the vertical operator.
The width component sets the width of a column. Its value can be a proportional integer (the default is 1) or a percentage (1 to 99).
[cols="1,2,6"]
|===
|Cell in column 1, row 1
|Cell in column 2, row 1
|Cell in column 3, row 1

|Cell in column 1, row 2
|Cell in column 2, row 2
|Cell in column 3, row 2
|===
Cell in column 1, row 1 |
Cell in column 2, row 1 |
Cell in column 3, row 1 |
Cell in column 1, row 2 |
Cell in column 2, row 2 |
Cell in column 3, row 2 |
When assigning percentage values to the cols attribute, you do not need to include the percent sign (%).
[cols="50,20,30"]
|===
|Cell in column 1, row 1
|Cell in column 2, row 1
|Cell in column 3, row 1

|Cell in column 1, row 2
|Cell in column 2, row 2
|Cell in column 3, row 2
|===
Cell in column 1, row 1 |
Cell in column 2, row 1 |
Cell in column 3, row 1 |
Cell in column 1, row 2 |
Cell in column 2, row 2 |
Cell in column 3, row 2 |
Let’s create a table with custom widths and alignments.
[cols=".<2,.^5,^.>3"]
|===
|Cell in column 1, row 1 with lots and lots and lots and lots of content
|Cell in column 2, row 1
|Cell in column 3, row 1

|Cell in column 1, row 2
|Cell in column 2, row 2
|Cell in column 3, row 2 and another bucket of content, and then a jelly roll of content
|===
Cell in column 1, row 1 with lots and lots and lots and lots of content |
Cell in column 2, row 1 |
Cell in column 3, row 1 |
Cell in column 1, row 2 |
Cell in column 2, row 2 |
Cell in column 3, row 2 and another bucket of content, and then a jelly roll of content |
The style component must always be located at the end of the specifier. When no style name is provided column contents will be processed as regular inline text.
The column styles are described in the table below.
| Style Name | Value | Description |
|---|---|---|
AsciiDoc |
|
Any block-level elements (paragraphs, delimited blocks and block macros) may be contained within the column. The elements will be processed and rendered. |
Emphasis |
|
Text is italicized |
Header |
|
Header styles are applied to the column |
Literal |
|
Column content is treated as if it were inside a literal block |
Monospaced |
|
Text is rendered in monospaced font |
None (default style) |
|
Text is handled like a normal paragraph. Supports all markup (i.e., inline formatting, inline macros) that is permitted in a paragraph. |
Strong |
|
Text is bolded |
Verse |
|
Column content is treated as if it were inside a verse block |
Let’s apply the header style to the first column, the monospaced style to the second, the strong style to the third, and the emphasis style to the fourth.
[cols="h,m,s,e"]
|===
|Cell in column 1, row 1
|Cell in column 2, row 1
|Cell in column 3, row 1
|Cell in column 4, row 1

|Cell in column 1, row 2
|Cell in column 2, row 2
|Cell in column 3, row 2
|Cell in column 4, row 2
|===Cell in column 1, row 1 |
|
Cell in column 3, row 1 |
Cell in column 4, row 1 |
|---|---|---|---|
Cell in column 1, row 2 |
|
Cell in column 3, row 2 |
Cell in column 4, row 2 |
Specifiers can also be applied to individual cells.
26.3. Cell Formatting
In addition to sharing many of the column specifier capabilities, cell specifiers allow cells to span rows and columns. Like a column specifier, a cell specifier is made up of components. These components, listed and defined below, are all optional.
-
span
-
align
-
style
A cell specifier is prefixed directly to the cell delimiter (|) preceding the content you want to customize.
The span component can duplicate a cell or have it span multiple rows or columns.
To duplicate a cell in multiple, consecutive columns, prefix the | with the multiplication factor and the * operator.
|===

|Cell in column 1, row 1 |Cell in column 2, row 1 |Cell in column 3, row 1

3*|Same cell content in columns 1, 2, and 3

|Cell in column 1, row 3
|Cell in column 2, row 3
|Cell in column 3, row 3

|===
Cell in column 1, row 1 |
Cell in column 2, row 1 |
Cell in column 3, row 1 |
Same cell content in columns 1, 2, and 3 |
Same cell content in columns 1, 2, and 3 |
Same cell content in columns 1, 2, and 3 |
Cell in column 1, row 3 |
Cell in column 2, row 3 |
Cell in column 3, row 3 |
To have a cell span multiple, consecutive columns, prefix the | with the span factor and the + operator.
|===

|Cell in column 1, row 1 |Cell in column 2, row 1 |Cell in column 3, row 1

3+|Content in a single cell that spans columns 1, 2, and 3

|Cell in column 1, row 3
|Cell in column 2, row 3
|Cell in column 3, row 3

|===
Cell in column 1, row 1 |
Cell in column 2, row 1 |
Cell in column 3, row 1 |
Content in a single cell that spans columns 1, 2, and 3 |
||
Cell in column 1, row 3 |
Cell in column 2, row 3 |
Cell in column 3, row 3 |
If you want to have a cell span multiple, consecutive rows, prefix the span factor with a dot (.).
|===

|Cell in column 1, row 1 |Cell in column 2, row 1 |Cell in column 3, row 1

.2+|Content in a single cell that spans rows 2 and 3
|Cell in column 2, row 2
|Cell in column 3, row 2

|Cell in column 2, row 3
|Cell in column 3, row 3

|===
Cell in column 1, row 1 |
Cell in column 2, row 1 |
Cell in column 3, row 1 |
Content in a single cell that spans rows 2 and 3 |
Cell in column 2, row 2 |
Cell in column 3, row 2 |
Cell in column 2, row 3 |
Cell in column 3, row 3 |
The alignment component for cells works the same as the column specifier alignment component.
[cols="3"]
|===
^|Prefix the +{vbar}+ with +{caret}+ to center content horizontally
<|Prefix the +{vbar}+ with `<` to align the content to the left horizontally
>|Prefix the +{vbar}+ with `>` to align the content to the right horizontally

.^|Prefix the +{vbar}+ with a `.` and +{caret}+ to center the content in the cell vertically
.<|Prefix the +{vbar}+ with a `.` and `<` to align the content to the top of the cell
.>|Prefix the +{vbar}+ with a `.` and `>` to align the content to the bottom of the cell

3+^.^|This content spans three columns (+3{plus}+) and is centered horizontally (+{caret}+) and vertically (+.{caret}+) within the cell.

|===
Prefix the {vbar} with {caret} to center content horizontally |
Prefix the {vbar} with |
Prefix the {vbar} with |
Prefix the {vbar} with a |
Prefix the {vbar} with a |
Prefix the {vbar} with a |
This content spans three columns (3{plus}) and is centered horizontally ({caret}) and vertically (.{caret}) within the cell. |
||
To use a pipe (|) within the content of a cell without creating a new cell, you must use the {vbar} attribute.
|
The style component can also be applied to individual cells.
For example, you can apply the AsciiDoc element styles to an individual cell by prefixing the vertical bar with an a.
[cols="2"]
|===

a|This cell is prefixed with an `a` so the following list is rendered with the AsciiDoc list element styles.

* List item 1
* List item 2
* List item 3
|This cell *is not* prefixed with an `a` so the following list is not rendered with the AsciiDoc list element styles.

* List item 1
* List item 2
* List item 3

a|This cell is prefixed with an `a` so the following paragraph is rendered with the `lead` style.

[.lead]
I am a paragraph styled with the lead attribute.
|This cell *is not* prefixed with an `a` so the following paragraph is not rendered with the `lead` style.

[.lead]
I am a paragraph styled with the lead attribute.

|===
This cell is prefixed with an
|
This cell is not prefixed with an * List item 1 * List item 2 * List item 3 |
This cell is prefixed with an I am a paragraph styled with the lead attribute. |
This cell is not prefixed with an [.lead] I am a paragraph styled with the lead attribute. |
Source code listing can be placed inside cells by using the listing syntax.
|===
|Source Code 1 |Source Code 2

a|
[source,python]
----
import os
print "%s" %(os.uname())
----

a|
[source,python]
----
import os
print ("%s" %(os.uname()))
----
|===
| Source Code 1 | Source Code 2 |
|---|---|
|
|
For the grand finale, let’s apply a variety of specifiers to individual cells.
|===

2*>m|This content is duplicated across two columns.

It is aligned right horizontally.

And it is monospaced.

.3+^.>s|This cell spans 3 rows. The content is centered horizontally, aligned to the bottom of the cell, and strong.
e|This content is emphasized.

.^l|This content is aligned to the top of the cell and literal.

v|This cell contains a verse
that may one day expound on the
wonders of tables in an
epic sonnet.

|===
|
|
This cell spans 3 rows. The content is centered horizontally, aligned to the bottom of the cell, and strong. |
This content is emphasized. |
This content is aligned to the top of the cell and literal. |
|
This cell contains a verse
that may one day expound on the
wonders of tables in an
epic sonnet. |
26.4. Header row
The first row of a table is promoted to a header row if the header option is set (either explicitly or implicitly).
You can enable the header option by adding the header keyword to the comma-separated list of values in the options attribute on the table.
You can also enable the header option by adding the %header directive to the table style (the first positional attribute).
In the example below, the table has an attribute list containing an options attribute that includes the header option.
[cols=2*,options="header"]
|===
|Name of Column 1
|Name of Column 2

|Cell in column 1, row 1
|Cell in column 2, row 1

|Cell in column 1, row 2
|Cell in column 2, row 2
|===| Name of Column 1 | Name of Column 2 |
|---|---|
Cell in column 1, row 1 |
Cell in column 2, row 1 |
Cell in column 1, row 2 |
Cell in column 2, row 2 |
Alternately, you can define the header row based on how you layout the table. Asciidoctor use the following conventions to determine when the first row should become the header row:
-
The first line of content inside the table block delimiters is not empty.
-
The second line of content inside the table block delimiters is empty.
-
The
optionsattribute has not been specified in the block attributes (prior to 1.5.5).
As seen in the result of the example below, if all of these rules hold, then the first row of the table is treated as a header.
|===
|Name of Column 1 |Name of Column 2

|Cell in column 1, row 1
|Cell in column 2, row 1

|Cell in column 1, row 2
|Cell in column 2, row 2
|===| Name of Column 1 | Name of Column 2 |
|---|---|
Cell in column 1, row 1 |
Cell in column 2, row 1 |
Cell in column 1, row 2 |
Cell in column 2, row 2 |
If you want to suppress this implicit behavior of promoting the first row to a header row, set the option value noheader (or add the %noheader directive to the table style).
Notice that when the implicit method of assigning the header row is used, it’s not necessary to set the cols attribute.
That’s because the number of columns are determined by the number of cells in the first line if the cols attribute is absent.
| We’re considering using a similar convention for enabling the footer in the future. Thus, if you rely on this convention to enable the header row, it’s advised that you not put all the cells in the last row on the same line unless you intend on making it the footer row. |
26.5. Footer row
The last row of a table can be styled as a footer by adding the footer keyword to the options attribute.
[options="footer"]
|===
|Name of Column 1 |Name of Column 2

|Cell in column 1, row 1
|Cell in column 2, row 1

|Cell in column 1, row 2
|Cell in column 2, row 2

|Footer in column 1, row 3
|Footer in column 2, row 3
|===
Footer in column 1, row 3 |
Footer in column 2, row 3 |
Name of Column 1 |
Name of Column 2 |
Cell in column 1, row 1 |
Cell in column 2, row 1 |
Cell in column 1, row 2 |
Cell in column 2, row 2 |
26.6. Table width
By default, a table will span the width of the content area.
To constrain the width of the table to a fixed value, set the width attribute in the table’s attribute list.
The width is an integer percentage value ranging from 1 to 100.
The % sign is optional.
[width=75%]
|===
|Name of Column 1 |Name of Column 2 |Name of Column 3

|Cell in column 1, row 1
|Cell in column 2, row 1
|Cell in column 3, row 1

|Cell in column 1, row 2
|Cell in column 2, row 2
|Cell in column 3, row 2
|===
| Name of Column 1 | Name of Column 2 | Name of Column 3 |
|---|---|---|
Cell in column 1, row 1 |
Cell in column 2, row 1 |
Cell in column 3, row 1 |
Cell in column 1, row 2 |
Cell in column 2, row 2 |
Cell in column 3, row 2 |
Alternately, you can make the width fit the content by setting the autowidth option.
The columns inherit this setting, so individual columns will also be sized according to the content.
[%autowidth]
|===
|Name of Column 1 |Name of Column 2 |Name of Column 3

|Cell in column 1, row 1
|Cell in column 2, row 1
|Cell in column 3, row 1

|Cell in column 1, row 2
|Cell in column 2, row 2
|Cell in column 3, row 2
|===
Name of Column 1 |
Name of Column 2 |
Name of Column 3 |
Cell in column 1, row 1 |
Cell in column 2, row 1 |
Cell in column 3, row 1 |
Cell in column 1, row 2 |
Cell in column 2, row 2 |
Cell in column 3, row 2 |
If you want each column to have an automatic width, but want the table to span the width of the content area, add the spread role to the table (or, as of 1.5.5, set the width attribute to 100%).
[%autowidth.spread]
|===
|Name of Column 1 |Name of Column 2 |Name of Column 3

|Cell in column 1, row 1
|Cell in column 2, row 1
|Cell in column 3, row 1

|Cell in column 1, row 2
|Cell in column 2, row 2
|Cell in column 3, row 2
|===
Name of Column 1 |
Name of Column 2 |
Name of Column 3 |
Cell in column 1, row 1 |
Cell in column 2, row 1 |
Cell in column 3, row 1 |
Cell in column 1, row 2 |
Cell in column 2, row 2 |
Cell in column 3, row 2 |
The autowidth option is not recognized by the DocBook converter.
|
|
A design for enabling autowidth for individual columns is underway.
(See issue #1844).
In the meantime, it’s still possible to apply a style to a column when using the In this case, the relative column widths are ignored. |
26.7. Table borders
The borders on a table are controlled using the frame and grid attributes.
You can combine these two attributes to achieve a variety of border styles for your tables.
26.7.1. Frame
The border around a table is controlled using the frame attribute.
By default, the frame attribute is assigned the all value, which draws a border on each side of the table.
If you set the frame attribute, you can override the default value with the values topbot, sides or none.
The topbot value draws a border on the top and bottom of the table.
[frame=topbot]
|===
|Name of Column 1 |Name of Column 2 |Name of Column 3

|Cell in column 1, row 1
|Cell in column 2, row 1
|Cell in column 3, row 1

|Cell in column 1, row 2
|Cell in column 2, row 2
|Cell in column 3, row 2
|===
| Name of Column 1 | Name of Column 2 | Name of Column 3 |
|---|---|---|
Cell in column 1, row 1 |
Cell in column 2, row 1 |
Cell in column 3, row 1 |
Cell in column 1, row 2 |
Cell in column 2, row 2 |
Cell in column 3, row 2 |
The sides value draws a border on the right and left side of the table.
[frame=sides]
|===
|Name of Column 1 |Name of Column 2 |Name of Column 3

|Cell in column 1, row 1
|Cell in column 2, row 1
|Cell in column 3, row 1

|Cell in column 1, row 2
|Cell in column 2, row 2
|Cell in column 3, row 2
|===
| Name of Column 1 | Name of Column 2 | Name of Column 3 |
|---|---|---|
Cell in column 1, row 1 |
Cell in column 2, row 1 |
Cell in column 3, row 1 |
Cell in column 1, row 2 |
Cell in column 2, row 2 |
Cell in column 3, row 2 |
The none value removes the borders around the table.
[frame=none]
|===
|Name of Column 1 |Name of Column 2 |Name of Column 3

|Cell in column 1, row 1
|Cell in column 2, row 1
|Cell in column 3, row 1

|Cell in column 1, row 2
|Cell in column 2, row 2
|Cell in column 3, row 2
|===
| Name of Column 1 | Name of Column 2 | Name of Column 3 |
|---|---|---|
Cell in column 1, row 1 |
Cell in column 2, row 1 |
Cell in column 3, row 1 |
Cell in column 1, row 2 |
Cell in column 2, row 2 |
Cell in column 3, row 2 |
26.7.2. Grid
The borders between the cells in a table are controlled using the grid attribute.
By default, the grid attribute is assigned the all value, which draws a border between all cells.
If you set the grid attribute, you can override the default value with the values rows, cols or none.
The rows value draws a border between the rows of the table.
[grid=rows]
|===
|Name of Column 1 |Name of Column 2 |Name of Column 3

|Cell in column 1, row 1
|Cell in column 2, row 1
|Cell in column 3, row 1

|Cell in column 1, row 2
|Cell in column 2, row 2
|Cell in column 3, row 2
|===
| Name of Column 1 | Name of Column 2 | Name of Column 3 |
|---|---|---|
Cell in column 1, row 1 |
Cell in column 2, row 1 |
Cell in column 3, row 1 |
Cell in column 1, row 2 |
Cell in column 2, row 2 |
Cell in column 3, row 2 |
The cols value draws borders between the columns.
[grid=cols]
|===
|Name of Column 1 |Name of Column 2 |Name of Column 3

|Cell in column 1, row 1
|Cell in column 2, row 1
|Cell in column 3, row 1

|Cell in column 1, row 2
|Cell in column 2, row 2
|Cell in column 3, row 2
|===
| Name of Column 1 | Name of Column 2 | Name of Column 3 |
|---|---|---|
Cell in column 1, row 1 |
Cell in column 2, row 1 |
Cell in column 3, row 1 |
Cell in column 1, row 2 |
Cell in column 2, row 2 |
Cell in column 3, row 2 |
The none value removes all borders between the cells.
[grid=none]
|===
|Name of Column 1 |Name of Column 2 |Name of Column 3

|Cell in column 1, row 1
|Cell in column 2, row 1
|Cell in column 3, row 1

|Cell in column 1, row 2
|Cell in column 2, row 2
|Cell in column 3, row 2
|===
| Name of Column 1 | Name of Column 2 | Name of Column 3 |
|---|---|---|
Cell in column 1, row 1 |
Cell in column 2, row 1 |
Cell in column 3, row 1 |
Cell in column 1, row 2 |
Cell in column 2, row 2 |
Cell in column 3, row 2 |
26.8. Table caption
If you specify a title on a table, the title will be used as part of the table’s caption. Adding a title also designates the table as a formal table.
By default, the title of a formal table is prefixed with the label Table <n>. followed by a space, where <n> is the 1-based index of all formal tables in the document.
.A formal table
|===
|Name of Column 1 |Name of Column 2

|Cell in column 1, row 1
|Cell in column 2, row 1

|Cell in column 1, row 2
|Cell in column 2, row 2
|===
| Name of Column 1 | Name of Column 2 |
|---|---|
Cell in column 1, row 1 |
Cell in column 2, row 1 |
Cell in column 1, row 2 |
Cell in column 2, row 2 |
You can customize the caption label by specifying the caption attribute.
If you want a space between the label and the title, you must add a trailing space to the value of the caption attribute.
(Don’t let the name of the attribute mislead you.
The caption attribute only sets the caption’s label, not the whole caption line).
[caption="Table A. "]
.A formal table
|===
|Name of Column 1 |Name of Column 2

|Cell in column 1, row 1
|Cell in column 2, row 1

|Cell in column 1, row 2
|Cell in column 2, row 2
|===
| Name of Column 1 | Name of Column 2 |
|---|---|
Cell in column 1, row 1 |
Cell in column 2, row 1 |
Cell in column 1, row 2 |
Cell in column 2, row 2 |
If you want to exclude the caption label altogether, simply assign a blank value to the caption attribute.
[caption=]
.A formal table
|===
|Name of Column 1 |Name of Column 2

|Cell in column 1, row 1
|Cell in column 2, row 1

|Cell in column 1, row 2
|Cell in column 2, row 2
|===
| Name of Column 1 | Name of Column 2 |
|---|---|
Cell in column 1, row 1 |
Cell in column 2, row 1 |
Cell in column 1, row 2 |
Cell in column 2, row 2 |
Alternatively, you can disable the caption label for tables globally by undefining the table-caption document attribute.
:table-caption!:
26.9. CSV and DSV Data Formats
Tables can be created from data stored as Comma Separated Values (CSV) and Delimiter Separated Values (DSV).
To use one of these dataset types, set the value of the format attribute on the table to csv or dsv, respectively.
The main difference between tables with one of these formats and psv tables is how the data inside the table delimiters is arranged.
When the format attribute is set to csv, the data separator is a comma (,), as seen in the table below.
[format="csv", options="header"]
|===
Artist,Track,Genre
Baauer,Harlem Shake,Hip Hop
The Lumineers,Ho Hey,Folk Rock
|===| Artist | Track | Genre |
|---|---|---|
Baauer |
Harlem Shake |
Hip Hop |
The Lumineers |
Ho Hey |
Folk Rock |
When the format attribute is set to dsv, the data separator is a colon (:).
[format="dsv", options="header"]
|===
Artist:Track:Genre
Robyn:Indestructable:Dance
The Piano Guys:Code Name Vivaldi:Classical
|===| Artist | Track | Genre |
|---|---|---|
Robyn |
Indestructable |
Dance |
The Piano Guys |
Code Name Vivaldi |
Classical |
Asciidoctor also provides shorthand notation for setting CSV and DSV table formats.
The first position of the table block delimiter (i.e., |===) can be replaced by the data delimiter to set the table format (e.g., ,===).
To set the format of the table to CSV using shorthand notation, simply replace the leading pipe (|) in the table delimiter with a command (,), as shown here:
,===
Artist,Track,Genre

Baauer,Harlem Shake,Hip Hop
,===| Artist | Track | Genre |
|---|---|---|
Baauer |
Harlem Shake |
Hip Hop |
In the same way, the DSV format can be specified by replacing the leading pipe (|) with a colon (:).
:===
Artist:Track:Genre

Robyn:Indestructable:Dance
:===| Artist | Track | Genre |
|---|---|---|
Robyn |
Indestructable |
Dance |
DSV and CSV datasets don’t support formatting of individual cells. However, you can apply formatting, such as the AsciiDoc style, to a column of cells using a table-wide column spec:
[cols="1h,1a"]
,===
Sky,image::sky.jpg[]
Forest,image::forest.jpg[]
,===
Keep in mind that endlines are not preserved in CSV and DSV data. That does somewhat limit the type of content you can put in these cells, particularly when using the AsciiDoc cell style.
DSV and CSV datasets can be, and often are, inserted into a table using the include directive.
[format="csv", options="header"]
|===
include::tracks.csv[]
|===| Artist | Track | Genre |
|---|---|---|
Baauer |
Harlem Shake |
Hip Hop |
The Lumineers |
Ho Hey |
Folk Rock |
Robyn |
Indestructable |
Dance |
The Piano Guys |
Code Name Vivaldi |
Classical |
26.10. Summary
| Attribute | Description | Value | Description | Notes |
|---|---|---|---|---|
|
comma separated list of column specifiers |
specifiers |
see Columns for details |
|
|
data format of the table’s contents |
|
cells are delimited by |
|
|
cells are delimited by a colon ( |
|||
|
cells are delimited by a comma ( |
|||
|
character used to separate cells (psv data format only) |
|
default for top-level tables |
|
|
default for nested tables |
|||
user-defined |
can be any single character, ideally one not found in the cell content |
|||
|
draws a border around the table |
|
border on all sides (default) |
|
|
border on top and bottom |
|||
|
no borders |
|||
|
border on left and right sides |
|||
|
draws boundary lines between rows and columns |
|
draws boundary lines around each cell (default) |
|
|
draws boundary lines between columns |
|||
|
draws boundary lines between rows |
|||
|
no boundary lines |
|||
|
horizontally aligns table within page width |
|
aligns to left side of page (default) |
Not yet implemented in Asciidoctor.
Applies to HTML output only.
The |
|
aligns to right side of page |
|||
|
horizontally aligns to center of page |
|||
|
floats the table to the specified side of the page |
|
floats the table to the left side of the page (default) |
Applies to HTML output only.
Must be used in conjunction with the table’s |
|
floats the table to the right side of the page |
|||
|
horizontally aligns all of the cell contents in a table |
|
aligns the contents of the cells to the left (default) |
Not implemented in Asciidoctor.
Define instead using column or cell specifiers (e.g., |
|
aligns the contents of the cells to the right |
|||
|
aligns the contents to the cell centers |
|||
|
vertically aligns all of the cell contents in a table |
|
aligns the cell contents to the top of the cell (default) |
Define instead using column or cell specifiers (e.g., |
|
aligns the cell contents to the bottom of the cell |
|||
|
aligns the cell contents to the middle of the cell |
|||
|
comma separated list of option names |
|
promotes first row to the table header |
header and footer rows are omitted by default |
|
promotes last row to the table footer |
|||
|
allows the table to split across a page (default) |
Mutually exclusive. Only applies to DocBook output when generating PDF using FOP. |
||
|
prevents the table from being split across a page |
|||
|
disables explicit column widths (ignores |
|||
|
the table width relative to the available page width |
user defined value |
a percentage value between 0% and 100% |
27. Horizontal Rules
'''27.1. Markdown-style horizontal rules
Asciidoctor recognizes Markdown horizontal rules. The motivation here is to ease migration of Markdown documents to AsciiDoc documents.
To avoid conflicts with AsciiDoc’s block delimiter syntax, only 3 repeating characters (- or *) are recognized.
As with Markdown, whitespace between the characters is optional.
---

- - -

***

* * *A macro definition for the Markdown horizontal rules is included in the AsciiDoc compatibility file so they can be recognized by the asciidoc command as well.
29. URLs
A Uniform Resource Link (URL) represents the location of a resource on the web. Typical URLs contain a scheme, domain name, file name, and extension.

Asciidoctor recognizes the following common schemes without the help of any markup.
-
http
-
https
-
ftp
-
irc
-
mailto
-
email@email.com
Since the URL in the example below begins with http, Asciidoctor will automatically turn it into a hyperlink when it is processed.
The homepage for the Asciidoctor Project is http://www.asciidoctor.org. (1)| 1 | The trailing period will not get caught up in the link. |
To prevent automatic linking of an URL, prepend it with a backslash (\).
If you prefer URLs to be rendered without a visible scheme, set the hide-uri-scheme attribute in the document’s header.
:hide-uri-scheme:

http://asciidoctor.org
When the hide-uri-scheme attribute is set, the above URL will render as follows:
<a href="http://asciidoctor.org">asciidoctor.org</a>Note the absence of http inside the <a> element.
To attach a URL to text, enclose the text in square brackets at the end of the URL.
Chat with other Asciidoctor users in the irc://irc.freenode.org/#asciidoctor[Asciidoctor IRC channel].
Additionally, you can format the linked text.
Ask questions on the http://discuss.asciidoctor.org/[*mailing list*].
The homepage for the Asciidoctor Project is http://asciidoctor.org.
Chat with other Asciidoctor users in the Asciidoctor IRC channel.
Ask questions on the mailing list.
When a URL does not start with one of the common schemes, you must use the link macro.
The URL is preceded by link: and followed by square brackets.
The square brackets can include optional link text, target preference, and roles.
link:url[optional link text, optional target attribute, optional role attribute]
First, let’s look at an example of a link macro that contains link text.
Let's view the raw HTML of the link:view-source:asciidoctor.org[Asciidoctor homepage].
Let’s view the raw HTML of the Asciidoctor homepage.
Next, we’ll add a target and role to a link macro.
When you set attributes in the link macro, you must also set the linkattrs attribute in the document’s header because Asciidoctor does not parse attributes in the link macro by default.
Once you’ve set linkattrs in the header, you can then specify the name of the target window using the window attribute.
= Asciidoctor Document Title
:linkattrs:
Let's view the raw HTML of the link:view-source:asciidoctor.org[Asciidoctor homepage, window="_blank"].Let’s view the raw HTML of the Asciidoctor homepage.
Since _blank is the most common window name, we’ve introduced shorthand for it.
Just end the link text with a caret (^):
Let's view the raw HTML of the link:view-source:asciidoctor.org[Asciidoctor homepage^].| If you use the caret syntax more than once in a single paragraph, you may need to escape the first occurrence with a backslash. |
When linkattrs is set, you can add a role (i.e., CSS class) to the link.
Chat with other Asciidoctor users in the irc://irc.freenode.org/#asciidoctor[Asciidoctor IRC channel] or on the http://discuss.asciidoctor.org/[*mailing list*^, role="green"].Chat with other Asciidoctor users in the Asciidoctor IRC channel or on the mailing list.
| Links with attributes (including the subject and body segments on mailto links) are a feature unique to Asciidoctor. When they are enabled, you must surround the link text in double quotes if it contains a comma. |
29.1. Link to Relative Files
If you want to link to an external file relative to the current document, use the link macro in front of the file name.
link:protocol.json[Open the JSON file]If your file is an HTML file, you can link directly to a section in the document, append a hash (#) followed by the section’s ID to the end of the file name.
link:external.html#livereload[LiveReload]29.2. Summary
| Attribute | Value(s) | Example Syntax | Comments |
|---|---|---|---|
linkattrs |
|
Must be set in the header to parse link macro attributes. |
|
window |
blank |
http://discuss.asciidoctor.org[Discuss Asciidoctor, window="_blank"] |
The blank value can also be specified using |
window |
^ |
http://example.org["Google, Yahoo, Bing^"] and http://discuss.asciidoctor.org[Discuss Asciidoctor^] |
Requires |
role |
CSS classes available to inline elements |
http://discuss.asciidoctor.org[Discuss Asciidoctor, role="teal"] |
Requires |
id |
name of element, custom link text |
<<section-title,cross reference text>> |
Applies to cross references |
30. Cross References
A link to another location within an AsciiDoc document or between AsciiDoc documents is called a cross reference (also referred to as an xref). To be able to create a cross reference, you first need to define the location where the reference will point to. This is the anchor definition.
30.1. Defining an Anchor
An anchor can be defined anywhere: header, image, listing or text block. The anchor’s ID is defined between two square brackets.
[[bookmark-a]]Inline anchors make arbitrary content referenceable.
In addition to being able to define anchors on sections and blocks, anchors can be defined inline where ever you can type normal text (anchors are a macro substitution). The anchors in the text get replaced with invisible anchor points in the output.
For example, you would not put an anchor in front of a list item:
[[anchor-point]]* list item text
Instead, you would put it at the very start of the text of the list item:
* Fist item * [[step2]]Second item * Third item
Another example with headers (the anchor needs to be in the text):
=== [[current]]Version 4.9
Remember that inline anchor points are discovered where text content is permitted. If text content doesn’t belong somewhere, neither does an inline anchor point.
It is possible to customize the text that will be used in the cross reference link (called xreflabel).
If not defined, Asciidoctor does it best to find suitable text (the solution differs from case to case).
In case of an image, the image caption will be used.
In case of a section header, the text of the section’s title will be used.
To define the xreflabel, add it in the anchor definition right after the ID (separated by a comma).
[[tiger-image,Image of a tiger]] .This image represents a Bengal tiger also called the Indian tiger image::tiger.png[]
Instead of the bracket form, you can use the macro anchor to achieve the same goal.
anchor:tiger-image[Image of a tiger]
30.2. Internal Cross References
In Asciidoctor, the xref inline macro is used to create cross references (i.e. links) to sections, blocks or phrases that have an ID (explicit or auto-generated).
An implicit cross reference is created by enclosing the ID of the target block or section (or the path of another document with an optional anchor) in double angled brackets.
The section <<images>> describes how to insert images into your document.The section Images describes how to insert images into your document.
You can also link to a block or section using the title by referencing its title. However, the title must begin with an uppercase letter (in basic Latin) without any leading formatting marks.
Refer to <<Internal cross references>>.Refer to [Internal cross references].
Some converters, such as the HTML converter, will use the xreflabel as the default text of the link.
However, you can also customize this text.
After the ID, add a comma and then enter the custom text you want the cross reference to display.
Learn how to <<link-macro-attributes,use attributes within the link macro>>.Learn how to use attributes within the link macro.
You can also use the inline xref macro as an alternative to the double angled bracket form.
Learn how to xref:link-macro-attributes[use attributes within the link macro].30.3. Inter-document Cross References
The xref inline macro can also link to IDs in other AsciiDoc documents. This eliminates the need to use direct links between documents that are coupled to a particular converter (e.g., HTML links). It also captures the intent of the author to establish a reference to a section in another document.
Here’s how a cross reference is normally defined in Asciidoctor:
The section <<images>> describes how to insert images into your document.
This cross reference creates a link to the section with the ID images.
Let’s assume the cross reference is defined in the document document-a.adoc. If the target section is in a separate document, document-b.adoc, the author may be tempted to write:
Refer to link:document-b.html#section-b[Section B] for more information.
However, this link is coupled to HTML output. What’s worse, if document-b.adoc is included in the same master as document-a.adoc, then the link will refer to a document that doesn’t even exist!
These problems can be alleviated by using an inter-document xref:
Refer to <<document-b.adoc#section-b,Section B>> for more information.
The ID of the target is now placed behind a hash symbol (#).
Preceding the hash is the name of the reference document (the file extension is optional).
We’ve also added a label since Asciidoctor cannot (yet) resolve the section title in a separate document.
When Asciidoctor generates the link for this cross reference, it first checks to see if document-b.adoc is included in the same master as document-a.doc. If not, it will generate a link to document-b.html, intelligently substituting the original file extension with the file extension of the output file.
<a href="document-b.html#section-b">Section B</a>
If document-b.adoc is included in the same master as document-a.doc, then the document will be dropped in the link target and look like the output of a normal cross reference:
<a href="#section-b">Section B</a>
Now you can create inter-document cross references without the headache.
30.3.1. Navigating Between Source Files
In certain environments, such as GitHub and the browser preview extensions, you view the generated HTML through the AsciiDoc source URL. This has consequences for inter-document cross references.
Since the default suffix for relative links in the html5 backend is .html, the inter-document cross references end up pointing to non-existent HTML files.
In this case, you need to change the inter-document cross references to refer to other AsciiDoc source files instead.
You can achieve this behavior by setting the outfilesuffix attribute to the value as .adoc, as the example below shows.
= Document Title
ifdef::env-github,env-browser[:outfilesuffix: .adoc]
See the <<README#,README>>.
We could also write the link as link:README{outfilesuffix}[README].
The links in the generated document will now point to README.adoc instead of the default, README.html.
You probably don’t want to set outfilesuffix to .adoc without the ifdef condition as it could result in Asciidoctor overwriting input files when you run it locally (though there’s some protection against this).
|
While outfilesuffix gives you control over the end of the resolved path for an inter-document cross reference, the relfileprefix attribute gives you control over the beginning of the path.
When resolving the path of an inter-document cross reference, if the relfileprefix attribute is set, the value of this attribute gets prepended to the path.
Let’s look at an example of when these two attributes are used together.
A common practice in website architecture is to move files into their own folder to make the path format agnostic (called “indexify”).
For example, the path filename.html becomes filename/ (which targets filename/index.html).
However, this is problematic for inter-document cross references.
Any cross reference that resolves to the path filename.html is now invalid since the file has moved to a subfolder (and thus no longer a sibling of the referencing document).
To solve this problem, you can define the following two attributes:
:relfileprefix: ../ :outfilesuffix: /
Now, the cross reference <<filename#,Label>> will resolve to ../filename/ instead of filename.html.
Since this change is specific to the website architecture described, you want to be sure to only set these attributes in that particular environment (either using an ifdef directive or via the API).
31. Include Directive
The include directive, include::path[attributes], allows you to insert content from another file into the current document.
You can use the include directive to:
-
partition a large document into smaller files (for better organization and to make restructuring simpler),
-
insert snippets of source code (so your examples are kept up-to-date with the latest source files),
-
populate tables with output from other programs (e.g., CSV data),
-
create document variants by combining the include directive with preprocessor conditionals (e.g.,
ifdef), and -
reuse fragments and boilerplate content multiple times within the same document.
It’s important to understand that the include directive is not aware of the document structure. It effectively copies the content from the other file and pastes it at the location of the include directive. This is called a preprocessor operation.
| The include directive is disabled when Asciidoctor is run in secure mode. In secure mode, include directives get converted to links in the output document. To learn more about secure mode, refer to the section Running Asciidoctor Securely. |
31.1. Basics
The include directive has the following anatomy:
include::path[leveloffset=offset,lines=ranges,tag(s)=name(s),indent=depth]
The leveloffset, lines, tag(s) and indent attributes are optional, making the simplest case look like:
= Document Title include::content.adoc[]
The sections that follow go into detail about how the include file is resolved and how each attribute is used.
31.2. File resolution
The path used in an include directive may be either relative or absolute.
If the path relative, the processor resolves the path using the following rules:
-
If the include directive is used in the main (top-level) document, relative paths are resolved relative to the base directory. (The base directory defaults to the directory of the main document and can be overridden from the CLI or API).
-
If the include directive is used in a file that has itself been included, the path is resolved relative to the including (i.e., current) file.
These defaults makes it easy to reason about how the path to the include file is resolved.
If the processor cannot locate the file (perhaps because you mistyped the path), you’ll still be able to convert the document. However, you will get the following warning message during conversion:
asciidoctor: WARNING: master.adoc: line 3: include file not found: /.../content.adoc
The following message will also be inserted into the output:
Unresolved directive in master.adoc - include::content.adoc[]
To fix the problem, edit the file path and run the converter again.
If you store your AsciiDoc files in nested folders at different levels, relative file paths can quickly become awkward and inflexible. A common pattern to help here is to define the paths in attributes defined in the header, then prefix all include paths with a reference to one of these attributes:
:includedir: _includes
:sourcedir: ../src/main/java
include::{includedir}/fragment1.adoc[]
[source,java]
----
include::{sourcedir}/org/asciidoctor/Asciidoctor.java[]
----
Keep in mind that no matter how Asciidoctor resolves the path to the file, access to that file is limited by the safe mode setting under which Asciidoctor is run. If a path violates the security restrictions, it may be truncated.
31.3. Partitioning large documents and using leveloffset
When your document gets large, you can split it up into subsections for easier editing as follows:
= My book include::chapter01.adoc[] include::chapter02.adoc[] include::chapter03.adoc[]
| Note the blank lines before and after the include directives. This practice is recommended whenever including AsciiDoc content to avoid unexpected results (e.g., a section title getting interpreted as a line at the end of a previous paragraph). |
The leveloffset attribute can help here by pushing all headings in the included document down by the specified number of levels. This allows you to publish each chapter as a standalone document (complete with a document title), but still be able to include the chapters into a master document (which has its own document title).
You can easily assemble your book so that the chapter document titles become level 1 headings using:
= My Book include::chapter01.adoc[leveloffset=+1] include::chapter02.adoc[leveloffset=+1] include::chapter03.adoc[leveloffset=+1]
Because the leveloffset is relative (it begins with + or -), this works even if the included document has its own includes and leveloffsets.
If you have lots of chapters to include and want them all to have the same offset, you can save some typing by setting leveloffset around the includes:
= My book :leveloffset: +1 include::chapter01.adoc[] include::chapter02.adoc[] include::chapter03.adoc[] :leveloffset: -1
The final line returns the leveloffset to 0.
Alternatively, you could use absolute levels:
:leveloffset: 1 //includes :leveloffset: 0
Relative levels are preferred. Absolute levels become awkward when you have nested includes since they aren’t context aware.
31.4. AsciiDoc vs non-AsciiDoc files
The include directive performs a simple file merge, so it works with any text file. The content of all included content is normalized. This means that the encoding is forced to UTF-8 (or converted from UTF-16 to UTF-8 if the file contains a BOM) and trailing whitespace and endlines are removed from each line and replaced with a Unix line feed. This normalization is important to how Asciidoctor works.
If the file is recognized as an AsciiDoc file (i.e., it has one of the following extensions: .asciidoc, .adoc, .ad, .asc, or .txt), Asciidoctor runs the preprocessor on the lines, looking for and interpreting the following directives:
-
includes
-
preprocessor conditionals (e.g.,
ifdef)
This allows includes to be nested, and provides lot of flexibility in constructing radically different documents with a single master document and a few command line attributes.
Including non-AsciiDoc files is normally done to merge output from other programs or populate table data:
.2016 Sales Results ,=== include::sales/2016/results.csv[] ,===
In this case, the include directive does not do any processing of AsciiDoc directives. The content is inserted as is (after being normalized).
31.5. Select Portions of a Document to Include
The include directive supports extracting portions of content from within a document. The content is specified either by user-defined tags or a range of line numbers.
When including multiple line ranges or multiple tags, the individual values can be separated either by a comma or a semi-colon. If commas are used, then the entire attribute value must be enclosed in quotes. Using the semi-colon as the data separator alleviates this requirement.
31.5.1. By tagged regions
Tags are useful when you want to display specific regions of content from an include file instead of all of its content.
You can select tagged regions of content with the tag macro and the tags attribute.
The example below shows how you tag a region of content inside a file containing multiple code examples.
# tag::timings[] (1) (2)
if timings
timings.record :read
timings.start :parse
end
# end::timings[] (3) (4)
# tag::parse[] (5)
doc = (options[:parse] == false ? (Document.new lines, options) :
(Document.new lines,options).parse)
timings.record :parse if timings
doc
# end::parse[] (6)| 1 | To indicate the start of a tagged region, insert a comment line in the code. |
| 2 | Assign a unique name to the tag macro. In this example the tag is called timings. |
| 3 | Insert another comment line where you want the tagged region to end. |
| 4 | Assign the name of the region you want to terminate to the end macro. |
| 5 | This is the start a tagged snippet named parse. |
| 6 | This is the end of the tagged snippet named parse. |
The tag::[] and end::[] directives should be placed after a line comment as defined by the language of the source file.
The directives must also appear at the end of the line.
In the previous example, we choose to prefix the lines with a hash (#) because that’s the start of a line comment in Ruby.
|
Asciidoctor supports targets that include spaces and the {sp} attribute references.
|
In the next example, the tagged region named parse is called by the include directive.
[source,ruby]
----
include::core.rb[tags=parse] (1)
----| 1 | In the directive’s brackets, set the tag attribute and assign it the unique name of the code snippet you tagged in your code file. |
You can include multiple tags from the same file.
[source,ruby]
----
include::core.rb[tags=timings;parse]
----It is also possible to have fine-grained tagged regions inside larger tagged regions.
For example, if your include file has the following content:
// tag::snippets[]
// tag::snippet-a[]
snippet a
// end::snippet-a[]
// tag::snippet-b[]
snippet b
// end::snippet-b[]
// end::snippets[]And you include this file using the following include directive:
include::file-with-snippets.adoc[tag=snippets]The following lines will be selected and displayed:
snippet a
snippet bNotice that none of the lines with the tag directives are displayed.
for XML files you can use the <!-- tag::name[] --> and <!-- end::name[] --> delimiters
|
Alternately, you can select content by line number.
31.5.2. By line ranges
To include content by line range, assign a starting line number and an ending line number separated by a pair of dots (e.g., lines=1..5) to the lines attribute.
include::filename.txt[lines=5..10]You can specify multiple ranges by separating each range by a comma. Since commas are normally used to separate individual attributes, you must quote the comma-separated list of ranges.
include::filename.txt[lines="1..10,15..20"]To avoid having to quote the list of ranges, you can instead separate them using semi-colons.
include::filename.txt[lines=7;14..25;28..43]If you don’t know the number of lines in the document, or you don’t want to couple the range to the length of the file, you can refer to the last line of the document using the value -1.
include::filename.txt[lines=12..-1]31.6. Normalize Block Indentation
Source code snippets from external files are often padded with a leading block indent. This leading block indent is relevant in its original context. However, once inside the documentation, this leading block indent is no longer needed.
The attribute indent allows the leading block indent to be stripped and, optionally, a new block indent to be set for blocks with verbatim content (listing, literal, source, verse, etc.).
-
When
indentis 0, the leading block indent is stripped -
When
indentis > 0, the leading block indent is first stripped, then the content is indented by the number of columns equal to this value.
If the tabsize attribute is set on the block or the document, tabs are also replaced with the number of spaces specified by that attribute, regardless of whether the indent attribute is set.
For example, this AsciiDoc source:
[source,ruby,indent=0]
----
def names
@name.split ' '
end
----Produces:
def names @name.split ' ' end
This AsciiDoc source:
[indent=2]
----
def names
@name.split ' '
end
----
Produces:
def names
@name.split ' '
end
31.7. Include Content from a URI
The include directive recognizes when the target is a URI and can include the content referenced by that URI.
This example demonstrates how to include an AsciiDoc file from a GitHub repo directly into your document.
include::https://raw.githubusercontent.com/asciidoctor/asciidoctor/master/README.adoc[]For security reasons, this capability is not enabled by default. To allow content to be read from a URI, you must enable the URI read permission by:
-
running Asciidoctor in
SERVERmode or less and -
setting the
allow-uri-readattribute securely (i.e., from the CLI or API).
Here’s an example that shows how to run Asciidoctor from the console so it can read content from a URI:
$ asciidoctor -a allow-uri-read filename.adoc
Remember that Asciidoctor executes in SAFE mode by default when run from the command line.
Here’s an example that shows how to run Asciidoctor from the API so it can read content from a URI:
Asciidoctor.convert_file 'filename.adoc', safe: :safe, attributes: { 'allow-uri-read' => '' }
Including content from sources outside your control carries certain risks, including the potential to introduce malicious behavior into your documentation.
Because allow-uri-read is a potentially dangerous feature, it is forcefully disabled when the safe mode is SECURE or higher.
|
The same restriction described in this section applies when embedding an image referenced from a URI, such as when data-uri is set or when converting to PDF using Asciidoctor PDF.
31.8. Caching URI Content
Reading content from a URI is obviously much slower than reading it from a local file.
Asciidoctor provides a way for the content read from a URI to be cached, which is highly recommended.
To enable the built-in cache, you must:
-
Install the
open-uri-cachedgem. -
Set the
cache-uriattribute in the document.
When these two conditions are satisfied, Asciidoctor caches content read from a URI according the to HTTP caching recommendations.
31.9. Include a File Multiple Times in the Same Document
A document can include the same file any number of times. The problem comes if there are IDs in the included file; the output document (HTML or DocBook) will then have duplicate IDs which will make it not well-formed. To fix this, you can reference a dynamic variable from the main document in the ID.
For example, let’s say you want to include the same subsection describing a bike chain in both the operation and maintenance chapters:
= Bike Manual :chapter: operation == Operation include::fragment-chain.adoc[] :chapter: maintenance == Maintenance include::fragment-chain.adoc[]
Write fragment-chain.adoc as:
[id='chain-{chapter}']
=== Chain
See xref:chain-{chapter}[].
The first time the fragment-chain.adoc file is included, the ID of the included section resolves to chain-operation.
The second time the file included, the ID resolves to chain-maintenance.
In order for this to work, you must use the long-hand forms of both the ID assignment and the cross-reference. The single quotes around the variable name in the assignment are required to force variable substitution (aka interpolation).
32. Images
To include an image on its own line (i.e., a block image), use the image:: prefix in front of the file name and square brackets after it.
image::sunset.jpg[]
If you want to specify alt text, include it inside the square brackets:
image::sunset.jpg[Sunset]You can also give the image an id, a title, set its dimensions and make it a link.
[[img-sunset]] (1)
.A mountain sunset (2)
image::sunset.jpg[Sunset, 300, 200, link="http://www.flickr.com/photos/javh/5448336655"] (3) (4) (5)| 1 | ID, see Defining an Anchor. |
| 2 | The title of a block image is displayed underneath the image when rendered. |
| 3 | The first positional attribute, Sunset, is the image’s alt text. |
| 4 | Image width and height |
| 5 | link makes the image a link |
Block images are prefixed by a caption label (Figure) and number automatically.
To turn off figure caption labels and numbers, add the figure-caption attribute to the document header and unset it.
:figure-caption!:
If you want to include an image inline, use the image: prefix instead (notice there is only one colon):
Click image:icons/play.png[Play, title="Play"] to get the party started.
Click image:icons/pause.png[title="Pause"] when you need a break.Click ![]() to get the party started.
to get the party started.
Click ![]() when you need a break.
when you need a break.
For inline images, the optional title is displayed as a tooltip.
32.1. Setting the Location of Images
The imagesdir document attribute can be used to specify the location of images that are referenced in the document using a relative path.
We recommend using the imagesdir attribute to avoid hard-coding the common path to your images in every single image macro.
The value of the imagesdir attribute can be an absolute path, relative path or URI. By default, the value of the imagesdir attribute is empty, which means these images are resolved relative to the document. If the image target is an absolute path or URI, the imagesdir prefix is not added to the path.
| You can set the imagesdir attribute multiple times in your document. This technique is useful if you store images for different parts, chapters, or sections of your document in different locations. |
32.1.1. Include Images by Full URL
Asciidoctor supports remote (i.e., images with a URL target) block and inline images. You can reference images served from any URL (e.g., your blog, an image hosting service, your docs server, etc.) and never have to worry about downloading the images and putting them somewhere locally.
Here are a few examples of images that have a URL target:
image::http://upload.wikimedia.org/wikipedia/commons/3/35/Tux.svg[Tux,250,350]
You can find image:http://upload.wikimedia.org/wikipedia/commons/3/35/Tux.svg[Linux,25,35] everywhere these days.You can find ![]() everywhere these days.
everywhere these days.
| The value of imagesdir is ignored when the image target is a URI. |
If you want to avoid typing the URL prefix for every image, and all the images are located on the same server, you can use the imagesdir attribute to set the base URL:
:imagesdir-old: {imagesdir}
:imagesdir: http://upload.wikimedia.org/wikipedia/commons
image::3/35/Tux.svg[Tux,250,350]
:imagesdir: {imagesdir-old}This time, the imagesdir is used since the image target is not a URL (the imagesdir just happens to be one).
| This feature is included in the AsciiDoc compatibility file so that AsciiDoc gets it right too. |
32.2. Putting Images in Their Place
Images are a great way to enhance the text, whether its to illustrate an idea, show rather than tell or just help the reader connect with the text.
Out of the box, images and text behave like oil and water. Images don’t like to share space with text. They are kind of “pushy” about it. That’s why we focused on tuning the controls in the image macros so you can get the images and the text to flow together.
There are two approaches you can take when positioning your images:
-
Named attributes
-
Roles
32.2.1. Positioning attributes
Asciidoctor supports the align attribute on block images to align the image within the block (e.g., left, right or center).
The named attribute float can be applied to both the block and inline image macros.
Float pulls the image to one side of the page or the other and wraps block or inline content around it, respectively.
Here’s an example of a floating block image. The paragraphs or other blocks that follow the image will float up into the available space next to the image. The image will also be positioned horizontally in the center of the image block.
image::tiger.png[Tiger,200,200,float="right",align="center"]Here’s an example of a floating inline image. The image will float into the upper-right corner of the paragraph text.
image:linux.png[Linux,150,150,float="right"]
You can find Linux everywhere these days!When you use the named attributes, CSS gets added inline (e.g., style="float: left").
That’s bad practice because it can make the page harder to style when you want to customize the theme.
It’s far better to use CSS classes for these sorts of things, which map to roles in AsciiDoc terminology.
32.2.2. Positioning roles
Here are the examples from above, now configured to use roles that map to CSS classes in the default Asciidoctor stylesheet:
[.right.text-center]
image::tiger.png[Tiger,200,200]image:sunset.jpg[Sunset,150,150,role="right"] What a beautiful sunset!The following table lists all the roles available out of the box for positioning images.
| Float | Align | ||||
|---|---|---|---|---|---|
Role |
left |
right |
text-left |
text-right |
text-center |
Block Image |
|||||
Inline Image |
|||||
Merely setting the float direction on an image is not sufficient for proper positioning. That’s because, by default, no space is left between the image and the text. To alleviate this problem, we’ve added sensible margins to images that use either the positioning named attributes or roles.
If you want to customize the image styles, perhaps to customize the margins, you can provide your own additions to the stylesheet (either by using your own stylesheet that builds on the default stylesheet or by adding the styles to a docinfo file).
The shorthand syntax for a role (.) can not yet be used with image styles.
|
32.2.3. Framing roles
It’s common to frame the image in a border to further offset it from the text.
You can style any block or inline image to appear as a thumbnail using the thumb role (or th for short).
The thumb role doesn’t alter the dimensions of the image.
For that, you need to assign the image a height and width.
|
Here’s a common example for adding an image to a blog post. The image floats to the right and is framed to make it stand out more from the text.
image:logo.png[role="related thumb right"] Here's text that will wrap around the image to the left.Notice we added the related role to the image.
This role isn’t technically required, but it gives the image semantic meaning.
32.2.4. Control the float
When you start floating images, you may discover that too much content is floating around the image.
What you need is a way to clear the float.
That is provided using another role, float-group.
Let’s assume that we’ve floated two images so that they are positioned next to each other and we want the next paragraph to appear below them.
[.left]
.Image A
image::a.png[A,240,180]
[.left]
.Image B
image::b.png[B,240,180,title="Image B"]
Text below images.When this example is rendered and viewed a browser, the paragraph text appears to the right of the images. To fix this behavior, you just need to "group" the images together in a block with self-contained floats. Here’s how it’s done:
[.float-group]
--
[.left]
.Image A
image::a.png[A,240,180]
[.left]
.Image B
image::b.png[B,240,180]
--
Text below images.This time, the text will appear below the images where we want it.
32.3. Sizing Images
Since images often need to be sized according to the medium, there are several ways to specify an image size.
In most output formats, the specified width is obeyed unless the image would exceed the content width or height, in which case it scaled to fit while maintaining the original aspect ratio (i.e., responsive scaling).
32.3.1. width and height
The primary way to specify the size of an image is to define the width and height attributes on the image macro.
Since these two attributes are so common, they are the second and third (unnamed) positional attributes on the image macros.
image::flower.jpg[Flower,640,480]That’s equivalent to the long-hand version:
image::flower.jpg[alt=Flower,width=640,height=480]While the values of width and height can be used to scale the image, these attributes are primarily intended to specify the intrinsic (or faux-intrinsic, aka too-lazy-to-resize) size of the image in CSS pixels.[1]
The width and height attributes are mapped to attributes of the same name on the <img> element in the HTML output.
These attributes are important because they provide a hint to the browser to tell it how much space to reserve for the image during layout to minimize page reflows.
32.3.2. pdfwidth
Asciidoctor recognizes the following attributes to size images when converting to PDF using Asciidoctor PDF:
-
pdfwidth- The preferred width of the image in the PDF when converting using Asciidoctor PDF.
The pdfwidth attribute accepts the following units:
| px |
Output device pixels (assumed to be 96 dpi) |
| pt (or none) |
Points (1/72 of an inch) |
| pc |
Picas (1/6 of an inch) |
| cm |
Centimeters |
| mm |
Millimeters |
| in |
Inches |
| % |
Percentage of the content width (area between margins) |
| vw |
Percentage of the page width (edge to edge) |
If pdfwidth is not provided, Asciidoctor PDF also accepts scaledwidth, or width (no units, assumed to be pixels), in that order.
See image scaling in Asciidoctor PDF for more details.
32.3.3. scaledwidth
Asciidoctor recognizes the following attributes to size images when converting to PDF using the DocBook toolchain:
-
scaledwidth- The preferred width of the image when converting to PDF using the DocBook toolchain. (mutually exclusive with scale) -
scale- Scales the original image size by this amount when converting to PDF using the DocBook toolchain (mutually exclusive with scaledwidth).
scaledwidth sizes images much like pdfwidth, except it does not accept the vw unit.
The value of scaledwidth when used with DocBook can have the following units:
| px |
Output device pixels (assumed to be 72 dpi) |
| pt |
Points (1/72 of an inch) |
| pc |
Picas (1/6 of an inch) |
| cm |
Centimeters |
| mm |
Millimeters |
| in |
Inches |
| em |
Ems (current font size) |
| % (or none) |
Percentage of intrinsic image size |
DocBook also accepts the width attribute if scaledwidth is not provided.
32.3.4. Image Sizing Recap
| Backend | Absolute size | Relative to original size | Relative to content width | Relative to page width |
|---|---|---|---|---|
html |
width=120 |
Not possible |
width=50% |
Not possible |
pdfwidth=100mm |
Not possible |
pdfwidth=80% |
pdfwidth=50vw |
|
docbook |
scaledwidth=100mm |
scale=80 |
scaledwidth=50% |
Not possible |
Here’s an example of how you might bring these attributes together to control the size of an image in various output formats:
image::flower.jpg[Flower,640,480,pdfwidth=50%,scaledwidth=50%]
A practice you might consider is using attributes to set the values for each output:
ifdef::backend-html5[]
:twoinches: width='144'
:full-width: width='100%'
:half-width: width='50%'
:half-size:
:thumbnail: width='60'
endif::[]
ifdef::backend-pdf[]
:twoinches: pdfwidth='2in'
:full-width: pdfwidth='100vw'
:half-width: pdfwidth='50vw'
:half-size: pdfwidth='50%'
:thumbnail: pdfwidth='20mm'
endif::[]
ifdef::backend-docbook5[]
:twoinches: width='50mm'
:full-width: scaledwidth='100%'
:half-width: scaledwidth='50%'
:half-size: width='50%'
:thumbnail: width='20mm'
endif::[]Then you can specify a half-size image using:
image::image.jpg[{half-size}]
In addition to providing consistency across your document, this technique will help insulate you from future changes. For a more detailed example, see this thread on the discussion list.
32.4. Summary
| Attribute | Value(s) | Example Syntax | Comments |
|---|---|---|---|
|
empty, absolute path, relative path or base URL |
|
If the image target is a URL or an absolute path, the |
|
User defined text |
|
|
|
User defined text in first position of attribute list or named attribute |
|
|
|
User defined text |
|
Blocks: title displayed below image; Inline: title displayed as tooltip |
|
User defined text |
|
Only applies to block images. |
|
User defined size in pixels |
|
|
|
User defined size in pixels |
|
|
|
User defined location of external URI |
|
|
|
A scaling factor to apply to the instrinsic image dimensions |
|
DocBook only |
|
User defined width for block images |
|
DocBook only |
|
User defined width for images in a PDF |
|
Asciidoctor PDF only |
|
left, center, right |
|
Block images only; Align and float attributes are mutually exclusive |
|
left, right |
|
Block images only; float and align attributes are mutually exclusive; to scope the float, use a float group. |
|
left, right, th, thumb, related, rel |
|
Inline images can use role to float images left and right; Role shorthand ( |
33. Video
The video block macro enables you to embed videos into your documentation.
You can embed self-hosted videos or videos shared on popular video hosting sites such as YouTube and Vimeo.
The video formats Asciidoctor supports is dictated by the formats supported by the browser (and, in turn, the user’s system).
While this was once a precarious ordeal, HTML5 has brought sanity to video support in the browser by adding a dedicated <video> element and by introducing several standard video formats.
Those formats are now widely supported across browsers and systems.
For a canonical list of supported web video formats and their interaction with modern browsers, see the Mozilla Developer Supported Media Formats documentation.
video::video_file.mp4[]You can control the video settings using additional attributes on the macro.
For instance, you can offset the start time of playback using the start attribute and enable autoplay using the autoplay option.
video::video_file.mp4[width=640, start=60, end=140, options=autoplay]You can include a caption on the video using the title attribute.
.A walkthrough of the product
video::video_file.mp4[]33.1. YouTube and Vimeo videos
The video macro supports embedding videos from external video hosting services like YouTube and Vimeo. Asciidoctor automatically generates the correct code to embed the video in the HTML output.
To use this feature, put the video ID in the macro target and the name of the hosting service in the first positional attribute.
video::rPQoq7ThGAU[youtube]video::67480300[vimeo]33.2. Supported Attributes
| Attribute | Value(s) | Example Syntax | Comments |
|---|---|---|---|
|
User defined text |
|
|
|
A URL to an image to show until the user plays or seeks. |
|
Can be specified as the first positional (unnamed) attribute. Also used to specify the service when referring to a video hosted on YouTube (youtube) or Vimeo (vimeo). |
|
User-defined size in pixels. |
|
Can be specified as the second positional (unnamed) attribute. |
|
User-defined size in pixels. |
|
Can be specified as the third positional (unnamed) attribute. |
|
autoplay, loop, modest, nocontrols, nofullscreen |
|
The controls are enabled by default. The modest option enables modest branding for a YouTube video. |
|
User-defined playback start time in seconds. |
|
|
|
User-defined playback end time in seconds. |
|
|
|
The YouTube theme to use for the frame. |
|
Valid values are dark (the default) and light. |
|
The language used in the YouTube frame. |
|
A two-letter language code or fully specified locale. |
35. Admonition
There are certain statements that you may want to draw attention to by taking them out of the content’s flow and labeling them with a priority. These are called admonitions. It’s rendered style is determined by the assigned label (i.e., value). Asciidoctor provides five admonition style labels:
-
NOTE -
TIP -
IMPORTANT -
CAUTION -
WARNING
When you want to call attention to a single paragraph, start the first line of the paragraph with the label you want to use.
The label must be uppercase and followed by a colon (:).
WARNING: Wolpertingers are known to nest in server racks. (1) (2)
Enter at your own risk.| 1 | The label must be uppercase and immediately followed by a colon (:). |
| 2 | Separate the first line of the paragraph from the label by a single space. |
| Wolpertingers are known to nest in server racks. Enter at your own risk. |
When you want to apply an admonition to complex content, set the label as a style attribute on a block. As seen in the next example, admonition labels are commonly set on example blocks. This behavior is referred to as masquerading. The label must be uppercase when set as an attribute on a block.
[IMPORTANT] (1)
.Feeding the Werewolves
==== (2)
While werewolves are hardy community members, keep in mind the following dietary concerns:
. They are allergic to cinnamon.
. More than two glasses of orange juice in 24 hours makes them howl in harmony with alarms and sirens.
. Celery makes them sad.
====| 1 | Set the label in an attribute list on a delimited block. The label must be uppercase. |
| 2 | Admonition styles are commonly set on example blocks. Example blocks are delimited by four equal signs (====). |
|
Feeding the Werewolves
While werewolves are hardy community members, keep in mind the following dietary concerns:
|
In the examples above, the admonition is rendered in a callout box with the style label in the gutter.
You can replace the rendered labels with icons by setting the icons attribute on the document.
This is how the WARNING admonition paragraph renders when icons is set and assigned the font value.
WARNING: Wolpertingers are known to nest in server racks.
Enter at your own risk.| Wolpertingers are known to nest in server racks. Enter at your own risk. |
Learn more about using Font Awesome or custom icons with admonitions in the icons section.
36. Sidebar
Use a sidebar for ancillary content that doesn’t fit into the flow of the document’s narrative. A sidebar can be titled and contain any type of content such as source code and images.
.AsciiDoc history (1)
**** (2)
AsciiDoc was first released in Nov 2002 by Stuart Rackham.
It was designed from the start to be a shorthand syntax
for producing professional documents like DocBook and LaTeX.
****| 1 | A title is optional. |
| 2 | A sidebar is delimited by four asterisks (****). |
37. Example
.Sample document
====
Here's a sample AsciiDoc document:
[listing]
....
= Title of Document
Doc Writer
:toc:
This guide provides...
....
The document header is useful, but not required.
====Here’s a sample AsciiDoc document:
= Title of Document Doc Writer :toc: This guide provides...
The document header is useful, but not required.
38. Prose Excerpts, Quotes and Verses
Prose excerpts, quotes and verses share the same syntax structure, including:
-
block name, either
quoteorverse -
name of who the content is attributed to
-
bibliographical information of the book, speech, play, poem, etc., where the content was drawn from
-
excerpt text
38.1. Quote
For content that doesn’t require the preservation of line breaks, set the quote attribute in the first position of the attribute list.
Next, set the attribution and relevant citation information.
However, these positional attributes are optional.
[quote, attribution, citation title and information] Quote or excerpt text
If the quote is a single line or paragraph, you can place the attribute list directly on top of the text.
.After landing the cloaked Klingon bird of prey in Golden Gate park: (1)
[quote, Captain James T. Kirk, Star Trek IV: The Voyage Home] (2) (3) (4)
Everybody remember where we parked. (5)| 1 | Mark lead-in text explaining the context or setting of the quote using a period (.). (optional) |
| 2 | For content that doesn’t require the preservation of line breaks, set quote in the first position of the attribute list. |
| 3 | The second position contains who the excerpt is attributed to. (optional) |
| 4 | Enter additional citation information in the third position. (optional) |
| 5 | Enter the excerpt or quote text on the line immediately following the attribute list. |
Everybody remember where we parked.
Star Trek IV: The Voyage Home
If the quote or excerpt is more than one paragraph, place the text between delimiter lines consisting of four underscores (____).
[quote, Monty Python and the Holy Grail]
____
Dennis: Come and see the violence inherent in the system. Help! Help! I'm being repressed!
King Arthur: Bloody peasant!
Dennis: Oh, what a giveaway! Did you hear that? Did you hear that, eh? That's what I'm on about! Did you see him repressing me? You saw him, Didn't you?
____Dennis: Come and see the violence inherent in the system. Help! Help! I’m being repressed!
King Arthur: Bloody peasant!
Dennis: Oh, what a giveaway! Did you hear that? Did you hear that, eh? That’s what I’m on about! Did you see him repressing me? You saw him, Didn’t you?
Asciidoctor also provides three alternative ways to markup quotes and prose excerpts.
38.1.1. Quoted paragraph
You can turn a single paragraph into a blockquote by:
-
surrounding it with double quotes
-
adding an optional attribution (prefixed with two dashes) below the quoted text
"I hold it that a little rebellion now and then is a good thing,
and as necessary in the political world as storms in the physical."
-- Thomas Jefferson, Papers of Thomas Jefferson: Volume 11I hold it that a little rebellion now and then is a good thing, and as necessary in the political world as storms in the physical.
Papers of Thomas Jefferson: Volume 11
38.1.2. Air quotes
Air quotes are two double quotes on each line, emulating the gesture of making quote marks with two fingers on each hand.
[, Richard M. Nixon]
""
When the President does it, that means that it's not illegal.
""When the President does it, that means that it’s not illegal.
38.1.3. Markdown-style blockquotes
Asciidoctor supports Markdown-style blockquotes.
> I hold it that a little rebellion now and then is a good thing,
> and as necessary in the political world as storms in the physical.
> -- Thomas Jefferson, Papers of Thomas Jefferson: Volume 11I hold it that a little rebellion now and then is a good thing, and as necessary in the political world as storms in the physical.
Papers of Thomas Jefferson: Volume 11
Like Markdown, Asciidoctor supports block content inside the blockquote, including nested blockquotes.
> > What's new?
>
> I've got Markdown in my AsciiDoc!
>
> > Like what?
>
> * Blockquotes
> * Headings
> * Fenced code blocks
>
> > Is there more?
>
> Yep. AsciiDoc and Markdown share a lot of common syntax already.Here’s how this conversation renders.
What’s new?
I’ve got Markdown in my AsciiDoc!
Like what?
Blockquotes
Headings
Fenced code blocks
Is there more?
Yep. AsciiDoc and Markdown share a lot of common syntax already.
38.2. Verse
When you need to preserve indents and line breaks, use the verse block name.
Verses are defined by setting verse on a paragraph or an excerpt block delimited by four underscores (____).
[verse, Carl Sandburg, two lines from the poem Fog]
The fog comes
on little cat feet.The fog comes on little cat feet.
two lines from the poem Fog
When the verse content includes blank or indented lines, enclose it in an excerpt block.
[verse, Carl Sandburg, Fog] ____ The fog comes on little cat feet. It sits looking over harbor and city on silent haunches and then moves on. ____
The fog comes on little cat feet. It sits looking over harbor and city on silent haunches and then moves on.
Fog
39. Comments
// A single-line comment.
| Single-line comments can be used to divide elements, such as two adjacent lists. |
//// A multi-line comment. Notice it's a delimited block. ////
Controlling Your Content
| Part introduction pending |
40. Text Substitutions
Text substitution elements replace characters, markup, attribute references, and macros with converter specific styles and values. When Asciidoctor processes a document it uses a set of six text substitution elements. The processor runs the text substitution elements in the following order.
-
Special characters
-
Quotes
-
Attribute references
-
Replacements
-
Inline macros
-
Post replacements
In turn, these substitutions are organized into composite value groups. The table below shows which substitution elements are included in each group.
| Group | Special characters | Quotes | Attributes | Replacements | Macros | Post replacements |
|---|---|---|---|---|---|---|
Header |
||||||
None |
||||||
Normal |
||||||
Pass |
||||||
Verbatim |
By default, the normal substitution group is applied to most block and inline elements.
However, there are a few exceptions.
The header substitution group is applied to the header of your document.
In the header, only special characters and attribute references are replaced.
Fenced, literal, listing, and source blocks are processed with the verbatim substitution group.
Only special characters are replaced in these blocks.
The pass substitution group can only be applied to passthrough elements.
Attribute references and macros are replaced in passthroughs.
The none substitution group is applied to comment blocks.
40.1. Special Characters
When applicable, the first text substitution to occur is the replacement of any special characters.
This process is handled by the specialchars element.
The specialchars element searches for three characters (<, >, &) and replaces them with their character entity references.
-
The less than symbol,
<, is replaced with the<character entity reference. -
The greater than symbol,
>, is replaced with the>character entity reference. -
An ampersand,
&, is replaced with the&character entity reference.
By default, the special characters substitution occurs on all inline and block elements except for comments and certain passthroughs. The substitution of special characters can be controlled on blocks using the subs attribute and on inline elements using the passthrough macro.
|
Special character substitution precedes attribute substitution, so you will need to manually escape any attributes containing special characters that you set in the CLI or API.
For example, on the command line, type |
40.2. Quotes
The quotes substitution replaces the formatting markup on inline elements.
For example, when a document is rendered to HTML, any asterisks enclosing text are replaced with <strong> HTML tags.
Happy werewolves are *really* slobbery.
Happy werewolves are <strong>really</strong> slobbery.
The following table shows the HTML markup that is generated by the quotes substitution process.
| Name | AsciiDoc | HTML |
|---|---|---|
emphasis |
_word_ |
<em>word</em> |
strong |
*word* |
<strong>word</strong> |
monospace |
`word` |
<code>word</code> |
superscript |
^word^ |
<sup>word</sup> |
subscript |
~word~ |
<sub>word</sub> |
double curved quotes |
"`word`" |
“word” |
single curved quotes |
'`word`' |
‘word’ |
The quotes substitution occurs on formatted text within title, paragraph, example, quote, sidebar, and verse blocks.
| Element | quotes substitution |
|---|---|
Attribute value |
|
Comment |
|
Example |
|
Fenced |
|
Header |
|
Literal |
|
Listing |
|
Macro |
|
Open |
Varies |
Paragraph |
|
Passthrough |
|
Quote |
|
Sidebar |
|
Source |
|
Special sections |
|
Table |
Varies |
Title |
|
Verse |
40.3. Attributes
Attribute references are replaced with their values when they’re processed by the attributes substitution.
| Element | attributes substitution |
|---|---|
Attribute value |
|
Comment |
|
Example |
|
Fenced |
|
Header |
|
Literal |
|
Listing |
|
Macro |
|
Open |
Varies |
Paragraph |
|
Passthrough |
|
Quote |
|
Sidebar |
|
Source |
|
Special sections |
|
Table |
Varies |
Title |
|
Verse |
40.4. Replacements
The replacements substitution processes textual characters such as marks, arrows and dashes and replaces them with the decimal format of their Unicode code point, i.e. their numeric character reference.
| Name | Syntax | Unicode Replacement | Rendered | Notes |
|---|---|---|---|---|
Copyright |
(C) |
© |
© |
|
Registered |
(R) |
® |
® |
|
Trademark |
(TM) |
™ |
™ |
|
Em dash |
-- |
— |
— |
Only replaced if it is a word, i.e. surrounded by white space, line start, or line end. When white space characters are detected on both sides of the em dash, they are replaced by thin spaces ( ). |
ellipses |
... |
… |
… |
|
right single arrow |
-> |
→ |
→ |
|
right double arrow |
=> |
⇒ |
⇒ |
|
left single arrow |
<- |
← |
← |
|
left double arrow |
<= |
⇐ |
⇐ |
|
apostrophe |
Sam's |
Sam’s |
Sam’s |
The vertical form apostrophe is replaced with the curved form apostrophe. |
The replacements element depends on the substitutions completed by the specialcharacters element.
This is important to keep in mind when applying custom substitutions to a block.
See the section about applying custom substitutions for more information.
|
The replacements substitution also recognizes HTML and XML character entity references as well as decimal and hexadecimal Unicode code points and substitutes them for their corresponding decimal form Unicode code point.
For example, to render the § symbol you could write §, §, or §.
When the document is processed, replacements will replace the section symbol reference, regardless of whether it is a character entity reference or a numeric character reference, with §.
In turn, § will render as §.
| Asciidoctor also provides numerous built-in attributes for representing characters and symbols. These attributes and their corresponding output are listed in Appendix B. |
The replacements substitution occurs within title, paragraph, example, quote, sidebar, and verse blocks.
| Element | replacements substitution |
|---|---|
Attribute value |
|
Comment |
|
Example |
|
Fenced |
|
Header |
|
Literal |
|
Listing |
|
Macro |
|
Open |
Varies |
Paragraph |
|
Passthrough |
|
Quote |
|
Sidebar |
|
Source |
|
Special sections |
|
Table |
Varies |
Title |
|
Verse |
40.5. Macros
Macros are processed by the macros element.
The macros substitution replaces a macro’s content with the appropriate built-in and user-defined configuration.
| Element | macros substitution |
|---|---|
Attribute value |
|
Comment |
|
Example |
|
Fenced |
|
Header |
|
Literal |
|
Listing |
|
Macro |
|
Open |
Varies |
Paragraph |
|
Passthrough |
|
Quote |
|
Sidebar |
|
Source |
|
Special sections |
|
Table |
Varies |
Title |
|
Verse |
40.6. Post Replacements
The line break character, +, is replaced when the post_replacements process runs.
| Element | post_replacements substitution |
|---|---|
Attribute value |
|
Comment |
|
Example |
|
Fenced |
|
Header |
|
Literal |
|
Listing |
|
Macro |
|
Open |
Varies |
Paragraph |
|
Passthrough |
|
Quote |
|
Sidebar |
|
Source |
|
Special sections |
|
Table |
Varies |
Title |
|
Verse |
40.7. Applying Substitutions
Specific substitution elements can be applied to any block or paragraph by setting the subs attribute.
The subs attribute can be assigned a comma separated list of the following substitution elements and groups.
none
|
Disables substitutions |
normal
|
Performs all substitutions except for callouts |
verbatim
|
Replaces special characters and processes callouts |
specialchars, specialcharacters
|
Replaces |
quotes
|
Applies text formatting |
attributes
|
Replaces attribute references |
replacements
|
Substitutes textual and character reference replacements |
macros
|
Processes macros |
post_replacements
|
Replaces the line break character ( |
Let’s look at an example where you only want to process special characters, formatting markup, and callouts in a literal block.
By default, literal blocks are only subject to special characters substitution.
But you can change this behavior by setting the subs attribute in the block’s attribute list.
[source,java,subs="verbatim,quotes"] (1)
----
System.out.println("Hello *bold* text"). (2)
----
| 1 | The subs attribute is set in the attribute list and assigned the verbatim and quotes values. |
| 2 | The formatting markup in this line will be replaced when the quotes substitution runs. |
System.out.println("Hello bold text"). (1) (2)| 1 | The verbatim value enables the callouts to be rendered. |
| 2 | The quotes value enables the text formatting to be rendered. |
|
If you are applying the same set of substitutions to numerous blocks, you should consider making them an attribute entry to ensure consistency. Another way to ensure consistency and keep your documents clean and simple is to use the Treeprocessor extension. |
40.8. Incremental Substitutions
When you set the subs attribute on a block, you automatically remove all of its default substitutions.
For example, if you set subs on a literal block, and assign it a value of attributes, only attributes are substituted.
The verbatim substitution will not be applied.
To remedy this situation, Asciidoctor provides a syntax to append or remove substitutions instead of replacing them outright.
You can add or remove a substitution from the default substitution list using the plus (+) and minus (-) modifiers.
These are known as incremental substitutions.
<substitution>+
|
Prepends the substitution to the default list. |
+<substitution>
|
Appends the substitution to the default list. |
-<substitution>
|
Removes the substitution from the default list. |
For example, you can add the attributes substitution to a listing block’s default substitution list.
[source,xml,subs="attributes+"]
----
<version>{version}</version>
----Similarly, you can remove the callouts substitution.
[source,xml,subs="-callouts"]
.An illegal XML tag
----
<1>foo</1>
----You can also specify whether the substitution is placed at the beginning or end of the substitution list.
If a + comes before the name of the substitution, then it’s added to the end of the existing list, and if a + comes after the name, it’s added to the beginning of the list.
[source,xml,subs="attributes+,+replacements,-callouts"]
----
<version>{version}</version>
<copyright>(C) ACME</copyright>
(1)
content in 1 element
</1>
----In the above example, the quotes, then the special characters, and then the attributes substitutions will be applied to the listing block.
40.8.1. Applying Substitutions to Inline Elements
Custom substitutions can also be applied to some inline elements, such as the pass macro.
For example, the quotes text substitution value is assigned in the inline pass macro below.
The markup pass:q[<u>underline *me*</u>] renders as underlined text and "`me`" is bold.The markup underline me renders as underlined text and “me” is bold.
40.9. Preventing Substitutions
Asciidoctor provides several approaches for preventing substitutions.
To prevent punctuation from being interpreted as formatting markup, precede it with a backslash (\).
If the formatting punctuation begins with two characters (e.g., __), you need to precede it with two backslashes (\\).
This is also how you can prevent character and attribute references from substitution.
When your document is processed, the backslash is removed so it doesn’t display in your output.
\*Stars* will appear as *Stars*, not as bold text.
\§ will appear as an entity, not the § symbol.
\\__func__ will appear as __func__, not as emphasized text.
\{two-semicolons} will appear {two-semicolons}, not resolved as ;;.You can also prevent substitutions with macro and block passthroughs.
41. Literal Text and Blocks
Literal paragraphs and blocks display the text you write exactly as you enter it. Literal text is treated as preformatted text. The text is shown in a fixed-width font and endlines are preserved. Only special characters and callouts are replaced when the document is rendered.
Literal blocks are defined three ways:
-
Indenting the first line of a paragraph by one or more spaces
-
Applying the
literalattribute to a paragraph or block -
Using the literal block delimiter (
....)
When a line begins with one or more spaces it is displayed as a literal paragraph. This method is a quick and easy way to insert code snippets.
~/secure/vault/defops~/secure/vault/defops
When you want an entire block of text to be literal and would prefer not to indent it, set the literal attribute on top of the element.
[literal]
error: The requested operation returned error: 1954 Forbidden search for defensive operations manual
absolutely fatal: operation initiation lost in the dodecahedron of doom
would you like to die again? y/nerror: The requested operation returned error: 1954 Forbidden search for defensive operations manual absolutely fatal: operation initiation lost in the dodecahedron of doom would you like to die again? y/n
Finally, you can surround the content you want rendered as literal by enclosing it in a set of literal block delimiters (....).
This method is useful when the content consists of several elements that are separated by blank lines.
....
Lazarus: Where is the *defensive operations manual*?
Computer: Calculating ...
Can not locate object that you are not authorized to know exists.
Would you like to ask another question?
Lazarus: Did the werewolves tell you to say that?
Computer: Calculating ...
....Notice in the output that the bold text formatting is not rendered nor are the three, consecutive periods replaced by the ellipsis Unicode character.
Lazarus: Where is the *defensive operations manual*? Computer: Calculating ... Can not locate object that you are not authorized to know exists. Would you like to ask another question? Lazarus: Did the werewolves tell you to say that? Computer: Calculating ...
42. Listing Blocks
Like literal blocks, the content in listing blocks is displayed exactly as you entered it.
Listing block content is rendered as <pre> text.
The content in listing blocks is only subject to special character and callout substitutions.
The listing block name can be applied to content two ways.
-
Set the
listingattribute on the element. -
Contain the content within a delimited listing block.
The listing block name is applied to an element, such as a paragraph, by setting the listing attribute on that element.
[listing]
This is an example of a paragraph styled with `listing`.
Notice that the monospace markup is preserved in the output.This is an example of a paragraph styled with `listing`. Notice that the monospace markup is preserved in the output.
A delimited listing block is surrounded by lines composed of four hyphens (----).
----
This is an example of a _listing block_.
The content inside is rendered as <pre> text.
----Here’s how the block above appears when rendered as HTML.
This is an example of a _listing block_. The content inside is rendered as <pre> text.
You should notice a few things about how the content is processed.
-
the HTML tag
<pre>is escaped -
then endlines are preserved
-
the phrase listing block is not italicized, despite having underscores around it.
Listing blocks are good for displaying raw source code, especially when used in tandem with the source and source-highlighter attributes.
The example below shows a listing block with source and the language ruby applied to its content.
[[app-listing]]
[source,ruby]
.app.rb
----
require 'sinatra'
get '/hi' do
"Hello World!"
end
----require 'sinatra'
get '/hi' do
"Hello World!"
endDetailed instructions for using the source and source-highlighter attributes are provided in the source code blocks section.
:version: 0.1.4
[source,xml,subs="verbatim,attributes"]
----
<dependency>
<groupId>org.asciidoctor</groupId>
<artifactId>asciidoctor-java-integration</artifactId>
<version>{version}</version>
</dependency>
----
<dependency>
<groupId>org.asciidoctor</groupId>
<artifactId>asciidoctor-java-integration</artifactId>
<version>0.1.4</version>
</dependency>42.1. To Wrap or to Scroll
The default Asciidoctor stylesheet wraps long lines in listing and literal blocks by applying the CSS white-space: pre-wrap and word-wrap: break-word.
The lines are wrapped at word boundaries, similar to how most text editors wrap lines.
This prevents horizontal scrolling which some users considered a greater readability problem than line wrapping.
However, this behavior is configurable because there are times when you don’t want the lines in listing and literal blocks to wrap.
There are two ways to prevent lines from wrapping so that horizontal scrolling is used instead:
-
nowrapblock option -
unset the
prewrapdocument attribute (on by default)
You can use the nowrap option on literal or listing blocks to prevent lines from being wrapped in the HTML.
[source%nowrap,java]
----
public class ApplicationConfigurationProvider extends HttpConfigurationProvider
{
@Override
public Configuration getConfiguration(ServletContext context)
{
return ConfigurationBuilder.begin()
.addRule()
.when(Direction.isInbound().and(Path.matches("/{path}")))
.perform(Log.message(Level.INFO, "Client requested path: {path}"))
.where("path").matches(".*");
}
}
----When the nowrap option is used, the nowrap class is added to the <pre> element.
This class changes the CSS to white-space: pre and word-wrap: normal.
public class ApplicationConfigurationProvider extends HttpConfigurationProvider
{
@Override
public Configuration getConfiguration(ServletContext context)
{
return ConfigurationBuilder.begin()
.addRule()
.when(Direction.isInbound().and(Path.matches("/{path}")))
.perform(Log.message(Level.INFO, "Client requested path: {path}"))
.where("path").matches(".*");
}
}To prevent lines from wrapping globally, unset the prewrap attribute on the document.
:prewrap!:When the prewrap attribute is unset, the nowrap class is added to any <pre> elements.
Now, you can use the line wrapping strategy that works best for you and your readers.
43. Macro and Block Passthroughs
Passthroughs are the “anything goes” mechanism in Asciidoctor. As its name implies, a passthrough passes its contents directly to the output document. The contents of a passthrough are excluded from all substitutions.
| Using passthroughs to pass content without processing can couple your document to a specific output format, such as HTML. In these cases, you can use conditional preprocessor directives to declare passthrough markup for each backend you need to support. |
43.1. Passthrough Macros
Asciidoctor provides several ways to write a passthrough macro.
The pass macro can be applied to inline or block content.
You can include a comma-separated list of substitutions prior to the passthrough content.
pass:optional-substitution-attribute-1,optional-substitution-attribute-x[content passed directly to the output] followed by normal content.
| Asciidoctor does not implement the block form of the block macro. Instead, you should use a pass block. |
To exclude a phrase from substitutions and disable escaping of special characters, enclose it in the inline pass macro:
The markup pass:[<u>underline me</u>] renders as underlined text.The markup underline me renders as underlined text.
If you want to enable ad-hoc quotes substitution, then assign the macros value to subs and use the inline pass macro.
[subs="verbatim,macros"] (1) ---- I better not contain *bold* or _italic_ text. pass:quotes[But I should contain *bold* text.] (2) ----
| 1 | macros is assigned to subs, which allows any macros within the block to be processed. |
| 2 | The pass macro is assigned the quotes value. Text within the square brackets will be formatted. |
The inline pass macro does introduce additional markup into the Java source code that makes it invalid in raw form, but the output it produces will be valid when viewed in a viewer (HTML, PDF, etc.).
I better not contain *bold* or _italic_ text. But I should contain bold text.
The inline pass macro also accepts shorthand values for specifying substitutions.
-
c= special characters -
q= quotes -
a= attributes -
r= replacements -
m= macros -
p= post replacements
For example, the quotes text substitution value is assigned in the inline passthrough macro below:
The markup pass:q[<u>underline *me*</u>] renders as underlined text and "`me`" is bold.The markup underline me renders as underlined text and “me” is bold.
The triple-plus passthrough works the same way as the pass macro. To exclude content from substitutions, enclose it in triple pluses (+++).
+++content passed directly to the output+++ followed by normal content.
The triple-plus macro is often used to output custom HTML or XML.
The markup +++<u>underline me</u>+++ renders as underlined text.The markup underline me renders as underlined text.
43.2. Block Passthroughs
The pass style and delimited passthrough block exclude blocks of content from all substitutions.
The pass style can be set on a paragraph or an open block.
[pass]
<u>underline me</u> renders as underlined text.A block passthrough is delimited by four plus signs (++++).
++++
<video poster="images/movie-reel.png">
<source src="videos/writing-zen.webm" type="video/webm">
</video>
++++If you want substitutions to be performed on the content in a delimited passthrough block, you can add them using the subs attribute.
[subs="attributes"]
++++
{name}
image:tiger.png[]
++++44. Open Blocks
The most versatile block of all is the open block.
--
An open block can be an anonymous container,
or it can masquerade as any other block.
--An open block can be an anonymous container, or it can masquerade as any other block.
An open block can act as any other block, with the exception of pass and table. Here’s an example of an open block acting as a sidebar.
[sidebar]
.Related information
--
This is aside text.
It is used to present information related to the main content.
--This is an open block acting as a source block.
[source]
--
puts "I'm a source block!"
--puts "I'm a source block!"Enriching Your Content
| Part introduction pending |
45. Equations and Formulas
If you need to get technical in your writing, Asciidoctor integrates with MathJax. MathJax is the standard library for displaying Science, Technology, Engineering and Math (STEM) expressions in the browser.
Thanks to MathJax JavaScript library, Asciidoctor supports both AsciiMathML and TeX and LaTeX math notation in the same document.
46. Activating stem support
To activate equation and formula support, simply set the stem attribute in the document’s header (or by passing the attribute to the commandline or API).
= My Diabolical Mathmatical Opus
Jamie Moriarty
:stem: (1)| 1 | The default interpreter value, asciimath, is assigned implicitly. |
By default, Asciidoctor’s stem support assumes all equations are AsciiMath if not specified explicitly.
If you want to use the LaTeX interpreter by default, assign latexmath to the stem attribute.
The html backend will just use mathjax client-side to render math notation, whereas the docbook backend will use it to convert math to mathml.
= My Diabolical Mathmatical Opus
Jamie Moriarty
:stem: latexmath
You can still use both interpreters in the same document.
The value of the stem attribute merely sets the default interpreter.
To set the interpreter explicitly for a given block or inline span, just use asciimath or latexmath in place of stem as explained in [Using multiple stem interpreters].
|
Stem content can be displayed inline with other content or as discrete blocks. No substitutions are applied to the content within a stem macro or block.
46.1. Inline Stem Content
The best way to mark up an inline formula is to use the stem macro.
stem:[sqrt(4) = 2] (1) (2)
Water (stem:[H_2O]) is a critical component.| 1 | The inline stem macro contains only one colon (:). |
| 2 | Place the content you want interpreted within the square brackets ([]) of the macro. |
\$sqrt(4) = 2\$
Water (\$H_2O\$) is a critical component.
46.2. Block Stem Content
Block formulas are marked up by assigning the stem style to a delimited passthrough block.
[stem] (1)
++++ (2)
sqrt(4) = 2
++++| 1 | Assign the stem style to the passthrough block. |
| 2 | A passthrough block is delimited by a line of four consecutive plus signs ( |
The result is rendered beautifully in the browser thanks to MathJax!
| You don’t need to add special delimiters around the expression as the MathJax documentation suggests. Asciidoctor handles that for you automatically! |
46.3. Using Multiple Stem Interpreters
You can use multiple interpreters for stem content within the same document by using the interpreter’s name instead of the default stem name.
For example, if you want LaTeXMath to interpret an inline equation, name the macro latexmath.
latexmath:[C = \alpha + \beta Y^{\gamma} + \epsilon]\(C = \alpha + \beta Y^{\gamma} + \epsilon\)
The name that maps to the interpreter you want to use can also be applied to block stem content.
= My Diabolical Mathmatical Opus
Jamie Moriarty
:stem: latexmath
[asciimath]
++++
sqrt(4) = 2
++++46.4. Enabling STEM expressions in the DocBook Toolchain
When converting to HTML, Asciidoctor relies on MathJax to parse and render the STEM expressions in the browser. We can’t rely on MathJax when converting to DocBook, so Asciidoctor must explicitly convert the expressions into something the DocBook toolchain can understand. Enter the asciimath gem.
The asciimath gem converts AsciiMath expressions to MathML. The DocBook converter uses this functionality if the gem is available. Thus, to enable AsciiMath support when converting to DocBook, you need to install the asciimath gem:
$ gem install asciimath
For full functionality, you’ll also need at least Asciidoctor version 1.5.4.
The asciimath gem converts AsciiMath to MathML. If you’re generating a PDF from the DocBook, the MathML needs to be interpreted and drawn into the PDF. In the DocBook FOP pipeline, this is handled by JEuclid.
Fortunately, fopub is already configured to use the JEuclid integration. When fopub generates the PDF, the JEuclid FOP plugin processes any MathML found in the DocBook file, including the expressions transformed from AsciiMath to MathML by the asciimath gem. As a result, AsciiMath stem expressions in the AsciiDoc file will render as expected in the generated PDF.
There’s no equivalent gem for converting STEM expressions written in LaTeX to MathML. Instead, you can convert the DocBook to PDF using the dblatex pipeline, which obviously supports LaTeX expressions.
47. User Interface Macros
We are looking for feedback on these macros before setting them in stone. If you have suggestions, we want to hear from you!
You must set the experimental attribute to enable these macros.
|
47.1. Keyboard shortcuts
Asciidoctor recognizes a macro for creating keyboard shortcuts using the syntax kbd:[key(+key)*].
|===
|Shortcut |Purpose
|kbd:[F11]
|Toggle fullscreen
|kbd:[Ctrl+T]
|Open a new tab
|kbd:[Ctrl+Shift+N]
|New incognito window
|kbd:[Ctrl + +]
|Increase zoom
|===| Shortcut | Purpose |
|---|---|
F11 |
Toggle fullscreen |
Ctrl+T |
Open a new tab |
Ctrl+Shift+N |
New incognito window |
Ctrl++ |
Increase zoom |
You no longer have to struggle to explain to users what keys they are supposed to press.
47.2. Menu selections
Trying to explain to someone how to select a menu item can be a pain.
With the menu macro, the symbols do the work.
To save the file, select menu:File[Save].
Select menu:View[Zoom > Reset] to reset the zoom level to the default setting.The instructions in the example above appear below.
To save the file, select .
Select to reset the zoom level to the default setting.
47.3. UI buttons
It can be equally difficult to communicate to the reader that they need to press a button.
They can’t tell if you are saying “OK” or they are supposed to look for a button labeled OK.
It’s all about getting the semantics right.
The btn macro to the rescue!
Press the btn:[OK] button when you are finished.
Select a file in the file navigator and click btn:[Open].Press the OK button when you are finished.
Select a file in the file navigator and click Open.
48. Icons
Icons are used for admonition labels, callout numbers and inline symbols.
Asciidoctor provides three strategies for display icons: as text, as images or as a characters selected from an icon font.
The strategy is controlled using the icons attribute.
The default behavior is to display the fallback text.
If you want icons to display using images, set the icons attribute to an empty value in the document header.
This strategy is recommended if you are converting to DocBook or you want an easy way to make HTML for viewing offline.
The DocBook toolchain provides images for the admonition and callout icons, which you can replace with your own custom icons.
If you use the inline icon macro, you’ll need to provide the images for those icons.
Alternatively, you can have Asciidoctor “draw” icons using the Font Awesome font-based icon set.
To use this feature, set the value of the icons document attribute to font in the document header.
You can see the available icons on the icons page.
Using Font Awesome provides many more images, but requires online access by default.
| The default CSS stylesheet (or any stylesheet produced by the Asciidoctor stylesheet factory) is required when using font-based icons. |
48.1. Admonition Icons
Here’s an example using font icons, starting with the AsciiDoc source:
= Document Title
:icons: font
NOTE: Asciidoctor supports font-based admonition icons, powered by Font Awesome!Asciidoctor will then emit HTML markup that selects an appropriate font character from the Font Awesome font for each admonition block:
<div class="admonitionblock note">
<table>
<tr>
<td class="icon">
<i class="fa icon-note" title="Note"></i>
</td>
<td class="content">
Asciidoctor supports font-based admonition icons, powered by Font Awesome!
</td>
</tr>
</table>
</div>This is how the admonition looks rendered.
| Asciidoctor supports font-based admonition icons, powered by Font Awesome! |
Asciidoctor adds a reference to the Font Awesome stylesheet and font files served from a CDN to the document header:
<link rel="stylesheet"
href="http://cdnjs.cloudflare.com/ajax/libs/font-awesome/3.1.0/css/font-awesome.min.css">48.2. Inline Icons
An icon can be inserted at an arbitrary place in paragraph content with an inline macro.
Here’s an example that inserts the Font Awesome tags icon in front of a list of tag names.
icon:tags[] ruby, asciidoctorHere’s how the HTML converter renders the above syntax when the icons attribute is assigned the font value.
<div class="paragraph">
<p><span class="icon"><i class="fa fa-tags"></i></span> ruby, asciidoctor</p>
</div>More importantly, here’s how it looks!
ruby, asciidoctor
You can even give the icon color by assigning it a role.
icon:tags[role="blue"] ruby, asciidoctorruby, asciidoctor
If you aren’t using font-based icons, Asciidoctor looks for icon images on disk, in the iconsdir, naturally.
Here’s how the HTML converter renders an icon when the icons attribute is not set or empty.
<div class="paragraph">
<p><span class="image"><img src="./images/icons/tags.png" alt="tags"></span> ruby, asciidoctor</p>
</div>Here’s how it renders in the DocBook backend, regardless of the icons attribute value.
<inlinemediaobject>
<imageobject>
<imagedata fileref="./images/icons/tags.png"/>
</imageobject>
<textobject><phrase>tags</phrase></textobject>
</inlinemediaobject> ruby, asciidoctorThe inline icon macro is similar to the inline image macro with a few exceptions:
-
If the icons attribute has the value font, the macro will translate to a font-based icon in the HTML converter (e.g.,
<i class="icon-tags"></i>) -
If the icons attribute does not have the value font, or the converter is DocBook, the macro will insert an image into the document that resolves to a file in the iconsdir directory (e.g.,
<img src="./images/icons/tags.png">)
The file resolution strategy when using image-based icons is the same used to locate images for the admonition icons.
The file extension is set using the icontype attribute, which defaults to PNG (png).
48.2.1. Size, Rotate, and Flip
The icon macro has a few attributes that can be used to modify the size and orientation of the icon. At the moment, these are specific to Font Awesome and therefore only apply to HTML output when icon fonts are enabled.
size-
First positional attribute; scales the icon; values:
1x(default),2x,3x,4x,5x,lg,fw rotate-
Rotates the icon; values:
90,180,270 flip-
Flips the icon; values:
horizontal,vertical
The first unnamed attribute is assumed to be the size.
For instance, to make the icon twice the size as the default, simply add 2x inside the square brackets.
icon:heart[2x]This is equivalent to:
icon:heart[size=2x]And this is how the displays.
The previous example emits the following HTML:
<span class="icon"><i class="fa fa-heart fa-2x"></i></span>|
If you want to line up icons so that you can use them as bullets in a list, use the [%hardbreaks] icon:bolt[fw] bolt icon:heart[fw] heart |
To rotate and flip the icon, specify these options using attributes:
icon:shield[rotate=90, flip=vertical]The looks like this.
The previous example emits the following HTML:
<span class="icon"><i class="fa-shield fa-rotate-90 fa-flip-vertical"></i></span>48.2.2. Link and Window
Like an inline image, it’s possible to add additional metadata to an inline icon.
Below are the possible attributes that apply to both font-based and image-based icons:
link-
The URI target used for the icon, which will be rendered as a link
window-
The target window of the link (when the
linkattribute is specified) (HTML converter)
Here’s an example of an icon rendered as a link:
icon:download[link="http://rubygems.org/downloads/asciidoctor-1.5.2.gem"]The previous example emits the following HTML:
<span class="icon"><a class="image" href="http://rubygems.org/downloads/asciidoctor-1.5.2.gem"><i class="fa-download"></i></a></span>48.2.3. Image Icon Attributes
Below are the possible attributes that apply in the case that font-based icons are not in use:
alt-
The alternate text on the
<img>tag (HTML backend) or text for<inlinemediaobject>(DocBook converter) width-
The width applied to the image
height-
The height applied to the image
title-
The title of the image displayed when the mouse hovers over it (HTML converter)
role-
The role applied to the element that surrounds the icon
Currently, the inline icon macro doesn’t support any options to change it’s physical position (such as alignment left or right).
49. Syntax Highlighting Source Code
Developers are accustomed to seeing source code that uses color and other styling to emphasize the code’s structure (i.e., keywords, types, delimiters, etc.). This technique is known as syntax highlighting source code (or source highlighting, for short). Since this technique is so prevelant—one could say expected, Asciidoctor integrates a wealth of libraries to syntax highlight source code blocks in your document. This list includes CodeRay, Pygments, highlight.js, and prettify.
49.1. Enabling Source Highlighting
When enabled, syntax highlighting gets applied to listing or literal blocks that have the source block style and a source language.
However, syntax highlighting is not enabled by default.
To enable syntax highlighting in a document, you must set the source-highlighter document attribute.
You can set this attribute in the document or from the CLI or API.
If you set the attribute in the document, it must be defined in the document header.
= Document Title :source-highlighter: <value>
For example, here’s how to enable syntax highlighting using CodeRay:
= Document Title :source-highlighter: coderay
49.2. Available Source Highlighters
The following table lists the recognized values for the source-highlighter attribute.
| Library Name | Attribute Value | Supported Environments |
|---|---|---|
|
Asciidoctor, AsciidoctorJ, Asciidoctor PDF |
|
|
Asciidoctor, AsciidoctorJ, Asciidoctor.js |
|
|
Asciidoctor, AsciidoctorJ, Asciidoctor.js |
|
|
Asciidoctor, Asciidoctor PDF |
|
|
Asciidoctor PDF |
|
To use CodeRay, Pygments, or Rouge, you must have the appropriate library installed on your system. See the CodeRay or Pygments section to find installation instructions. (We don’t yet have a section about Rouge). On the other hand, if you’re using a client-side syntax highlighting library like highlight.js or prettify, there’s no need to install additional libraries. The generated HTML will load the required source files from a CDN (or custom URL or file path). |
49.3. Applying Source Highlighting
To apply highlighting to source code, you must add the source block style to a listing block, literal block, or paragrah and also specify a source language.
[[app-listing]] (1) [source,ruby] (2) (3) .app.rb (4) ---- (5) require 'sinatra' get '/hi' do "Hello World!" end ----
| 1 | An optional ID can be added to the block. See Defining an Anchor. |
| 2 | Assign the block name source to the first position in the attribute list. |
| 3 | Assign a source language to the second position. |
| 4 | An optional title can be added to the block. |
| 5 | The source block name is typically assigned to listing and literal blocks. |
require 'sinatra'
get '/hi' do
"Hello World!"
end[source,xml] (1) <meta name="viewport" content="width=device-width, initial-scale=1.0"> This is normal content. (2)
| 1 | Place the attribute list directly on the paragraph |
| 2 | Once an empty line is encountered the syntax highlighting is unset. |
<meta name="viewport"
content="width=device-width, initial-scale=1.0">This is normal content.
If the majority of your source blocks use the same source language, you can set the source-language attribute in the document header and assign a language to it.
:source-highlighter: pygments
:source-language: java
[source]
----
public void setAttributes(Attributes attributes) {
this.options.put(ATTRIBUTES, attributes.map());
}
----
You can override the global source language by specifying a source language on the block.
[source,ruby]
require 'sinatra'
Additionally, you can use an include directive to insert source code into an AsciiDoc document directly from a file.
[source,ruby] ---- include::app.rb[] ----
If you specify custom substitutions on the source block using the subs attribute, make sure to include the specialcharacters substitution if you want to preserve syntax highlighting.
However, if you do plan to modify the substitutions, we recommend using incremental substitutions instead.
|
49.4. Pygments
Pygments is a popular syntax highlighter that supports a broad range of programming, template and markup languages.
In order to use Pygments with Asciidoctor, you need Python 2 and the pygments.rb gem (which bundles Pygments).
| You do not need to install Pygments itself. It comes bundled with the pygments.rb gem. |
You must have Python 2 install.
Python 3 is not sufficient to use Pygments with the pygments.rb gem.
Check that you have a python2 (Linux, OSX) or py -2 (Windows) binary on your PATH.
|
$ "`\which apt-get || \which dnf || \which yum || \which brew`" install python (1)
$ gem install pygments.rb (2)| 1 | Install Python using your package manager |
| 2 | Install the pygments.rb gem |
Once you’ve installed these libraries, assign pygments to the source-highlighter attribute in your document’s header.
:source-highlighter: pygmentsYou can further customize the source block output with additional Pygments attributes.
| pygments-style |
Sets the name of the color theme Pygments uses.
To see the list of available style names, see Available Pygments style names.
Default: |
| pygments-css |
Controls what method is used for applying CSS to the tokens.
Can be |
| pygments-linenums-mode |
Controls how line numbers are arranged when line numbers are enabled on the source block.
Can be |
:source-highlighter: pygments
:pygments-style: manni
:pygments-linenums-mode: inline
[source,ruby,linenums]
----
ORDERED_LIST_KEYWORDS = {
'loweralpha' => 'a',
'lowerroman' => 'i',
'upperalpha' => 'A',
'upperroman' => 'I'
#'lowergreek' => 'a'
#'arabic' => '1'
#'decimal' => '1'
}
----
49.4.1. Available Pygments style names
To list the available Pygments styles, run the following command in a terminal:
$ $(dirname $(gem which pygments.rb))/../vendor/pygments-main/pygmentize -L styles
The pygments.rb gem uses a bundled version of Pygments (often ahead of the latest release).
This command ensures that you are invoking the pygmentize command from the Pygments used by that gem.
49.4.2. Using a custom Pygments installation
If you already have Pygments installed on your system, you want to use your own fork, or you want to customize how Pygments is configured, you can get Asciidoctor to use a custom version of Pygments instead of the one bundled with the pygments.rb gem.
First, install your own version of Pygments. You can do this, for instance, by cloning the upstream Pygments repository:
$ hg clone https://bitbucket.org/birkenfeld/pygments-main pygments
Find the directory that contains the file pygmentize or the Makefile. That’s your Pygments installation path. Make note of it.
Next, create a script to run before invoking Asciidoctor for the first time. Let’s call it pygments_init.rb. Populate the script with the following content:
require 'pygments'
# use a custom Pygments installation (directory that contains pygmentize)
Pygments.start '/path/to/pygments'
# example of registering a missing or additional lexer
#Pygments::Lexer.create name: 'Turtle', aliases: ['turtle'],
# filenames: ['*.ttl'], mimetypes: ['text/turtle', 'application/x-turtle']| You could enhance this script to read the Pygments installation path from an environment variable (or configuration file). |
Now just require this script before your invoke Asciidoctor the first time.
When using the asciidoctor command, pass the script using the -r flag:
$ asciidoctor -r ./pygments_init.rb document.adoc
When using the Asciidoctor API, require the script using require or require_relative:
require 'asciidoctor'
require_relative './pygments_init.rb'
Asciidoctor.convert_file 'document.adoc', safe: :safeNow Asciidoctor is using your custom installation of Pygments instead of the one bundled with the pygments.rb gem.
49.5. CodeRay
CodeRay is an encoding-aware, syntax highlighter that supports the languages listed below.
C |
C++ |
Clojure |
CSS |
Delphi |
diff |
ERB |
Go |
Groovy |
HAML |
HTML |
Java |
JavaScript |
JSON |
Lua |
PHP |
Python |
Ruby |
Sass |
SQL |
Taskpaper |
XML |
YAML |
In order to use CodeRay with Asciidoctor, you need the coderay RubyGem. You can use one of the following methods to install CodeRay.
- Install using
gem(all systems) -
$ gem install coderay
- Install using
apt-get(Debian-based systems) -
$ sudo apt-get install coderay
- Install using
dnf(Fedora-based systems) -
$ sudo dnf install rubygem-coderay
Once you’ve installed the RubyGem, assign the coderay value to the source-highlighter attribute in the document header to activate it.
:source-highlighter: coderayYou can further customize the source block output with additional CodeRay attributes.
| coderay-css |
Controls what method is used for applying CSS to the tokens.
Can be |
| coderay-linenums-mode |
Controls how line numbers are laid out.
Can be |
:source-highlighter: coderay
:coderay-linenums-mode: inline
[source,ruby,linenums]
----
ORDERED_LIST_KEYWORDS = {
'loweralpha' => 'a',
'lowerroman' => 'i',
'upperalpha' => 'A',
'upperroman' => 'I'
#'lowergreek' => 'a'
#'arabic' => '1'
#'decimal' => '1'
}
----See the CodeRay stylesheet section to learn about the coderay-css attribute.
49.6. highlight.js
highlight.js is a popular client-side syntax highlighter that supports a broad range of languages.
To use highlight.js, simply add the following attribute entry to the header of your AsciiDoc file:
:source-highlighter: highlightjsBy default, Asciidoctor will link to the highlight.js library and stylesheet hosted on cdnjs.
The version of the highlight.js library hosted on cdnjs only includes the basic language bundle. To enable support for a wider range of languages (or to use a different version), follow these steps:
-
Create your custom bundle on the download page.
-
Download and unpack the zip into a folder called highlight adjacent to your AsciiDoc file (or in the output directory, if different)
-
Rename highlight/highlight.pack.js to highlight/highlight.min.js
-
Rename highlight/styles/github.css to highlight/styles/github.min.css
-
Replace
githubwith the name of thehighlightjs-themeyou are using, if different.
-
-
Add the attribute entry
:highlightjsdir: highlightto the header of your AsciiDoc file.-
Alternatively, you can pass the
-a highlightjsdir=highlightflag when invoking the Asciidoctor CLI.
-
The output file will use your personal copy of the highlight.js library and stylesheet instead of the one hosted on cdnjs.
50. Callouts
Callout numbers (aka callouts) provide a means to add annotations to lines in a verbatim block.
Each callout number used in a verbatim block must appear twice. The first use, which goes within the verbatim block, marks the line being annotated (i.e., the target). The second use, which goes below the verbatim block, defines the annotation text. Multiple callout numbers may be used on a single line.
| The callout number (at the target) must be placed at the end of the line. |
Here’s a basic example of a verbatim block that uses callouts:
[source,ruby]
----
require 'sinatra' <1>
get '/hi' do <2> <3>
"Hello World!"
end
----
<1> Library import
<2> URL mapping
<3> Response blockHere’s how this example gets rendered:
require 'sinatra' (1)
get '/hi' do (2) (3)
"Hello World!"
end| 1 | Library import |
| 2 | URL mapping |
| 3 | Response block |
Since callout number can interfere with the syntax of the code they are annotating, Asciidoctor provides several features to hide the callout numbers from both the source and the rendered document. The sections that follow detail these features.
50.1. Copy and Paste Friendly Callouts
In versions prior to Asciidoctor 0.1.4, when a reader visiting an HTML page generated by Asciidoctor selected source code from a listing that contained callouts and copied it, the callout numbers would get caught up in the copied text. If the reader pasted that code and tried to run it, likely the extra characters from the callouts would cause compile or runtime errors.
Asciidoctor uses CSS to prevent callouts from being selected.
On the other side of the coin, you don’t want the callout annotations or CSS messing up your raw source code either. You can tuck your callouts neatly behind line comments. Asciidoctor will recognize the line comments characters in front of a callout number, optionally offset by a space, and remove them when rendering the document.
Here are the line comments that are supported:
----
line of code // <1>
line of code # <2>
line of code ;; <3>
----
<1> A callout behind a line comment for C-style languages.
<2> A callout behind a line comment for Ruby, Python, Perl, etc.
<3> A callout behind a line comment for Clojure.Here’s how it looks when rendered:
line of code (1) line of code (2) line of code (3)
| 1 | A callout behind a line comment for C-style languages. |
| 2 | A callout behind a line comment for Ruby, Python, Perl, etc. |
| 3 | A callout behind a line comment for Clojure. |
50.1.1. XML Callouts
XML doesn’t have line comments, so our “tuck the callout behind a line comment” trick doesn’t work here. To use callouts in XML, you must place the callout’s angled brackets around the the XML comment and callout number.
Here’s how it appears in a listing:
[source,xml]
----
<section>
<title>Section Title</title> <!--1-->
</section>
----
<1> The section title is required.Here’s how it looks when rendered:
<section>
<title>Section Title</title> (1)
</section>| 1 | The section title is required. |
Notice the comment has been replaced with a circled number that cannot be selected (if not using font icons it will be rendered differently and selectable). Now both you and the reader can copy and paste XML source code containing callouts without worrying about errors.
50.2. Callout Icons
The font icons setting also enables callout icons drawn using CSS.
= Document Title
:icons: font (1)
NOTE: Asciidoctor now supports font-based admonition icons, powered by Font Awesome! (2)| 1 | Activates font-based icons in the HTML5 backend |
| 2 | Admonition block that uses a font-based icon |
51. Conditional Preprocessor Directives
You can include or exclude lines of text in your document using one of the following conditional preprocessor directives:
-
ifdef
-
ifndef
-
ifeval
These directives tell the processor whether to include the enclosed content based on certain conditions. The conditions are based on the presence or value of document attributes.
For example, say you want to include a certain section of content only when converting to HTML.
Conditional preprocessor directives make this possible.
You simply check for the presence of the basebackend-html attribute using an ifdef directive.
Details of this example, as well as others, are described in the following sections.
51.1. ifdef Directive
Content between the ifdef and endif directives gets included if the specified attribute is set:
ifdef::env-github[] This content is for GitHub only. endif::[]
The syntax of the start directive is ifdef::<attribute>[], where <attribute> is the name of an attribute.
Keep in mind that the content is not limited to a single line.
You can have any amount of content between the ifdef and endif directives.
If you have a large amount of content inside the ifdef directive, you may find it more readable to use the long-form version of the directive, in which the attribute (aka condition) is referenced again in the endif directive.
ifdef::env-github[] This content is for GitHub only. So much content in this section, I'd get confused reading the source without the closing `ifdef` directive. It isn't necessary for short blocks, but if you are conditionally including a section it may be something worth considering. Other readers reviewing your docs source code may go cross-eyed when reading your source docs if you don't. endif::env-github[]
| A great example of long-form conditional formatting is the source of this user manual! We use it to show and hide entire sections when building individual content for separate guides. |
If you’re only dealing with a single line of text, you can put the content directly inside the square brackets and drop the endif directive.
ifdef::revnumber[This document has a version number of {revnumber}.]
The single-line block above is equivalent to this formal ifdef directive:
ifdef::revnumber[]
This document has a version number of {revnumber}.
endif::[]51.2. ifndef Directive
ifndef is the logical opposite of ifdef.
Content between ifndef and endif gets included only if the specified attribute is not set:
ifndef::env-github[] This content is not shown on GitHub. endif::[]
The syntax of the start directive is ifndef::<attribute>[], where <attribute> is the name of an attribute.
The ifndef directive supports the same single-line and long-form variants as ifdef.
51.3. Checking multiple attributes (ifdef and ifndef only)
Both the ifdef and ifndef directives accept multiple attribute names.
The combinator can be “and” or “or”.
- Any attribute (or)
-
Multiple comma-separated (,) directive names evaluate to true if one or more of the directives is defined, otherwise the content is not included.
Any attribute exampleifdef::backend-html5,backend-docbook5[Only shown when converting to HTML5 or DocBook 5.]
- All attributes (and)
-
Multiple plus-separated (+) directive names evaluate to true if all of the directives are defined, otherwise the content is not included.
All attributes exampleifdef::env-github+backend-html5[Only shown when converting to HTML5 on GitHub.]
51.4. ifeval directive
Content between ifeval and endif gets included if the expression inside the square brackets evaluates to true.
ifeval::[{sectnumlevels} == 3]
If the `sectnumlevels` attribute has the value 3, this sentence is included.
endif::[]
The ifeval directive does not have a single-line or long-form variant like ifdef and ifndef.
51.4.1. Anatomy
The expression consists of a left-hand value and a right-hand value with an operator in between.
ifeval::[2 > 1]
...
endif::[]
ifeval::["{backend}" == "html5"]
...
endif::[]
ifeval::[{sectnumlevels} == 3]
...
endif::[]
ifeval::["{docname}{outfilesuffix}" == "master.html"]
...
endif::[]
51.4.2. Values
Each expression value can reference the name of zero or more AsciiDoc attribute using the attribute reference syntax (for example, {backend}).
Attribute references are resolved (substituted) first. Once attributes references have been resolved, each value is coerced to a recognized type.
When the expected value is a string (i.e., a string of characters), we recommend that you enclose the expression in quotes.
The following values types are recognized:
- number
-
Either an integer or floating-point value.
- quoted string
-
Enclosed in either single (') or double (") quotes.
- boolean
-
Literal value of
trueorfalse.
How value type coercion works
If a value is enclosed in quotes, the characters between the quotes are preserved and coerced to a string.
If a value is not enclosed in quotes, it is subject to the following type coercion rules:
-
an empty value becomes nil (aka null).
-
a value of
trueorfalsebecomes a boolean value. -
a value of only repeating whitespace becomes a single whitespace string.
-
a value containing a period becomes a floating-point number.
-
any other value is coerced to an integer value.
51.4.3. Operators
The value on each side is compared using the operator to derive an outcome.
==-
Checks if the two values are equal.
!=-
Checks if the two values are not equal.
<-
Checks whether the left-hand side is less than the right-hand side.
<=-
Checks whether the left-hand side is less than or equal to the right-hand side.
>-
Checks whether the left-hand side is greater than the right-hand side.
>=-
Checks whether the left-hand side is greater than or equal to the right-hand side.
| The operators follow the same rules as operators in Ruby. |
52. Docinfo Files
You can add custom content to the head or footer of an output document using docinfo files. Docinfo files are useful for injecting auxiliary metadata, stylesheet, and script information into the output not added by the converter.
Different docinfo files get used depending on whether you are converting to HTML or DocBook (but don’t yet apply when converting to PDF).
52.1. Head docinfo files
The content of head docinfo files gets injected into the top of the document.
For HTML, the content is append to the <head> element.
For DocBook, the content is appended to the root <info> element.
The docinfo file for HTML output may contain valid elements to populate the HTML <head> element, including:
-
<base> -
<link> -
<meta> -
<noscript> -
<script> -
<style>
Use of the <title> element is not recommend as it’s already emitted by the converter.
|
You do not need to include the enclosing <head> tag as it’s assumed to be the envelop.
Here’s an example:
<meta name="keywords" content="open source, documentation">
<meta name="description" content="The dangerous and thrilling adventures of an open source documentation team.">
<link rel="stylesheet" href="basejump.css">
<script src="map.js"></script>Docinfo files for HTML output must be saved with the .html file extension.
See Naming docinfo files for more details.
The docinfo file for DocBook 5.0 output may include any of the <info> element’s children, such as:
-
<address> -
<copyright> -
<edition> -
<keywordset> -
<publisher> -
<subtitle> -
<revhistory>
The following example shows some of the content a docinfo file for DocBook might contain.
<author>
<personname>
<firstname>Karma</firstname>
<surname>Chameleon</surname>
</personname>
<affiliation>
<jobtitle>Word SWAT Team Leader</jobtitle>
</affiliation>
</author>
<keywordset>
<keyword>open source</keyword>
<keyword>documentation</keyword>
<keyword>adventure</keyword>
</keywordset>
<printhistory>
<para>April, 2019. Twenty-sixth printing.</para>
</printhistory>Docinfo files for DocBook output must be saved with the .xml file extension.
See Naming docinfo files for more details.
To see a real-world example of a docinfo file for DocBook, checkout the RichFaces Developer Guide docinfo file.
52.2. Footer docinfo files
Footer docinfo files are differentiated from head docinfo files by the addition of -footer to the file name.
In the HTML output, the footer content is inserted immediately after the footer div (i.e., <div id="footer">).
In the DocBook output, the footer content is inserted immediately before the ending tag (e.g., </article> or </book>).
One possible use of the footer docinfo file is to completely replace the default footer in the standard stylesheet.
Just set the attribute nofooter, then apply a custom footer docinfo file.
|
52.3. Naming docinfo files
The required file name depends on which backend it is for (html or docbook), and whether it is for a specific document (“private”) or for all the documents in a directory (“shared”).
The file extension should match the file extension of the output file (as controlled by the outfilesuffix attribute).
| Mode | Location | Behaviour | Docinfo file name |
|---|---|---|---|
Private |
Head |
Adds content to |
|
Footer |
Adds content to end of document for <docname>.adoc files. |
|
|
Shared |
Head |
Adds content to |
|
Footer |
Adds content to end of document for any document in same directory. |
|
To specify which file(s) you want to apply, set the docinfo attribute to any combination of these values:
-
private-head -
private-footer -
private(alias forprivate-head,private-footer) -
shared-head -
shared-footer -
shared(alias forshared-head,shared-footer)
Setting docinfo with no value is equivalent to setting the value to private.
For example:
:docinfo: shared,private-footerThis docinfo configuration will apply the shared docinfo head and footer files, if they exist, as well as the private footer file, if it exists.
|
|
Let’s apply this to an example:
You have two AsciiDoc documents, adventure.adoc and insurance.adoc, saved in the same folder. You want to add the same content to the head of both documents when they’re rendered to HTML.
-
Create a docinfo file containing
<head>elements. -
Save it as docinfo.html.
-
Set the
docinfoattribute in adventure.adoc and insurance.adoc toshared.
You also want to include some additional content, but only to the head of adventure.adoc.
-
Create another docinfo file containing
<head>elements. -
Save it as adventure-docinfo.html.
-
Set the
docinfoattribute in adventure.adoc toshared,private-head
If other AsciiDoc files are added to the same folder, and docinfo is set to shared in those files, only the docinfo.html file will be added when converting those files.
52.4. Locating docinfo files
By default, docinfo files are searched for in the same folder as the document file.
If you want to keep them anywhere else, set the docinfodir attribute to their location:
:docinfodir: common/metaNote that if you use this attribute, only the specified folder will be searched; docinfo files in the document folder will no longer be found.
52.5. Attribute substitution in docinfo files
Docinfo files may include attribute references.
Which substitutions get applied is controlled by the docinfosubs attribute, which takes a comma-separated list of substitution names.
The value of this attribute defaults to attributes.
For example, if you created the following docinfo file:
<edition>{revnumber}</edition>And this source document:
= Document Title
Author Name
v1.0, 2013-06-01
:doctype: book
:backend: docbook
:docinfo:Then the rendered DocBook output would be:
<?xml version="1.0" encoding="UTF-8"?>
<book xmlns="http://docbook.org/ns/docbook"
xmlns:xlink="http://www.w3.org/1999/xlink" version="5.0" lang="en">
<info>
<title>Document Title</title>
<date>2013-06-01</date>
<author>
<personname>
<firstname>Author</firstname>
<surname>Name</surname>
</personname>
</author>
<authorinitials>AN</authorinitials>
<revhistory>
<revision>
<revnumber>1.0</revnumber> (1)
<date>2013-06-01</date>
<authorinitials>AN</authorinitials>
</revision>
</revhistory>
</info>
</book>| 1 | The revnumber attribute reference was replaced by the source document’s revision number in the rendered output. |
53. Counters
Counters are used to store and display ad-hoc sequences of numbers or latin characters. They are designed for simple use cases. Possible uses include inline itemized lists, paragraph numbers and serial item numbers.
A counter is implemented as a specialized document attribute.
You declare and display a counter using an augmented attribute reference, in which the attribute name is prefixed with counter: (e.g., {counter:name}).
Since counters are attributes, counter names follow the same rules as attribute names.
The counter value is incremented and displayed every time the counter: attribute reference is used.
The term increment means advance to the next value in the sequence.
If the counter value is an integer, add 1.
If the counter value is a character, move to the next letter in the Latin alphabet.
The default start value of a counter is 1.
To create a sequence starting at 1, use the simple form {counter:name} as shown here:
The salad calls for {counter:seq1}) apples, {counter:seq1}) oranges and {counter:seq1}) pears.Here’s the resulting output:
The salad calls for 1) apples, 2) oranges and 3) pears.
To increment the counter without displaying it (i.e., to skip an item in the sequence), use the counter2 prefix instead:
{counter2:seq1}
A counter2 attribute reference on a line by itself will produce an empty paragraph.
You’ll need to adjoin it to the nearest content to avoid this side effect.
|
To display the current value of the counter without incrementing it, reference the counter name as you would any other attribute:
{counter2:pnum}This is paragraph {pnum}.To create a character sequence, or start a number sequence with a value other than 1, specify a start value by appending it to the first use of the counter:
Dessert calls for {counter:seq1:A}) mangoes, {counter:seq1}) grapes and {counter:seq1}) cherries.| Character sequences either run from a,b,c,…x,y,z,{,|… or A,B,C,…,X,Y,Z,[,… depending on the start value. Therefore, they aren’t really useful for more than 26 items. |
The start value of a counter is only recognized if the counter is unset at that point in the document. Otherwise, the start value is ignored.
To reset a counter attribute, unset the corresponding attribute using an attribute entry. The attribute entry must be adjacent to a block or else it is ignored.
The salad calls for {counter:seq1:1}) apples, {counter:seq1}) oranges and {counter:seq1}) pears.
:!seq1:
Dessert calls for {counter:seq1:A}) mangoes, {counter:seq1}) grapes and {counter:seq1}) cherries.This gives:
The salad calls for 1) apples, 2) oranges and 3) pears.
Dessert calls for A) mangoes, B) grapes and C) cherries.
Here’s a full example that shows how to use a counter for part numbers in a table.
[caption=""]
.Parts{counter2:index:0}
|===
|Part Id |Description
|PX-{counter:index}
|Description of PX-{index}
|PX-{counter:index}
|Description of PX-{index}
|===Here’s the output of that table:
| Part Id | Description |
|---|---|
PX-1 |
Description of PX-1 |
PX-2 |
Description of PX-2 |
Structuring, Navigating, and Referencing Your Content
Asciidoctor provides macros or attributes for the specialized frontmatter and backmatter sections commonly found in journal articles, academic papers, and books. In the following sections, you’ll learn the dependency, structure, and output rules for the special section macros and attributes and how to use them.
54. Title Page
|
Discuss and Contribute
Use Issue 448 to drive development of this section. Your contributions make a difference. No contribution is too small.
|
55. Colophon
Book colophons list information such as the ISBN, publishing house, edition and copyright dates, legal notices and disclaimers, cover art, design, and book layout credits, and any significant production notes. In most mass market books, the colophon is on the verso (back side) of the title page, but it can also be located at the end of the book.
[colophon] = Colophon The Asciidoctor Press, Ceres and Denver (C) 2013 by The Asciidoctor Press Published in the Milky Way Galaxy This book is designed by Dagger Flush, Denver, Colorado. The types are handset Chinchilla and Dust, designed by Leeloo. Leeloo designed the typefaces to soften the bluntness of documentation. Created in Asciidoctor and Fedora 19. The printing and binding is by Ceres Lithographing, Inc., Ceres, Milky Way.
56. Table of Contents
A table of contents (TOC) is an index of section and subsection titles that can be automatically generated from the document’s structure when converting a document with Asciidoctor.
To enable the auto-generated TOC, you must set the toc attribute.
The toc attribute can be specified via the command line (-a toc),
$ asciidoctor -a toc adventure.adoc
or in the document header (:toc:).
= The Dangerous and Thrilling Documentation Chronicles Kismet Chameleon :toc: This journey begins on a bleary... == Cavern Glow The river rages through the cavern, rattling its content...
When no other options are specified, the TOC is inserted directly below the document header (document title, author, and revision lines), it has the title Table of Contents, and contains section 1 and section 2 level titles only.
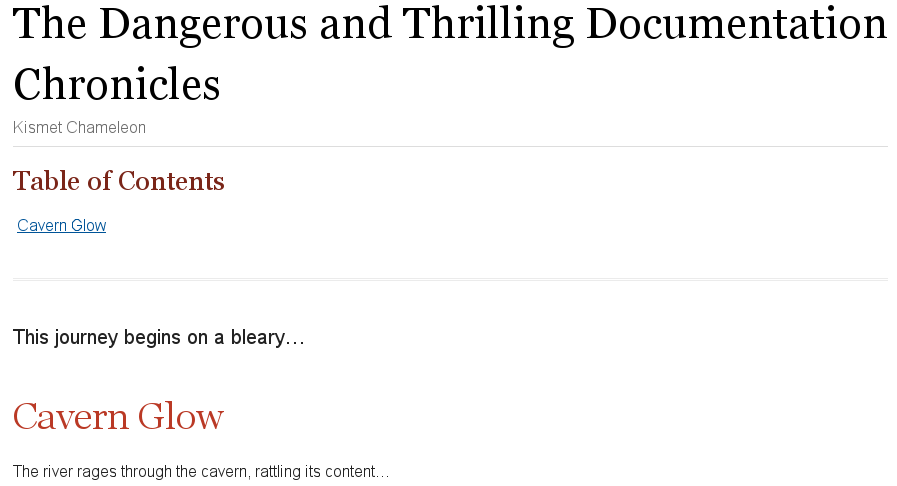
Asciidoctor allows you to customize the layout, placement, and title of the table of contents. However, not all customizations are supported by all converters. See the Table of Contents Summary to find out which customizations are available to each backend.
56.1. In-Document Placement
toc values of auto (the default), preamble, and macro place the TOC in the main document area.
When the value of toc attribute is unspecified or auto, the TOC is inserted directly below the document header (document title, author and revision lines).
When toc is set to preamble, the TOC is placed immediately below the preamble.
When using the preamble placement, the TOC will not appear if your document does not have a preamble.
To fix this problem, just set the toc attribute to an empty value (or auto).
|
To place the TOC anywhere else in the document, set the toc attribute to macro.
Then, put the toc::[] block macro at the location in the document where you want the TOC to appear.
The toc::[] macro should appear at most once in any document.
If toc is not set to macro, any toc::[] macros will silently be ignored.
toc::[] macro= The Dangerous and Thrilling Documentation Chronicles Kismet Chameleon :toc: macro (1) This journey begins on a bleary... == Cavern Glow toc::[] (2) The river rages through the cavern, rattling its content...
| 1 | The toc attribute must be set to macro in order to enable the use of the toc::[] macro. |
| 2 | In this example, the toc::[] macro is placed below the first section’s title, indicating that this is the location where the TOC will be displayed once the document is rendered. |
toc::[] macro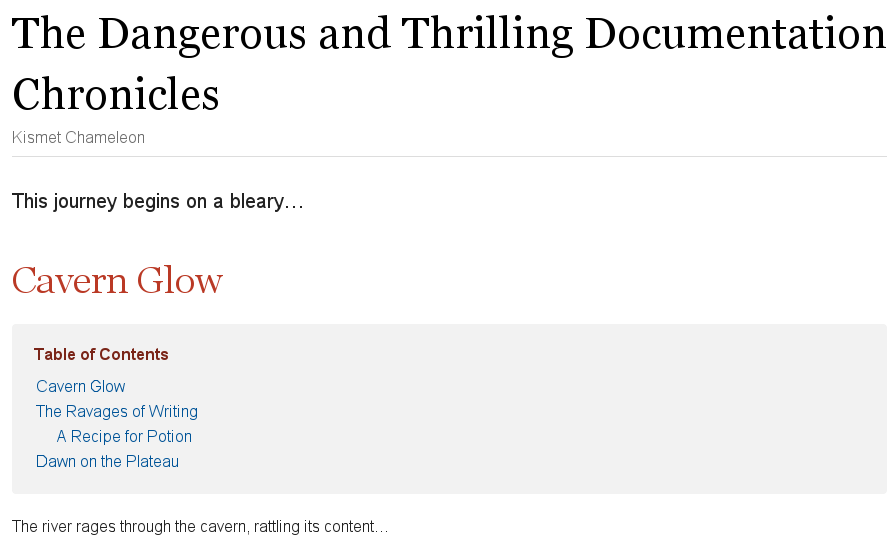
56.2. Side Column Placement
When converting to HTML, the TOC can be positioned in a column to the left or right of the main content by assigning the left or right value to the toc attribute.
This positioning is achieved using CSS (so it depends on support from the stylesheet).
The column is scrollable and fixed.
toc= The Dangerous and Thrilling Documentation Chronicles Kismet Chameleon :toc: left This journey begins on a bleary... == Cavern Glow The river rages through the cavern, rattling its content... == The Ravages of Writing Her finger socks had been vaporized by crystalline nuggets of... === A Recipe for Potion Two fresh Burdockian leaves, harvested by the light of the teal moons... ==== Searching for Burdockian Crawling through the twisted understory...
toc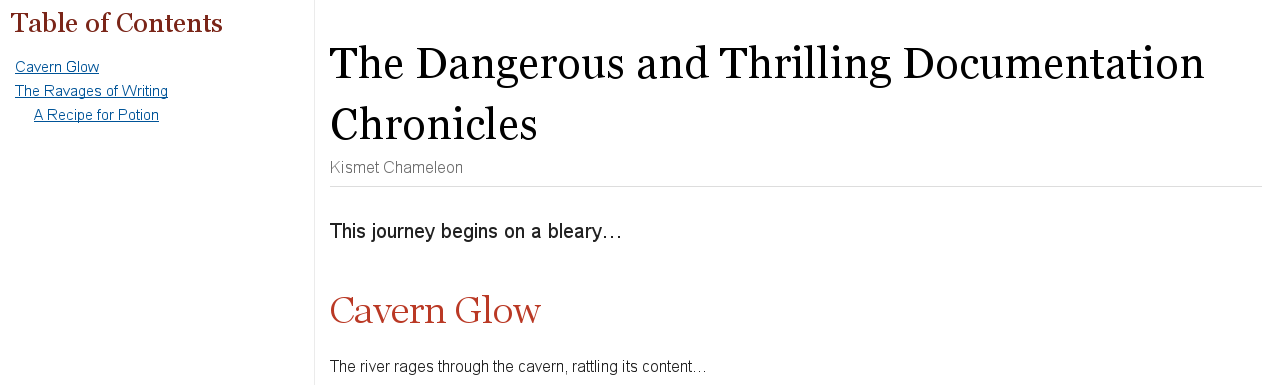
56.3. Title
The toc-title attribute allows you to change the title of the TOC.
= The Dangerous and Thrilling Documentation Chronicles Kismet Chameleon :toc: (1) :toc-title: Table of Adventures (2) This journey begins on a bleary... == Cavern Glow The river rages through the cavern, rattling its content...
| 1 | The toc attribute must be set in order to use toc-title. |
| 2 | toc-title is set and assigned the value Table of Adventures in the document’s header. |
56.4. Levels
By default, the TOC will display level 1 and level 2 section titles.
You can set a different depth with the toclevels attribute.
= The Dangerous and Thrilling Documentation Chronicles Kismet Chameleon :toc: (1) :toclevels: 4 (2) This journey begins on a bleary... == Cavern Glow The river rages through the cavern, rattling its content... == The Ravages of Writing Her finger socks had been vaporized by crystalline nuggets of... === A Recipe for Potion Two fresh Burdockian leaves, harvested by the light of the teal moons... ==== Searching for Burdockian Crawling through the twisted understory...
| 1 | The toc attribute must be set in order to use toclevels. |
| 2 | toclevels is set and assigned the value 4 in the document’s header.
The TOC will list the titles of the section 1, 2, 3, and 4 levels when the document is rendered. |
56.5. Using a TOC with Embeddable HTML
When AsciiDoc is converted to embeddable HTML (i.e., the header_footer option is false), there are only three valid values for the toc attribute:
-
auto (or unspecified value)
-
preamble
-
macro
All of the following environments convert AsciiDoc to embeddable HTML:
-
the file viewer on GitHub and GitLab
-
the AsciiDoc preview in an editor like Atom, Brackets or AsciidocFX
-
the Asciidoctor browser extensions
| The side column placement (left or right) isn’t available in this mode. That’s because the embeddable HTML doesn’t have the outer framing (or the CSS) necessary to support a side column TOC. |
56.6. Table of Contents Summary
| Attribute | Values | Example Syntax | Comments | Backends |
|---|---|---|---|---|
|
auto, left, right, macro, preamble |
|
Not set by default.
Defaults to |
html |
|
|
Not set by default.
Defaults to |
html (embeddable) |
|
|
|
Not set by default. The table of contents is placed after the title page (See issue #233 for developments). |
||
|
|
Not set by default. The placement and styling of the table of contents is determined by the DocBook toolchain configuration. |
docbook |
|
|
1–5 |
|
Default value is |
html, pdf |
|
<text> |
|
Default value is Table of Contents. |
html, pdf |
57. Abstract
An abstract is a concise overview of an article or of a chapter in a book. They are frequently found in the frontmatter of academic, research, and analytical papers. A complete (i.e., informative) abstract states the key topics and findings while a limited (i.e., descriptive) abstract briefly describes the structure of the content.
The abstract may be written using a section, open block, or paragraph and must bear the abstract style. If used, the abstract must appear before the first section of an article (at the start of the preamble) or at the start of a chapter in a book. An abstract may not be used before a part or chapter in a book.
Here’s an example of an abstract at the beginning of an article, defined using a section:
= Article Title [abstract] == Abstract Documentation is a distillation of many long, squiggly adventures. == First Section
Here’s an example of the same abstract defined using a paragraph:
= Article Title [abstract] .Abstract Documentation is a distillation of many long, squiggly adventures. == First Section
In the book doctype, the abstract section must be a level below the chapter.
== Chapter Title [abstract] === Chapter Abstract Documentation is a distillation of many long, squiggly adventures. === First Section
An abstract defined using an open block or paragraph does not require a title and does not depend on a subsequent section to terminate.
= Article Title [abstract] .Optional Abstract Title -- This article will take you on a wonderful adventure of knowledge. You'll start with the basics. Beyond that, where you go is up to you. -- Your journey begins here.
| To include a quote at the beginning of a chapter in a book, wrap the quote block inside an abstract block. |
58. Preface
The preface is a special section of a book that precedes the first part or chapter of the book (or the first chapter of a part). The preface can contain subsections.
An author explains how the idea behind her book manifested and developed in the preface. The preface can include acknowledgments and may be signed by the author with her name, writing date and location.
For multi-part books, the preface must be defined as a level-0 section and any subsections must start at level 2.
= Book Title :doctype: book [preface] = Documentation Preface The basis for this documentation germinated when I awoke one morning and was confronted by the dark and stormy eyes of the chinchilla. She had conquered the mountain of government reports that, over the course of six months, had eroded into several minor foothills and a creeping alluvial plain of loose papers. === Acknowledgments in Preface I'd like to thank the Big Bang and String Theory. Would we be without them? = Part 1 ...
For books without parts, the preface must be defined as a level-1 section and any subsections must start at level 2.
= Book Title :doctype: book [preface] == Documentation Preface The basis for this documentation germinated when I awoke one morning and was confronted by the dark and stormy eyes of the chinchilla. She had conquered the mountain of government reports that, over the course of six months, had eroded into several minor foothills and a creeping alluvial plain of loose papers. === Acknowledgments in Preface I'd like to thank the Big Bang and String Theory. Would we be without them? == Chapter 1 ...
The same structure can be used to define a preface for a part.
As an alternative to a special section, Asciidoctor will automatically promote the preamble to a preface.
The title of the preface is set using the preface-title document attribute.
When defined this way, the preface may not contain subsections.
= Book Title :doctype: book :preface-title: Documentation Preface The basis for this documentation germinated when I awoke one morning and was confronted by the dark and stormy eyes of the chinchilla. She had conquered the mountain of government reports that, over the course of six months, had eroded into several minor foothills and a creeping alluvial plain of loose papers. == Chapter 1 ...
The special section is the preferred way of defining a preface.
59. Dedication
The dedication page is where the author expresses gratitude toward a person.
[dedication] = Dedication For S.S.T.-- thank you for the plague of archetypes.
60. Book Parts and Chapters
You may group the sections of your document into parts when you set the doctype to book.
In fact, parts can only be used when the doctype is book.
When a document has its doctype set to book and contains at least one part, it implicitly becomes a multi-part book.
There is no dedicated doctype value for a multi-part book to distinguish it from a regular book.
That distinction is made by the content.
Part titles are specified with a single equals sign (=), the equivalent to the structure of a document title (i.e., level-0 section).
Each part must contain at least one section (a chapter or special section).
Immediately after the part title, you may insert an optional introduction, which is designated by the partintro style.
[partintro] .Optional part introduction title -- Optional part introduction goes here. --
A part can also include its own preface, bibliography, glossary and index.
= Title of Part 1 [partintro] -- This is the introduction to the first part of our mud-encrusted journey. -- == Chapter 1 There was mud... == Chapter 2 Great gobs of mud... [glossary] == Part 1 Glossary [glossary] mud:: wet, cold dirt = Part 2 [preface] == Part 2 Preface This part was written because... == Chapter 1 The mud had turned to cement...
When using the PDF converter (i.e., Asciidoctor PDF), the value of the chapter-label attribute (followed by a space) is automatically added to the beginning of the chapter title.
A chapter title is a level-1 section title when the doctype is book.
You can modify this prefix by redefining the chapter-label attribute.
:chapter-label: Chapter ~
To use no prefix, set the value to blank.
61. Appendix
You can indicate that a section, part, or chapter is an appendix by adding an [appendix] line above the section title.
[appendix]
== Copyright and LicenseWhile the AsciiDoc structure allows appendices to be placed anywhere, it’s customary to place them at the end of the document, after all other sections.
Sections marked as appendix have a different title, which is built as follows:
-
A fixed prefix (taken from the value of the
appendix-captionattribute, which defaults to “Appendix”) -
A letter that represents the number of this appendix within the sequence of appendices (A, B, C, …)
-
A colon
-
The original section title
For example:
Appendix A: Copyright and License
The prefix can be modified by defining the appendix-caption attribute.
This value can be changed using:
:appendix-caption: AppxOr it can be unset using:
:appendix-caption!:Appendices can have subsections. However, there are some rules to follow depending on which type of document you are creating.
For articles, the appendix must be defined as a level-1 section. (If a level-0 section is used, a level-1 section is implied). For example:
= Article Title
:appendix-caption: Appx
:sectnums:
:toc:
== First Section
=== Subsection
[appendix]
== First Appendix
=== First Subsection
=== Second Subsection
[appendix]
== Second AppendixThe table of contents will appear as follows:
1. First Section
1.1. Subsection
Appx A: First Appendix
1.1. First Subsection
1.2. Second Subsection
Appx B: Second AppendixFor books, the appendix must be defined as a level-1 section if you want the appendix to be a adjacent to other chapters (and in the current part if the book has multiple parts). In a multi-part book, if you want the appendix to be adjacent to other parts, the appendix must be defined as a level-0 section. In either case, the first subsection of the appendix must be a level-3 section, not a level-2 section. That’s because an appendix cannot contain chapters.
The following example shows how to define an appendix for a multi-book (take away the part title if you’re creating a simple book):
= Book Title
:doctype: book
:appendix-caption: Appx
:sectnums:
:toc:
= First Part
== First Chapter
=== Subsection
[appendix]
= First Appendix
=== First Subsection
=== Second Subsection
[appendix]
= Second AppendixThe table of contents will appear as follows:
First Part
1. First Chapter
1.1. Subsection
Appx A: First Appendix
1.1. First Subsection
1.2. Second Subsection
Appx B: Second Appendix62. Glossary
You can include a glossary of definitions by including the [glossary] marker before the section header and before the first definition.
[glossary] == Glossary [glossary] mud:: wet, cold dirt rain:: water falling from the sky
63. Bibliography
_The Pragmatic Programmer_ <<prag>> should be required reading for all developers. [bibliography] - [[[prag]]] Andy Hunt & Dave Thomas. The Pragmatic Programmer: From Journeyman to Master. Addison-Wesley. 1999. - [[[seam]]] Dan Allen. Seam in Action. Manning Publications. 2008.
The Pragmatic Programmer [prag] should be required reading for all developers.
64. Index
You can define index terms in AsciiDoc content. Index terms form a controlled vocabulary that can be used to navigate the document by keyword.
There are two types of index terms in AsciiDoc:
- flow index term
-
indexterm2:[<primary>]or((<primary>))An index term that appears in both the text flow and the index. This type of index term can only be used to define a primary entry.
- concealed index term
-
indexterm:[<primary>, <secondary>, <tertiary>]or(((<primary>, <secondary>, <tertiary>)))A group of index terms that appear only in the index. This type of index term can be used to define a primary entry as well as optional secondary and tertiary entries.
Here’s an example that shows the two forms in use.
The Lady of the Lake, her arm clad in the purest shimmering samite, held aloft Excalibur from the bosom of the water, signifying by divine providence that I, ((Arthur)), (1) was to carry Excalibur (((Sword, Broadsword, Excalibur))). (2) That is why I am your king. Shut up! Will you shut up?! Burn her anyway! I'm not a witch. Look, my liege! We found them. indexterm2:[Lancelot] was one of the Knights of the Round Table. (3) indexterm:[knight, Knight of the Round Table, Lancelot] (4)
| 1 | The double parenthesis form adds a primary index term and includes the term in the generated output. |
| 2 | The triple parenthesis form allows for an optional second and third index term and does not include the terms in the generated output (i.e., concealed index term). |
| 3 | The inline macro indexterm2:[primary] is equivalent to the double parenthesis form. |
| 4 | The inline macro indexterm:[primary, secondary, tertiary] is equivalent to the triple parenthesis form. |
If you’re defining a concealed index term (i.e., the indexterm macro), and one of the terms contains a comma, you must surround that segment in double quotes so the comma is treated as content.
For example:
I, King Arthur. indexterm:[knight, "Arthur, King"]
or
I, King Arthur. (((knight, "Arthur, King")))
Asciidoctor does not currently generate the index when using the built-in HTML5 converter (a limitation that was inherited by the design of AsciiDoc Python).
To generate an index in the interim, you have to either write a custom extension or produce HTML5 by way of DocBook using the DocBook toolchain (a2x or fopub).
We’re tracking support for native index generation when using the built-in HTML5 converter in issue #450.
|
65. Footnotes
A footnote is created with the footnote macro (footnote:[]).
If you plan to reference a footnote more than once, use the ID footnoteref macro (footnoteref:[]).
The hail-and-rainbow protocol can be initiated at five levels: double, tertiary, supernumerary, supermassive, and apocalyptic party.footnote:[The double hail-and-rainbow level makes my toes tingle.] (1) (2)
A bold statement.footnoteref:[disclaimer,Opinions are my own.] (3) (4)
Another outrageous statement.footnoteref:[disclaimer] (5)| 1 | Insert the footnote macro directly after any punctuation. Note that the footnote macro only uses one colon. |
| 2 | Insert the footnote’s content within the square brackets of the macro. The text may span several lines. |
| 3 | The first time you enter a footnote you want to reuse, give it a unique ID in the first position. |
| 4 | Separate the ID from the footnote text with a comma. Do not enter a space between the comma and the footnote text. |
| 5 | The next time you reference the footnote you only need to insert the ID in the square brackets. |
When rendered, the footnotes will be numbered consecutively throughout the article.
Processing Your Content
While the AsciiDoc syntax is designed to be readable in raw form, the intended audience for that format are writers and editors. Readers aren’t going to appreciate the raw text nearly as much. Aesthetics matter. You’ll want to apply nice typography with font sizes that adhere to the golden ratio, colors, icons and images to give it the respect it deserves. That’s where the Asciidoctor themes and backends come into play.
66. Selecting an Output Format
The Asciidoctor processor is typically used to parse an AsciiDoc document and convert it to a variety of formats, including HTML, DocBook and PDF. This section describes how to specify the output format.
The processor generates the output format using a converter, which is mapped to the name of a backend.
You specify the backend—and therefore the converter—using the -b (--backend) command line option or backend API option.
If no backend is specified, the processor uses the converter for the default backend (html5).
Asciidoctor provides several built-in converters, which are mapped to the following backend names:
- html (or html5)
-
HTML 5, styled with CSS3 (default).
- xhtml (or xhtml5)
-
The XHTML variant of the output from
html5. - docbook (or docbook5)
-
DocBook 5.0 XML.0.
- docbook45
-
DocBook 4.5 XML.
- manpage
-
Manual pages for Unix and Unix-like operating systems.
Asciidoctor also has several add-on converters, which can be plugged in by adding the appropriate library to the runtime path (e.g., -r asciidoctor-pdf).
These converters are mapped to the following backend names:
-
PDF, a portable document format. Requires the asciidoctor-pdf gem.
- epub3
-
EPUB3, a distribution and interchange format standard for digital publications and documents. Requires the asciidoctor-epub3 gem.
- latex
-
LaTeX, a document preparation system for high-quality typesetting. Requires the asciidoctor-latex gem.
- mallard
-
Mallard 1.0 XML. Requires the asciidoctor-mallard gem (not yet released).
There are also converters available for HTML5 presentation systems such as Bespoke.js, reveal.js and deck.js. Those converters are still in development and will be documented once releases become available.
67. HTML
Asciidoctor’s default output format is HTML.
html5-
HTML 5 markup styled with CSS3.
67.1. Using the Command Line
In this section, we’ll create a sample document, then process and render it with Asciidoctor’s html5 converter.
-
Create an AsciiDoc file like the one below
-
Save the file as
mysample.adoc
= My First Experience with the Dangers of Documentation In my world, we don't have to worry about mutant, script-injecting warlocks. No. We have something far worse. We're plagued by Wolpertingers. == Origins You may not be familiar with these http://en.wikipedia.org/wiki/Wolpertinger[ravenous beasts], but, trust me, they'll eat your shorts and suck the loops from your code.
To convert mysample.adoc to HTML from the command line:
-
Open a console
-
Switch to the directory that contains the mysample.adoc document
-
Call the Asciidoctor processor with the
asciidoctorcommand, followed by the name of the document you want to render
$ asciidoctor mysample.adoc
Remember, Asciidoctor’s default converter is html5, so it isn’t necessary to specify it with the -b command.
You won’t see any messages printed to the console.
If you type ls or view the directory in a file manager, there is a new file named mysample.html.
$ ls mysample.adoc mysample.html
Asciidoctor derives the name of the output document from the name of the input document.
Open mysample.html in your web browser.
Your document should look like the image below.
The document’s text, titles, and link is styled by the default Asciidoctor stylesheet, which is embedded in the HTML output. As a result, you could save mysample.html to any computer and it will look the same.
67.2. Using the Ruby API
Asciidoctor also includes a Ruby API that lets you generate an HTML document directly from a Ruby application.
require 'asciidoctor'
Asciidoctor.convert_file 'mysample.adoc'Alternatively, you can capture the HTML output in a variable instead of writing it to a file.
html = Asciidoctor.convert_file 'mysample.adoc', to_file: false, header_footer: true
puts htmlThe convert methods also accept a map of options. Use of this map is described in Ruby API Options.
67.3. Styling the HTML with CSS
Asciidoctor uses CSS for HTML document styling and JavaScript for generating document attributes such as a table of contents and footnotes.
It comes bundled with a fresh, modern stylesheet, named asciidoctor.css.
When you generate a document with the html5 backend, the asciidoctor.css stylesheet is embedded into the HTML output by default (when the safe mode is less than SECURE).
You have the option of linking to the stylesheet instead of embedding it. This is the mandatory behavior when the safe mode is SECURE. If your stylesheet is being linked instead of embedded, adjust the safe mode.
To have your document link to the stylesheet, set the linkcss attribute in the document’s header.
= My First Experience with the Dangers of Documentation :linkcss: In my world, we don't have to worry about mutant, script-injecting warlocks. No. We have something far worse. We're plagued by Wolpertingers. == Origins You may not be familiar with these http://en.wikipedia.org/wiki/Wolpertinger[ravenous beasts], but, trust me, they'll eat your shorts and suck the loops from your code.
You can also set linkcss with the CLI.
$ asciidoctor -a linkcss mysample.adoc
Now, when you view the directory, you should see the file asciidoctor.css in addition to mysample.adoc and mysample.html.
The linkcss attribute automatically copies asciidoctor.css to the output directory.
Additionally, you can inspect mysample.html in your browser and see <link rel="stylesheet" href="./asciidoctor.css"> inside the <head> tags.

If you don’t want any styles applied to the HTML output of your document, unset the stylesheet attribute.
$ asciidoctor -a stylesheet! mysample.adoc
One of Asciidoctor’s strengths is the ease in which you can swap the default stylesheet for an alternative Asciidoctor theme or use your own custom stylesheet.
67.4. Managing Images
Images are not embedded in the HTML output by default. If you have image references in your document, you’ll have to save the image files in the same directory as your rendered document.
As an alternative, you can embed the images directly into the document by setting the data-uri document attribute.
$ asciidoctor -a data-uri mysample.adoc
= My First Experience with the Dangers of Documentation :imagesdir: myimages :data-uri: In my world, we don't have to worry about mutant, script-injecting warlocks. No. We have something far worse. We're plagued by Wolpertingers. == Origins [.left.text-center] image::wolpertinger.jpg[Wolpertinger] You may not be familiar with these http://en.wikipedia.org/wiki/Wolpertinger[ravenous beasts], but, trust me, they'll eat your shorts and suck the loops from your code.
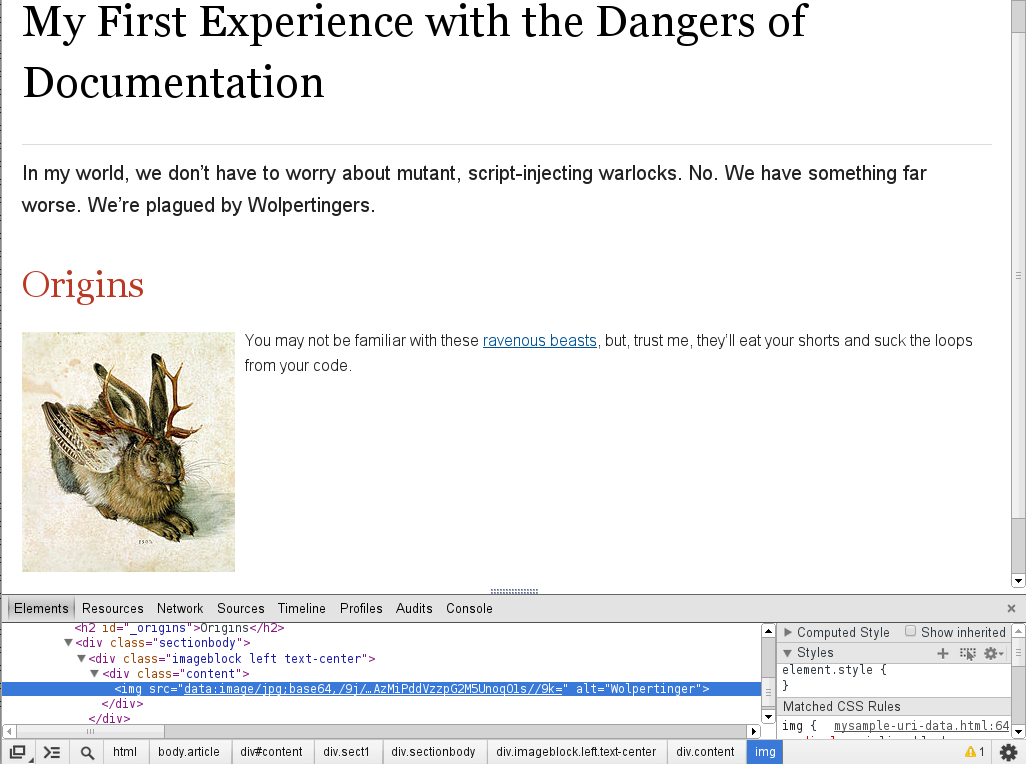
If the target of one or more images in the document is a URI, you must also set the allow-uri-read attribute securely and run Asciidoctor in SECURE mode or less.
$ asciidoctor -a data-uri -a allow-uri-read mysample.adoc
The same is true when converting the document to PDF using Asciidoctor PDF, even if the allow-uri-read attribute is not set (since the behavior is implied).
67.5. CodeRay and Pygments Stylesheets
Asciidoctor will also embed the theme stylesheet for the CodeRay or Pygments syntax highlighter.
If the source-highlighter attribute is coderay and the coderay-css attribute is class, the CodeRay stylesheet is:
-
embedded by default
-
copied to the file asciidoctor-coderay.css inside the
stylesdirfolder within the output directory iflinkcssis set
If the source-highlighter attribute is pygments and the pygments-css attribute is class, the Pygments stylesheet is:
-
embedded by default
-
copied to the file asciidoctor-pygments.css inside the
stylesdirfolder within the output directory iflinkcssis set
68. XHTML
To convert AsciiDoc to XHTML, set the backend to xhtml5.
asciidoctor -b xhtml5 document.adocYou can also set the backend using the backend attribute in the document header and assigning it the xhtml5 value.
To emit XHTML when using the deck.js templates, set both the backend and the htmlsyntax attribute:
asciidoctor -T /path/to/asciidoctor-backends -b deckjs -a htmlsyntax=html deck.adoc69. DocBook
Asciidoctor can produce DocBook 5.0 and 4.5 output. Since the AsciiDoc syntax was designed with DocBook output in mind, the conversion is very good. There’s a corresponding DocBook element for each markup in the AsciiDoc syntax.
To convert the mysample.adoc document to DocBook 5.0 format, call the processor with the backend flag set to docbook.
$ asciidoctor -b docbook mysample.adoc
A new XML document, named mysample.xml, will now be present in the current directory.
$ ls mysample.adoc mysample.html mysample.xml
Here’s a snippet of the XML generated by the DocBook converter.
<?xml version="1.0" encoding="UTF-8"?>
<article xmlns="http://docbook.org/ns/docbook"
xmlns:xl="http://www.w3.org/1999/xlink" version="5.0" xml:lang="en">
<info>
<title>Hello, AsciiDoc!</title>
<date>2013-09-03</date>
<author>
<personname>
<firstname>Doc</firstname>
<surname>Writer</surname>
</personname>
<email>doc@example.com</email>
</author>
<authorinitials>DW</authorinitials>
</info>
<simpara>
An introduction to <link xl:href="http://asciidoc.org">AsciiDoc</link>.
</simpara>
<section xml:id="_first_section">
<title>First Section</title>
<itemizedlist>
<listitem>
<simpara>item 1</simpara>
</listitem>
<listitem>
<simpara>item 2</simpara>
</listitem>
</itemizedlist>
</section>
</article>|
By default, the |
If you’re on Linux, you can view the DocBook file with Yelp.
$ yelp mysample.xml
And of course, if you’re using the Asciidoctor Ruby API, you can generate a DocBook document directly from your application.
Asciidoctor.convert_file 'mysample.adoc', backend: 'docbook'By default, the docbook converter produces DocBook 5.0 output that is compliant to the DocBook 5.0 specification.
A summary of the differences are as follows:
-
XSD declarations are used on the document root instead of a DTD
-
<info>elements for document info instead of<articleinfo>and<bookinfo> -
elements that hold the author’s name are wrapped in a
<personname>element -
the id for an element is defined using an
xml:idattribute -
<link>is used for links instead of<ulink> -
the URL for a link is defined using the
xl:hrefattribute
Refer to What’s new in DocBook v5.0? for more details about how DocBook 5.0 differs from DocBook 4.5.
If you need to output DocBook 4.5, set the backend to docbook45.
$ asciidoctor -b docbook45 mysample.adoc
70. Man Pages
One of the more specialized uses of AsciiDoc is to serve as a shorthand for generating man pages (short for manual pages) for Unix and Unix-like operating systems.
A man page is coded in the roff typesetting language.
By adhering to a specific structure in the man page file, the man command can parse the content and present a formatted document in a textual (command line) pager.
Manual pages provide a unified help catalog for all commands in the system.
For a full description, see the roff man page (or type man roff or man 7 man).
Asciidoctor can produce roff-formatted man pages if the structure of the AsciiDoc document follows certain rules (described later in this section).
To produce a roff-formatted man page from an AsciiDoc file, run:
$ asciidoctor -d manpage -b manpage source.adoc
Note that the manpage converter sets the output file name to progname.1, where progname is the name of the command and 1 is the volume number, as defined in the source document.
Asciidoctor can also produce HTML and PDF versions similar to the man output for viewing in other contexts.
To see the man page in HTML instead, run:
$ asciidoctor -d manpage source.adoc
Here is a man page for the command eve written in AsciiDoc:
= eve(1)
Andrew Stanton
v1.0.0
:manmanual: EVE
:mansource: EVE
:man-linkstyle: pass:[blue R < >]
== NAME
eve - analyzes an image to determine if it's a picture of a life form
== SYNOPSIS
*eve* ['OPTION']... 'FILE'...
== OPTIONS
*-o, --out-file*=_OUT_FILE_::
Write result to file _OUT_FILE_.
*-c, --capture*::
Capture specimen if it's a picture of a life form.
== EXIT STATUS
*0*::
Success.
Image is a picture of a life form.
*1*::
Failure.
Image is not a picture of a life form.
== RESOURCES
*Project web site:* http://eve.example.org
== COPYING
Copyright \(C) 2008 {author}. +
Free use of this software is granted under the terms of the MIT License.The AsciiDoc document has the following required parts:
- Document Header
-
A manpage document header is mandatory. The title line contains the man page name followed immediately by the manual section number in round brackets. The title name should not contain white space. The manual section number is a single digit optionally followed by a single character.
- The NAME Section
-
The first manpage section is mandatory, must be titled “NAME” and must contain a single paragraph (usually a single line) consisting of a list of one or more comma separated command name(s) separated from the command purpose by a dash character. The dash must have at least one white space character on either side.
- The SYNOPSIS Section
-
The second manpage section is mandatory and must be titled “SYNOPSIS”.
Subsequent sections are optional, but typical sections include “SEE ALSO”, “BUGS REPORTS”, “AUTHORS” and “COPYRIGHT”.
There are several built-in document attributes that affect only manpages. If used, they must be set in the document header.
| Attribute name | Description | Value (as parsed from example above) |
|---|---|---|
mantitle |
Alternative way to set the man page name. |
ASCIIDOCTOR(1) |
manvolnum |
Manual section number. |
1 |
manname |
Alternative way to set the command name. |
asciidoctor |
manpurpose |
Alternative way to set the command purpose. |
converts AsciiDoc source files |
man-linkstyle |
Style the links in the manpage output. A valid link format sequence. |
blue R <> |
mansource |
The source to which the manpage pertains. When producing DocBook, it becomes a DocBook refmiscinfo attribute and appears in the footer. |
Asciidoctor |
manversion |
The version of the man page. Defaults to revnumber if not specified. When producing DocBook, it becomes a DocBook refmiscinfo attribute and appears in the footer. Not used by Asciidoctor. |
1.5.4 |
manmanual |
Manual name. When producing DocBook, it becomes a DocBook refmiscinfo attribute and appears in the footer. |
Asciidoctor Manual |
Refer to the AsciiDoc source of the Asciidoctor man page to see a complete example. The man page for Asciidoctor is produced using the built-in manpage converter in Asciidoctor. The man pages for git are also produced from AsciiDoc documents, so you can use those as another example to follow.
71. PDFs
Conversion from AsciiDoc to PDF is made possible by a number of tools.
- Asciidoctor PDF
-
A native PDF converter for Asciidoctor (converts directly from AsciiDoc to PDF using Prawn).
Instructions for installing and using Asciidoctor PDF are documented in the project’s README. The tool provides built-in theming via a YAML configuration file, which is documented in the theming guide.
Asciidoctor PDF is the preferred tool for converting to PDF and is fully supported by the Asciidoctor community. - a2x
-
A DocBook toolchain frontend provided by that AsciiDoc Python project.
To use this tool, you should first convert to DocBook using Asciidoctor, then convert the DocBook to PDF using a2x. a2x accepts a DocBook file as input and can convert it to a PDF using either Apache FOP or dblatex. Instructions for using a2x are documented in the project’s man page.
- asciidoctor-fopub
-
A DocBook toolchain frontend similar to a2x, but which only requires Java to be installed on your machine.
Instructions for using asciidoctor-fopub are documented in the project’s README. To alter the look and feel of the PDF, it’s necessary to pass XSL parameters or modify the XSLT. More information about customization can be found in DocBook XSL: The Complete Guide.
72. Preview Your Content
|
Discuss and Contribute
Use Issue 449 to drive development of this section. Your contributions make a difference. No contribution is too small.
|
73. Process Multiple Source Files from the CLI
You can pass multiple source files (or a file name pattern) to the Asciidoctor CLI and it will process all the files in turn.
Let’s assume there are two AsciiDoc files in your directory, a.adoc and b.adoc. When you enter the following command in your terminal:
$ asciidoctor a.adoc b.adoc
Asciidoctor will process both files, transforming a.adoc to a.html and b.adoc to b.html.
To save you some typing, you can use the glob operator (*) to match both files using a single argument:
$ asciidoctor *.adoc
The shell will expand the previous command to the one you typed earlier:
$ asciidoctor a.adoc b.adoc
You can also render all the AsciiDoc files in immediate subfolders using the double glob operator (**) in place of the directory name:
$ asciidoctor **/*.adoc
To match all files in the current directory and immediate subfolders, use both glob patterns:
$ asciidoctor *.adoc **/*.adoc
If the file name argument is quoted, the shell will not expand it:
$ asciidoctor '*.adoc'
This time, the text *.adoc gets passed directly to Asciidoctor instead of being expanded to a.adoc and b.adoc.
In this case, Asciidoctor handles the glob matching internally in the same way the shell does (when the file name is not in quotes)--with one exception.
Asciidoctor can match files in the current directory and subfolders at any depth using a single glob pattern:
$ asciidoctor '**/*.adoc'
- TIP
-
If you process multiple nested AsciiDoc files at once and are also applying a custom stylesheet to them, you’ll need to manage the stylesheet’s location.
74. Specifying an Output File
Using the - flag, you can pipe content to the asciidoctor command.
This flag tells Asciidoctor read the source from standard input (STDIN).
For example:
$ echo 'content' | asciidoctor -
| Any variation of STDIN will work. |
This command is effectively the same as:
$ echo 'content' | asciidoctor -o - -
When reading source from STDIN, Asciidoctor doesn’t have a reference to an input file. Therefore, it sends the converted text to standard output (STDOUT) by default.
If, instead, you want to write the full document to an output file, you specify it using the -o flag.
For example, the following command writes a standalone HTML document to output.html instead of STDOUT:
$ echo "content" | asciidoctor -o output.html -
When piping source from STDIN to STDOUT through the asciidoctor command, you often just want the converted body (i.e., embeddable HTML).
To produce that variant, add the -s flag:
$ echo 'content' | asciidoctor -s -
Or perhaps you want to include the doctitle as well:
$ echo -e '= Document Title\n\ncontent' | asciidoctor -s -a showtitle -
75. Running Asciidoctor Securely
Asciidoctor provides security levels that control the read and write access of attributes, the include directive, macros, and scripts while a document is processing. Each level includes the restrictions enabled in the prior security level.
| UNSAFE |
A safe mode level that disables any security features enforced by Asciidoctor. Ruby is still subject to its own restrictions. This is the default safe mode for the CLI. Its integer value is 0. |
| SAFE |
This safe mode level prevents access to files which reside outside of the parent directory of the source file. The include directive is enabled, but paths to include files must be within the parent directory. This mode allows assets (such as the stylesheet) to be embedded in the document. Its integer value is 1. |
| SERVER |
A safe mode level that disallows the document from setting attributes that would affect the rendering of the document. This level trims docfile to its relative path and prevents the document from:
It allows icons and linkcss. Its integer value is 10. |
| SECURE |
A safe mode level that disallows the document from attempting to read files from the file system and including their contents into the document. Additionally, it:
Asciidoctor extensions may still embed content into the document depending whether they honor the safe mode setting. This is the default safe mode for the API. Its integer value is 20. |
You can set Asciidoctor’s safe mode level using the CLI or API.
75.1. Set the Safe Mode in the CLI
When Asciidoctor is invoked via the CLI, the safe mode is set to UNSAFE by default.
You can change the safe level by executing one of the following commands in the CLI.
-S,--safe-mode=SAFE_MODE-
Sets the safe mode level of the document according to the assigned level (
UNSAFE,SAFE,SERVER,SECURE). --safe,asciidoctor-safe-
Sets the safe mode level to
SAFE. Provided for compatibility with the python AsciiDocsafecommand.
75.2. Set the Safe Mode in the API
The default safe level in the API is SECURE.
In the API, you can set the safe mode using a string, symbol or integer value.
The value must be set in the document constructor using the :safe option.
result = Asciidoctor.convert_file('master.adoc', :safe => 'server')
or
result = Asciidoctor.convert_file('master.adoc', :safe => :server)
or
result = Asciidoctor.convert_file('master.adoc', :safe => 10)
75.3. Set Attributes Based on the Safe Mode
You can enable or disable content within your document based on safe modes using the safe-mode attribute.
The safe mode can be defined by its integer value or name.
For example, to assign the SAFE level to the attribute, you could append 10 or safe to the attribute.
safe-mode-10
or
safe-mode-safe
The attributes in the next example enable the author to define replacement text for features that are disabled in high security environments.
For example:
ifdef::safe-mode-secure[]
Links to chapters.
endif::safe-mode-secure[]Customizing Your Output
Asciidoctor provides a default stylesheet and built-in converters so you can quickly process and render your document, but it also lets you use custom stylesheets and converters. The Asciidoctor project includes alternative stylesheet themes from the stylesheet factory and specialized backends, such as the Deck.js backend. You can also create your own themes and backends.
76. Custom Themes
| Section introduction pending |
76.1. Creating a Theme
You can create your own themes to apply to your documents.
Themes go in the sass/ folder.
To create a new theme, let’s call it hipster, start by creating two new files:
- sass/hipster.scss
-
-
Imports the theme settings, which includes default variables and resets
-
Imports the AsciiDoc components
-
Defines any explicit customization
-
- sass/settings/_hipster.scss
-
-
Sets variables that customize Foundation 4 and the AsciiDoc CSS components
-
Here’s a minimal version of sass/hipster.scss:
@import "settings/hipster";
@import "components/asciidoc";
@import "components/awesome-icons";| You don’t have to include the underscore prefix when importing files. |
The awesome-icons component is only applicable to HTML generated by Asciidoctor > 0.1.2 with the icons attribute set to font.
|
You can add any explicit customization below the import lines.
The variables you can set in sass/settings/_hipster.scss are a combination of the Foundation 4 built-in global settings and global settings and imports for the AsciiDoc components.
Once you’ve created your custom theme, it’s time to apply it to your document.
76.2. Applying a Theme
A custom stylesheet can be stored in the same directory as your document or in a separate directory. And, like the default stylesheet, you can link your document to your custom stylesheet or embed it. If the stylesheet is in the same directory as your document, you can apply it when rendering your document to HTML from the CLI.
$ asciidoctor -a stylesheet=mystyles.css mysample.adoc
-
Save your custom stylesheet in the same directory as
mysample.adoc -
Call the
asciidoctorprocessor -
Set
-a(--attribute) andstylesheet -
Assign the stylesheet file’s name to the
stylesheetattribute -
Enter your document file’s name.
Alternatively, let’s set the stylesheet attribute in the header of mysample.adoc.
= My First Experience with the Dangers of Documentation :stylesheet: mystyles.css In my world, we don't have to worry about mutant, script-injecting warlocks. No. We have something far worse. We're plagued by Wolpertingers. == Origins You may not be familiar with these http://en.wikipedia.org/wiki/Wolpertinger[ravenous beasts], but, trust me, they'll eat your shorts and suck the loops from your code.
When your document and the stylesheet are stored in different directories, you need to tell Asciidoctor where to look for the stylesheet in relation to your document.
Asciidoctor uses the relative or absolute path you assign to the stylesdir attribute to find the stylesheet.
Let’s move mystyles.css into mydocuments/mystylesheets/.
Our AsciiDoc document, mysample.adoc, is saved in the mydocuments/ directory.
= My First Experience with the Dangers of Documentation :stylesdir: mystylesheets/ :stylesheet: mystyles.css In my world, we don't have to worry about mutant, script-injecting warlocks. No. We have something far worse. We're plagued by Wolpertingers. == Origins You may not be familiar with these http://en.wikipedia.org/wiki/Wolpertinger[ravenous beasts], but, trust me, they'll eat your shorts and suck the loops from your code.
After processing mysample.adoc, its HTML output (mysample.html), which includes the embedded mystyles.css stylesheet, is created in the mydocuments/ directory.
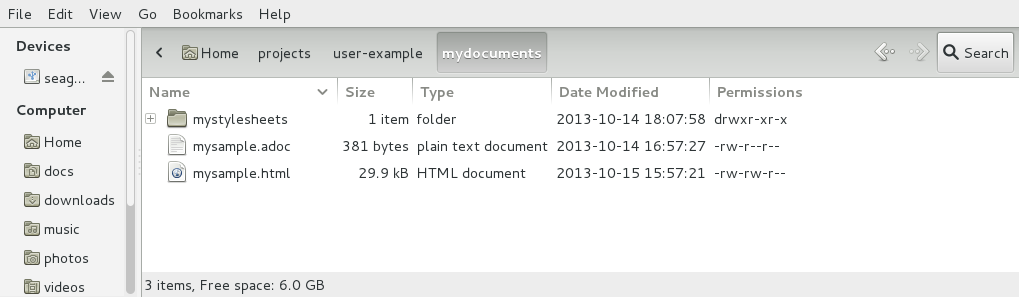
You can also set stylesdir in the CLI.
$ asciidoctor -a stylesdir=mystylesheets/ -a stylesheet=mystyles.css mysample.adoc
If you don’t want to embed the mystyles.css stylesheet into your HTML output, make sure to set linkcss.
= My First Experience with the Dangers of Documentation :stylesdir: mystylesheets/ :stylesheet: mystyles.css :linkcss: In my world, we don't have to worry about mutant, script-injecting warlocks. No. We have something far worse. We're plagued by Wolpertingers. == Origins You may not be familiar with these http://en.wikipedia.org/wiki/Wolpertinger[ravenous beasts], but, trust me, they'll eat your shorts and suck the loops from your code.
After your document is rendered, notice that a copy of mystyles.css was not created in the mydocuments/ directory.
Unlike when you link to the default Asciidoctor stylesheet, any custom stylesheets you link to are not copied to the directory where your output is saved.
77. Stylesheet Factory
The Asciidoctor stylesheet factory is where themes are developed for styling your documents. Specifically, these stylesheets can be used to quickly customize the look and feel of HTML 5 documents generated by Asciidoctor.
To view the Asciidoctor themes in action, visit the theme showcase.
| The Asciidoctor stylesheet factory is only compatible with Asciidoctor 0.1.2 and greater. |
77.1. Setting up the Factory
The stylesheets in the Asciidoctor stylesheet factory are built using Compass, a CSS authoring framework that uses Sass to generate CSS files. The styles and components are generated by Foundation 4, an awesome and flexible CSS component framework that ensures your stylesheet is cross-browser and mobile friendly.
77.1.1. Install the Gems
In order to build the stylesheets, you must download the Asciidoctor stylesheet factory repository and install the Compass and Foundation gems.
-
Download or clone the Asciidoctor stylesheet factory repository.
It does not matter where you save the project on your system. -
Make sure you have Ruby and RubyGems installed, and, ideally, Bundler.
-
Run Bundler to install the Compass and Foundation gems.
$ bundle install
The previous
bundlecommand is equivalent to the following two commands:$ gem install compass --version 0.12.2 $ gem install zurb-foundation --version 4.3.2
You don’t need to execute these
gem installcommands if you use Bundler.
Once you have the gems installed, you can build the stylesheets.
77.1.2. Build the Stylesheets
To build the stylesheets:
-
Navigate to the Asciidoctor stylesheet factory directory on your system.
-
Run Compass’s
compilecommand.$ compass compile
The stylesheets are compiled from the Sass source files in the sass/ folder and written to the stylesheets/ folder. You can reference the stylesheets in stylesheets/ from your HTML file.
77.2. Applying a Stylesheet
Let’s practice applying a stylesheet to a simple AsciiDoc file.
-
Create an AsciiDoc file like the one below.
-
Save the file as mysample.adoc.
= Introduction to AsciiDoc
Doc Writer <doc@example.com>
A preface about http://asciidoc.org[AsciiDoc].
== First Section
* item 1
* item 2
[source,ruby]
puts "Hello, World!"Next, you’ll use the Asciidoctor processor to generate HTML and apply a stylesheet to it from the stylesheets/ directory.
77.3. Generate an HTML Document
Now it’s time to pick the stylesheet you want to apply to your content when it is rendered.
In your file browser, navigate to the stylesheets/ directory.
Or, using a console, change to the stylesheets/ directory and list the available stylesheets using the ls command.
$ ls
ls commandasciidoctor.css foundation-lime.css iconic.css riak.css colony.css foundation-potion.css maker.css rubygems.css foundation.css golo.css readthedocs.css
Let’s apply the colony.css stylesheet to the sample document.
-
Navigate to the directory where you saved mysample.adoc.
-
Call the
asciidoctorprocessor. -
Specify the stylesheet you want applied with the
stylesheetattribute. -
Tell the processor where the specified stylesheet is located with the
stylesdirattribute.$ asciidoctor -a stylesheet=colony.css -a stylesdir=../stylesheets mysample.adoc
Open a browser, navigate to mysample.html and checkout the result! If you inspect the mysample.html document, you should see that the stylesheet is embedded in the rendered document.
77.4. External Preview
You may want to preview sample HTML files on another computer or device. To do that, you need to serve them through a web server. You can quickly serve HTML files in the root directory of the project using the following command:
$ python -m SimpleHTTPServer 4242
or
$ ruby -run -e httpd . -p 4242
78. Slideshows
The conversion to HTML-based slides is handled by a custom backend. The backends usually requires that you adhere to a set of conventions to define a slide and its content. But there’s nothing in that content that restricts the document from being converted to a regular HTML page or PDF.
The first backend created was the one for deck.js. Asciidoctor has backends for generating dzslides and reveal.js presentations as well. Backends for other presentation frameworks are in the works.
78.1. Deck.js
The deck.js backend for Asciidoctor is a collection of Haml templates that transform an AsciiDoc document to HTML 5-based slides animated by deck.js.
78.1.1. Gem Requirements
The Asciidoctor deck.js backend requires the following gems:
-
asciidoctor
-
tilt
-
haml
To determine what gems are installed on your system, open a terminal window and type:
$ gem list --local
A list of installed gems will be returned.
If you’re missing the asciidoctor, tilt, or haml gems, install them from the command line with gem install.
$ gem install asciidoctor tilt haml
78.1.2. Backend and deck.js Installation
-
Download or
git clonethe Asciidoctor backends repository.$ git clone git://github.com/asciidoctor/asciidoctor-backends.git
-
Create a directory named
deck.jsinside your working directory (i.e. where your AsciiDoc document resides). -
Download and extract the deck.js archive or
git clonethe deck.js repository into thedeck.jsdirectory you created in step 2.$ git clone git://github.com/imakewebthings/deck.js.git
-
If you plan to split your slides, download the
deck.split.jsextension and copy it into thedeck.js/extensionsdirectory. -
If you want to use the fullscreen photo feature, create an
imagesdirectory in your working directory.
78.1.3. Deckjs Backend Attributes
There are a number of document attributes specific to the deckjs backend.
| Attribute | Description | Example |
|---|---|---|
:backend: deckjs |
Activates the deck.js backend to render the document as a deck.js presentation |
|
:deckjs_theme: <theme> |
Sets the deck.js theme to neon, swiss or web-2.0 |
|
:deckjs_transition: <type> |
Sets the transition style to horizontal-slide, vertical-slide or fade |
|
:customjs: <javascript location> |
Sets a custom javascript file; can be used as a deck.js custom configuration |
|
:customcss: <css location> |
Sets a custom css file |
|
:menu: |
Toggle to and from a grid layout overview of all the slides by pressing the |
|
:navigation: |
Renders clickable previous and next navigation icons on the slides |
|
:status: |
Renders the current slide number and total number of slides |
|
:split: |
Registers the split module for use in the document |
|
You can also specify a custom stylesheet using the stylesheet attribute, which customizes AsciiDoc elements like section, paragraph, images, etc.
|
The attributes described in the table above are set in the header of your document.
deckjs backend attributes= Presentation Title Presenter Name :backend: deckjs :deckjs_theme: web-2.0 :deckjs_transition: horizontal-slide :navigation:
78.1.4. Slide syntax Examples
Structuring a slideshow and writing the slide content uses the same syntax as a typical AsciiDoc document, with a few added features.
Let’s see some examples of the deckjs backend features:
= Title of Presentation (1) Presenter Name :backend: deckjs :deckjs_transition: fade :navigation: == Title of Slide One (2) This is the first slide after the title slide. [canvas-image="images/example.jpg"] (3) == Slide Two's Title will not be displayed (4) [role="canvas-caption", position="center-up"] (5) This text is displayed on top of the example.jpg image.
| 1 | The presentation title and author’s name will be displayed on the title slide. |
| 2 | Each new slide is designated by a level 1 section title (==). |
| 3 | The canvas-image attribute embeds a fullscreen image as a slide background. Position the attribute above the title of the slide you want the image applied to. |
| 4 | When the canvas-image attribute is applied to a slide, that slide’s title will not be displayed. |
| 5 | canvas-caption applies a colored box around the caption text. position specifies the location of the caption block (bottom-left, top-left, bottom-right, top-right, center-up, center-down) |
== Stepped paragraphs [options="step"] This paragraph is displayed first. [options="step"] Then this paragraph is displayed when the _Next_ arrow is clicked. == Stepped list items [options="step"] * A bullet is displayed each time the _Next_ arrow is clicked. * B * C == Stepped blocks [options="step"] ---- Block one ---- [options="step"] ---- Block two ----
The step option reveals each paragraph, bullet, etc. separately each time you click the Next arrow.
The original AsciiDoc deckjs backend for the AsciiDoc processor used the option incremental instead of step.
We’ve changed it to step in order to save you some typing.
|
= Presentation Title Presenter Name :backend: deckjs :split: (1) == This Slide is Split This Slide will act like <<< (2) three individual slides with the same title <<< once the document is rendered.
| 1 | To create multiple, consecutive slides with the same title, set the split attribute in the document header. |
| 2 | Then, within a slide, insert <<< to specify the slide breaks. |
78.1.5. Rendering
To render your presentation as HTML5, execute the command:
$ asciidoctor -T ../asciidoctor-backends/haml presentation.adoc
-
The command
-T(--template-dir) tells the Asciidoctor processor to override the built-in backends. -
Directly after
-Tis the path to where you saved or cloned the Asciidoctor backends repository containing thedeckjsbackend (step 1 under the installation section).
79. Custom Backends
|
Discuss and Contribute
Use Issue 451 to drive development of this section. Your contributions make a difference. No contribution is too small.
|
79.1. Creating a Backend
|
Discuss and Contribute
Use Issue 452 to drive development of this section. Your contributions make a difference. No contribution is too small.
|
79.1.1. Storing Multiple Templates
Custom templates can be stored in multiple directories. That means you can build on an existing backend by copying only the templates you want to modify. Then, just pass both the directory holding the original templates and the directory containing your customized templates when you invoke Asciidoctor.
In the CLI, multiple template directories are specified by using the -T option multiple times.
$ asciidoctor -T /path/to/original/templates -T /path/to/modified/templates mysample.adoc
In the API, multiple template directories are specified by passing an array to the template_dirs option:
Asciidoctor.convert_file 'mysample.adoc', safe: :safe
template_dirs: %w(/path/to/original/templates /path/to/modified/templates)80. Using Asciidoctor with Other Languages
The built-in labels, messages, and syntax keywords in Asciidoctor are English by default. However, Asciidoctor is not restricted to working with English-only content. Asciidoctor can process the full range of the UTF-8 character set. That means you can write your document in any language, save the file with UTF-8 encoding, and expect Asciidoctor to convert the text properly. Furthermore, you can customize the built-in labels (e.g., “Appendix”) to match the language in which you are writing.
There are some caveats to know about:
-
Currently, the official HTML and PDF converters only fully support left-to-right (and top-to-bottom) reading. Support for right-to-left (RTL) is being worked on. See issue #1601 for details. In the interim, you can leverage the DocBook toolchain to get right-to-left support.
-
Attributes that store dates and times (e.g.,
docdatetime) are always formated like2015-01-04 19:26:06 GMT+0000. -
Message (aka logging) strings are always in English.
-
Asciidoctor does not support the language conf files used by AsciiDoc Python. However, Asciidoctor does provide a translation file that can be used for a similar purpose.
80.1. Translating built-in labels
When converting to DocBook, you can rely on the DocBook toolchain to translate (most) built-in labels.
To activate this feature, simply set the lang attribute to a valid country code (which defaults to en for English).
For example:
$ asciidoctor -a lang=es -b docbook article.adoc
The list of supported languages, as well as additional language considerations for DocBook, are described in DocBook XSL: The Complete Guide.
The lang attribute does not enable automatic translation of built-in labels when converting directly to HTML or PDF.
It’s merely a hint to configure the DocBook toolchain.
If you’re not using the DocBook toolchain for publishing, you must translate each built-in label yourself.
One way is to set the following attributes in the document header or by passing the attributes via the API or CLI:
| Attribute name | Used for | Default |
|---|---|---|
appendix-caption |
Appendix titles. |
Appendix |
caution-caption |
CAUTION admonitions (when icons are not in use). |
Caution |
chapter-label |
Prefix added to chapter titles (i.e., level-1 section titles when doctype is book). (pdf converter only) |
Chapter |
example-caption |
Example titles. |
Example |
figure-caption |
Automatically prefixed to figure titles. |
Figure |
important-caption |
IMPORTANT admonitions (when icons are not in use). |
Important |
last-update-label |
Label for when the document was last updated. |
Last updated |
listing-caption |
The label for listing blocks.
By default, listing blocks do not have captions.
If you specify |
not set |
manname-title |
Label for the program name section in the manpage. |
NAME |
note-caption |
NOTE admonitions (when icons are not in use). |
Note |
preface-title |
Title text used for the anonymous preface (when the |
not set |
table-caption |
Automatically prefixed to table titles. |
Table |
tip-caption |
TIP admonitions (when icons are not in use). |
Tip |
toc-title |
Title of the table of contents. |
Table of Contents |
untitled-label |
The document title, for documents that have only body content. |
Untitled |
version-label |
The label preceding the revnumber in the document’s byline. |
Version |
warning-caption |
WARNING admonitions (when icons are not in use). |
Warning |
If you plan to support multiple languages, you’ll want to define the attributes for each language inside a conditional preprocessor directive. For example:
ifeval::["{lang}" == "de"]
:caution-caption: Achtung
...
endif::[]Of course, you’re probably hoping this has already been done for you. Indeed, it has!
You can find an AsciiDoc file in the Asciidoctor repository that provides translations of these attributes for most major languages. The translations are defined using AsciiDoc attribute entries inside conditional preprocessor blocks, just as suggested above.
To use this file to translate the built-in labels according the the value of the lang attribute (just like the DocBook toolchain does), follow these steps:
-
Download the AsciiDoc file attributes.adoc from the Asciidoctor repository.
-
Put the file in the folder locale relative to your document.
-
Add the following line to the header of your AsciiDoc document:
include::locale/attributes.adoc[] -
Set the language using the
langattribute. This attribute must be set before the include directive gets processed. For example:-a lang=es
The built-in labels will now be translated automatically based on the value of the lang attribute.
There’s an ongoing discussion about how to make language support even simpler (issue #1129). Input is welome.
80.2. Translation
Asciidoctor (or DocBook) currently does not support translation of content out of the box. There’s a proposal to integrate gettext (discussion), but suggestions are welcome.
Publishing Your Content
81. Repositories
|
Discuss and Contribute
Use Issue 453 to drive development of this section. Your contributions make a difference. No contribution is too small.
|
82. Static Website Generators
|
Discuss and Contribute
Use Issue 454 to drive development of this section. Your contributions make a difference. No contribution is too small.
|
82.1. Front Matter Added for Static Site Generators
Many static site generators (i.e., Jekyll, Middleman, Awestruct) rely on "front matter" added to the top of the document to determine how to render the content. Front matter typically starts on the first line of a file and is bounded by block delimiters (e.g., ---).
Here’s an example of a document that contains front matter:
--- (1) layout: default (2) --- (1) = Document Title content
| 1 | Front matter delimiters |
| 2 | Front matter data |
The static site generator removes these lines before passing the document to the AsciiDoc processor to be rendered. Outside of the tool, however, these extra lines can throw off the processor.
If the skip-front-matter attribute is set, Asciidoctor (as of 0.1.4) will recognize the front matter and consume it before parsing the document.
Asciidoctor stores the content it removes in the front-matter attribute to make it available for integrations.
Asciidoctor also removes front matter when reading include files.
| Awestruct can read front matter directly from AsciiDoc attributes defined in the document header, thus eliminating the need for this feature. |
82.1.1. Configuring Attributes for Awestruct
Awestruct defines a set of default attributes that it passes to the API in its /default-site.yml file.
One of the attributes in that configuration is imagesdir.
The value there is set to /images.
That means the value in your document is skipped due to the precedence rules.
Fortunately, there is one additional place you can override the attribute.
This gives you the opportunity to set your own default and to flip the precedence order so that the document wins out.
If an attribute value that is passed to the API ends with an @ symbol, it makes that assignment have a lower precedence than an assignment in the document.
You can define attributes you want to pass to the API in the _config/site.yml file. Here’s an example entry for Asciidoctor:
asciidoctor:
:safe: safe
:attributes:
imagesdir: /assets/images@
icons: font
...| The second-level keys (safe and attributes, in this case) must have colons on both sides of the key name. The rest of the keys only have a colon after the key. |
With this configuration added, you should observe that the imagesdir attribute in your document is now respected.
Using Asciidoctor’s API
In addition to the command line interface, Asciidoctor provides a Ruby API. The API is intended for integration with other software projects and is suitable for server-side applications, such as Rails, Sinatra and GitHub.
Asciidoctor also has a Java API that mirrors the Ruby API. The Java API calls through to the Ruby API using an embedded JRuby runtime. See the AsciidoctorJ project for more information.
83. Load and Render a File Using the API
To use Asciidoctor in your application, you first need to require the gem:
require 'asciidoctor'With that in place, you can start processing AsciiDoc documents.
To parse a file into an Asciidoctor::Document object:
doc = Asciidoctor.load_file 'mysample.adoc'You can get information about the document:
puts doc.doctitle
puts doc.attributesMore than likely, you will want to render the document. To render a file containing AsciiDoc markup to HTML 5, use:
Asciidoctor.convert_file 'mysample.adoc'The command will output to the file mysample.html in the same directory.
You can render the file to DocBook 5.0 by setting the :backend option to 'docbook':
Asciidoctor.convert_file 'mysample.adoc', backend: 'docbook'The command will output to the file mysample.xml in the same directory.
If you’re on Linux, you can view the file using Yelp.
83.1. Render Strings
To render an AsciiDoc-formatted string:
puts Asciidoctor.convert '*This* is Asciidoctor.'When rendering a string, the header and footer are excluded by default to make Asciidoctor consistent with other lightweight markup engines like Markdown.
If you want the header and footer, just enable it using the :header_footer option:
puts Asciidoctor.convert '*This* is Asciidoctor.', :header_footer => trueNow you’ll get a full HTML 5 file.
If you only want the inline markup to be processed, set the :doctype option to 'inline':
puts Asciidoctor.convert '*This* is Asciidoctor.', :doctype => 'inline'As before, you can also produce DocBook 5.0:
puts Asciidoctor.convert '*This* is Asciidoctor.', :header_footer => true,
:backend => 'docbook'When rendering a string the TOC is only included by default when using the :header_footer option as shown above.
However, you can force it to be included without the header and footer by setting the toc attribute with a value of macro and using the toc::[] macro in the string itself.
If you don’t like the output you see, you can change it. Any of it!
84. Provide Custom Templates
Asciidoctor allows you to override the converter methods used to render almost any individual AsciiDoc element. If you provide a directory of Tilt-compatible templates, named in such a way that Asciidoctor can figure out which template goes with which element, Asciidoctor will use the templates in this directory instead of its built-in templates for any elements for which it finds a matching template. It will fallback to its default templates for everything else.
puts Asciidoctor.convert '*This* is Asciidoctor.', :header_footer => true,
:template_dir => 'templates'The Document and Section templates should begin with document. and section., respectively. The file extension is used by Tilt to determine which view framework it will use to use to render the template. For instance, if you want to write the template in ERB, you’d name these two templates document.html.erb and section.html.erb. To use Haml, you’d name them document.html.haml and section.html.haml.
Templates for block elements, like a Paragraph or Sidebar, would begin with block_<style>.. For instance, to override the default Paragraph template with an ERB template, put a file named block_paragraph.html.erb in the template directory you pass to the Document constructor using the :template_dir option.
For more usage examples, see the (massive) test suite.
Extensions
Extensions have proven to be central to the success of AsciiDoc because they open up the language to new use cases. However, the way extensions are implemented in AsciiDoc Python presents a number of problems:
-
They are challenging to write because they work at such a low-level (read as: nasty regular expressions).
-
They are fragile since they often rely on system commands to do anything significant.
-
They are hard to distribute due to the lack of integration with a formal distribution system.
Asciidoctor addresses these issues by introducing a proper extension API that offers a superset of the extension points that AsciiDoc Python provides. As a result, extensions in Asciidoctor are easier to write, more powerful, and simpler to distribute.
The goal for Asciidoctor has always been to allow extensions to be written using the full power of a programming language (whether it be Ruby, Java, Groovy or JavaScript), similar to what we’ve done with the backend (conversion) mechanism. That way, you don’t have to shave yaks to get the functionality you want, and you can distribute the extension using defacto-standard packaging mechanisms like RubyGems or JARs.
| The extension API in Asciidoctor is stable with the exception of inline macros. Since inline content is not parsed until the convert phase, the inline macro processor must return converted text (e.g., HTML) rather than an AST node. Once Asciidoctor is changed to process inline content during the parse phase, the inline macro processor will need to return an inline node. When that switch occurs, there will either be some sort of adapter or required migration for inline macro processors, but that has yet to be determined. |
85. Extension Points
Here are the extension points that are available in Asciidoctor 0.1.4.
- Preprocessor
-
Processes the raw source lines before they are passed to the parser.
- Treeprocessor
-
Processes the Asciidoctor::Document (AST) once parsing is complete.
- Postprocessor
-
Processes the output after the document has been rendered, but before it’s written to disk.
- Block processor
-
Processes a block of content marked with a custom block style (i.e.,
[custom]). (similar to an AsciiDoc filter) - Block macro processor
-
Registers a custom block macro and processes it (e.g.,
gist::12345[]). - Inline macro processor
-
Registers a custom inline macro and processes it (e.g.,
Save). - Include processor
-
Processes the
include::<filename>[]directive.
These extensions are registered per document using a callback that feels sort of like a DSL:
Asciidoctor::Extensions.register do |document|
preprocessor FrontMatterPreprocessor
treeprocessor ShellSessionTreeprocessor
postprocessor CopyrightFooterPostprocessor
block ShoutBlock
block_macro GistBlockMacro if document.basebackend? 'html'
inline_macro ManInlineMacro
include_processor UriIncludeProcessor
end| Extension classes must be defined outside of the register block. Once an extension class is registered, it is frozen, preventing further modification. If you define an extension class inside the register block, it will result in an error on subsequent invocations. |
You can register more than one processor of each type, though you can only have one processor per custom block or macro. Each registered class is instantiated when the Asciidoctor::Document is created.
| There is currently no extension point for processing a built-in block, such as a normal paragraph. Look for that feature in a future Asciidoctor release. |
86. Example Extensions
Below are several examples of extensions and how they are registered.
86.1. Preprocessor Example
- Purpose
-
Skim off front matter from the top of the document that gets used by site generators like Jekyll and Awestruct.
---
tags: [announcement, website]
---
= Document Title
content
[subs="attributes,specialcharacters"]
.Captured front matter
....
---
{front-matter}
---
....require 'asciidoctor'
require 'asciidoctor/extensions'
class FrontMatterPreprocessor < Asciidoctor::Extensions::Preprocessor
def process document, reader
lines = reader.lines # get raw lines
return reader if lines.empty?
front_matter = []
if lines.first.chomp == '---'
original_lines = lines.dup
lines.shift
while !lines.empty? && lines.first.chomp != '---'
front_matter << lines.shift
end
if (first = lines.first).nil? || first.chomp != '---'
lines = original_lines
else
lines.shift
document.attributes['front-matter'] = front_matter.join.chomp
# advance the reader by the number of lines taken
(front_matter.length + 2).times { reader.advance }
end
end
reader
end
endAsciidoctor::Extensions.register do
preprocessor FrontMatterPreprocessor
end
Asciidoctor.convert_file 'sample-with-front-matter.adoc', :safe => :safe86.2. Treeprocessor Example
- Purpose
-
Detect literal blocks that contain shell commands, strip the prompt character and style the command using CSS in such a way that the prompt character cannot be selected (as seen on help.github.com).
$ echo "Hello, World!"
> Hello, World!
$ gem install asciidoctorclass ShellSessionTreeprocessor < Asciidoctor::Extensions::Treeprocessor
def process document
return unless document.blocks?
process_blocks document
nil
end
def process_blocks node
node.blocks.each_with_index do |block, i|
if block.context == :literal &&
(((first_line = block.lines.first).start_with? '$ ') ||
(first_line.start_with? '> '))
node.blocks[i] = convert_to_terminal_listing block
else
process_blocks block if block.blocks?
end
end
end
def convert_to_terminal_listing block
attrs = block.attributes
attrs['role'] = 'terminal'
prompt_attr = (attrs.has_key? 'prompt') ?
%( data-prompt="#{block.sub_specialchars attrs['prompt']}") : nil
lines = block.lines.map do |line|
line = block.sub_specialchars line.chomp
if line.start_with? '$ '
%(<span class="command"#{prompt_attr}>#{line[2..-1]}</span>)
elsif line.start_with? '> '
%(<span class="output">#{line[5..-1]}</span>)
else
line
end
end
create_listing_block block.document, lines * EOL, attrs, subs: nil
end
endAsciidoctor::Extensions.register do |document|
treeprocessor ShellSessionTreeprocessor
end
Asciidoctor.convert_file 'sample-with-shell-session.adoc', :safe => :safe86.3. Postprocessor Example
- Purpose
-
Insert copyright text in the footer.
class CopyrightFooterPostprocessor < Asciidoctor::Extensions::Postprocessor
def process document, output
content = (document.attr 'copyright') || 'Copyright Acme, Inc.'
if document.basebackend? 'html'
replacement = %(<div id="footer-text">\\1<br>\n#{content}\n</div>)
output = output.sub(/<div id="footer-text">(.*?)<\/div>/m, replacement)
elsif document.basebackend? 'docbook'
replacement = %(<simpara>#{content}</simpara>\n\\1)
output = output.sub(/(<\/(?:article|book)>)/, replacement)
end
output
end
endAsciidoctor::Extensions.register do
postprocessor CopyrightFooterPostprocessor
end
Asciidoctor.convert_file 'sample-with-copyright-footer.adoc', :safe => :safe86.4. Block Processor Example
- Purpose
-
Register a custom block style named
shoutthat uppercases all the words and converts periods to exclamation points.
[shout]
The time is now. Get a move on.require 'asciidoctor'
require 'asciidoctor/extensions'
class ShoutBlock < Asciidoctor::Extensions::BlockProcessor
PeriodRx = /\.(?= |$)/
use_dsl
named :shout
on_context :paragraph
name_positional_attributes 'vol'
parse_content_as :simple
def process parent, reader, attrs
volume = ((attrs.delete 'vol') || 1).to_i
create_paragraph parent, (reader.lines.map {|l| l.upcase.gsub PeriodRx, '!' * volume }), attrs
end
endAsciidoctor::Extensions.register do
block ShoutBlock
end
Asciidoctor.convert_file 'sample-with-shout-block.adoc', :safe => :safe86.5. Block Macro Processor Example
- Purpose
-
Create a block macro named
gistfor embedding a gist.
.My Gist
gist::123456[]require 'asciidoctor'
require 'asciidoctor/extensions'
class GistBlockMacro < Asciidoctor::Extensions::BlockMacroProcessor
use_dsl
named :gist
def process parent, target, attrs
title_html = (attrs.has_key? 'title') ?
%(<div class="title">#{attrs['title']}</div>\n) : nil
html = %(<div class="openblock gist">
#{title_html}<div class="content">
<script src="https://gist.github.com/#{target}.js"></script>
</div>
</div>)
create_pass_block parent, html, attrs, subs: nil
end
endAsciidoctor::Extensions.register do
block_macro GistBlockMacro if document.basebackend? 'html'
end
Asciidoctor.convert_file 'sample-with-gist.adoc', :safe => :safe86.6. Inline Macro Processor Example
- Purpose
-
Create an inline macro named
manthat links to a manpage.
See man:gittutorial[7] to get started.require 'asciidoctor'
require 'asciidoctor/extensions'
class ManInlineMacro < Asciidoctor::Extensions::InlineMacroProcessor
use_dsl
named :man
name_positional_attributes 'volnum'
def process parent, target, attrs
text = manname = target
suffix = ''
target = %(#{manname}.html)
suffix = if (volnum = attrs['volnum'])
"(#{volnum})"
else
nil
end
parent.document.register :links, target
%(#{(create_anchor parent, text, type: :link, target: target).convert}#{suffix})
end
endAsciidoctor::Extensions.register do
inline_macro ManInlineMacro
end
Asciidoctor.convert_file 'sample-with-man-link.adoc', :safe => :safe86.7. Include Processor Example
- Purpose
-
Include a file from a URI.
Asciidoctor supports including content from a URI out of the box if you set the allow-uri-read attribute (not available if the safe mode is secure).
|
:source-highlighter: coderay
.Gemfile
[source,ruby]
----
include::https://raw.githubusercontent.com/asciidoctor/asciidoctor/master/Gemfile[]
----require 'asciidoctor'
require 'asciidoctor/extensions'
require 'open-uri'
class UriIncludeProcessor < Asciidoctor::Extensions::IncludeProcessor
def handles? target
(target.start_with? 'http://') or (target.start_with? 'https://')
end
def process doc, reader, target, attributes
content = (open target).readlines
reader.push_include content, target, target, 1, attributes
reader
end
endAsciidoctor::Extensions.register do
include_processor UriIncludeProcessor
end
Asciidoctor.convert_file 'sample-with-uri-include.adoc', :safe => :safeYou can see plenty more extension examples in the extensions lab.
Build Integrations and Implementations
87. Java
|
Discuss and Contribute
Use Issue 455 to drive development of this section. Your contributions make a difference. No contribution is too small.
|
88. Gradle
|
Discuss and Contribute
Use Issue 456 to drive development of this section. Your contributions make a difference. No contribution is too small.
|
89. Maven
|
Discuss and Contribute
Use Issue 457 to drive development of this section. Your contributions make a difference. No contribution is too small.
|
90. Apache Ant
The asciidoctor-ant task is an all-in-one solution for running Asciidoctor from Ant.
It is based on AsciidoctorJ and JRuby, both of which are encapsulated in a single jar file.
Usage is:
<project xmlns:asciidoctor="antlib:org.asciidoctor.ant">
...
<target name="doc">
<taskdef uri="antlib:org.asciidoctor.ant"
resource="org/asciidoctor/ant/antlib.xml"
classpath="lib/asciidoctor-ant.jar"/>
<asciidoctor:convert sourceDirectory="src/asciidoc" outputDirectory="target"/>
</target>
...
</project>For more details, see asciidoctor-ant on GitHub.
91. JavaDoc
|
Discuss and Contribute
Use Issue 458 to drive development of this section. Your contributions make a difference. No contribution is too small.
|
92. JavaScript
|
Discuss and Contribute
Use Issue 459 to drive development of this section. Your contributions make a difference. No contribution is too small.
|
93. Yard
|
Discuss and Contribute
Use Issue 460 to drive development of this section. Your contributions make a difference. No contribution is too small.
|
94. Rdoc
|
Discuss and Contribute
Use Issue 461 to drive development of this section. Your contributions make a difference. No contribution is too small.
|
Conversions and Migrations
In this part, you’ll learn how to migrate documents written in other documentation languages to AsciiDoc. We’ll start with the simplest migration, switching from AsciiDoc Python, the original implementation of AsciiDoc, to Asciidoctor, the modern implementation. We’ll then cover how to move to AsciiDoc from other documentation languages like DocBook, Markdown and HTML. In addition to differences in the syntax, many of the sections also suggest tools you can use to ease the migration.
95. Migrating from AsciiDoc Python
The purpose of this section is to help you migrate legacy AsciiDoc documents written for AsciiDoc Python to the modern AsciiDoc syntax supported by Asciidoctor and to learn about equivalent tools and extensions.
The differences are minor, so most documents will need very few changes, if any. Once you’ve made the necessary changes, this section also describes how to take advantage of the new features provided in Asciidoctor.
| This section specifically covers migration from AsciiDoc Python 8 to Asciidoctor 1.5.x. The content assumes you’ve already updated any content that is deprecated as of AsciiDoc Python 8. |
95.1. Command Line Interface
Asciidoctor was designed from the outset to be a (must faster) drop-in replacement for AsciiDoc Python. For most documents, you can simply replace the call to AsciiDoc Python:
$ asciidoc document.adoc
with an equivalent call to Asciidoctor:
$ asciidoctor -a compat-mode document.adoc
If you run into trouble, check out the differences below, namely Deleted and Deprecated Syntax and Attributes.
| Keep in mind you can also run Asciidoctor on the JVM using AsciidoctorJ or with JavaScript using Asciidoctor.js. |
95.1.1. Help
AsciiDoc Python has --help syntax to show a syntax cheatsheet, and --help manpage to show the command usage as a Linux manpage.
Asciidoctor only has --help, which shows the command usage.
If you installed Asciidoctor using a Linux package, you can view the manpage using:
$ man asciidoctor
If you installed Asciidoctor using RubyGems, you have to tell the man command where to find the manpage using:
$ man "`gem which asciidoctor | xargs dirname`/../man/asciidoctor.1"
You can also view the manpage online at asciidoctor(1).
To get help with the AsciiDoc syntax in Asciidoctor, refer to the AsciiDoc Syntax Quick Reference.
95.1.2. Configuration Files
Asciidoctor does not use .conf files or filters, so --conf-file, --dump-conf, and --filter are not implemented.
Asciidoctor provides an extension API that replaces the configuration-based extension and filter mechanisms in AsciiDoc Python.
95.1.3. Internationalization
AsciiDoc Python has built-in .conf files that are used to translate built-in labels.
You load the .conf file for a given language by setting the lang attribute to a supported language code (e.g., -a lang=<language code>).
In Asciidoctor, you must define the translations for these labels explicitly.
See Using Asciidoctor with Other Languages for details.
95.1.4. Themes
AsciiDoc Python provides a theming mechanism that encapsulates CSS, JavaScript and images.
The --theme option activates one of these themes, which is resolved from your home directory.
In Asciidoctor, you control the theme using CSS (i.e., a stylesheet) only, which you can specify using -a stylesheet=<stylesheet>.
If you require more advanced theming, you can inject additional resources using a docinfo file or use a postprocessor extension.
95.1.5. Default HTML Backend
AsciiDoc Python uses XHTML 1.1 as its default output (the xhtml11 backend), though it supports HTML5 output as well (the html5 backend). Asciidoctor defaults to creating HTML5 output (the html5 backend), which closely adheres to the backend by the same name in AsciiDoc Python. The web has moved forward since AsciiDoc Python was created, so the switch to HTML5 is recommended anyway.
95.1.6. Doctest
AsciiDoc Python --doctest runs units tests.
See Tests for how to run the Asciidoctor unit tests.
Asciidoctor also has a doctest tool which you can use when creating custom HTML or XML-based converters.
95.2. Changed Syntax
These changes are not backward-compatible, but if you set the compat-mode attribute, Asciidoctor will accept the AsciiDoc Python syntax.
For the long term, you should update to the Asciidoctor syntax.
Consult the Migration Guide to get the full details and learn how to migrate smoothly.
| Feature | AsciiDoc Python (or Asciidoctor in compat mode) | Asciidoctor (no compat mode) |
|---|---|---|
italic text |
'italic text' |
_italic text_ |
|
+monospaced text+ |
`monospaced text` |
|
`{asciidoc-version}` |
`+{asciidoc-version}+` |
``double quotes'' |
``double quotes'' |
"`double quotes`" or type the Unicode quote characters using your editor |
`single quotes' |
`single quotes' |
'`single quotes`' or type the Unicode quote characters using your editor |
Document title [1] |
Title ===== |
= Title |
[1] Asciidoctor accepts the two-line heading style to set the document title.
However, by using it, you implicitly set compat-mode.
If you want to use the new Asciidoctor syntax, make sure to use the single-line style for the document title or unset the compat-mode attribute explicitly.
The following changes are not affected by the compat-mode attribute:
| Feature | AsciiDoc Python | Asciidoctor |
|---|---|---|
Underlined titles |
Underline length must match title length +/- 2 characters. |
Underline length must match title length +/- 1 character (Underlined titles are deprecated anyway. See Sections.) |
ifeval::[] |
Evaluates any Python expression. |
Evaluates simple logical expressions testing the value of attributes. See ifeval directive. |
Block delimiters |
Delimiter lines do not have to match in length. |
The length of start and end delimiter lines must match exactly. |
AsciiDoc table cell |
|
|
95.3. Deleted and Deprecated Syntax and Attributes
These are attributes that either no longer exist, work differently, or have better alternatives.
| AsciiDoc Python | Asciidoctor | Notes |
|---|---|---|
|
deprecated |
Character attributes to apply formatting directly. Usually better to apply a role, then apply the formatting based on that role by using a stylesheet. |
|
Column and cell specifiers |
See Cell Formatting. |
|
not implemented |
Provides the name and directory of the current document.
(Distinct from |
|
||
|
|
AsciiDoc Python sets |
|
|
Combined in a single attribute, see Table of Contents. |
|
||
|
||
|
not implemented |
DocBook attribute to make tables full page width, whatever the current indent. No Asciidoctor equivalent. |
options="unbreakable" |
In Asciidoctor, this only works for tables, not paragraphs. |
|
|
not implemented |
AsciiDoc Python uses this to suppress inline substitutions and retain block indents when importing large blocks of plain text. Asciidoctor deliberately does not implement it; the closest Asciidoctor equivalent is a passthrough block. |
|
|
Renamed. |
|
- |
Not required. |
|
not implemented |
In AsciiDoc Python, turns single line comments into DocBook ifdef::showcomments+basebackend-docbook[] ++++ <remark>Your comment here</remark> ++++ endif::[] |
|
not implemented |
In AsciiDoc Python, applies special formatting to named text. In Asciidoctor this could be implemented using an extension. |
|
in-document only |
AsciiDoc Python replaces tabs with spaces in all text, using a default tab size of 8. Asciidoctor only replaces tabs with spaces in verbatim content blocks (listing, literal, etc), and the attribute has no default. In other words, tabs are not expanded in verbatim content blocks unless this attribute is set on the block or the document. For all other text, Asciidoctor tabs are fixed at 4 spaces by the CSS. See Normalize Block Indentation for more detail. |
95.4. Default HTML Stylesheet
You’ll notice that the AsciiDoc Python and Asciidoctor stylesheets look quite different. However, they are compatible (for the most part) since the formatting is based on the same HTML structure and CSS classes. If you happen to prefer the AsciiDoc Python stylesheet, you can use it by copying it from the AsciiDoc Python stylesheets directory and instructing Asciidoctor to apply it using:
$ asciidoctor -a stylesheet=asciidoc.css document.adoc
| Keep in mind that the default stylesheet in Asciidoctor is just that, a default. If you don’t like its appearance, you can either customize it or choose another stylesheet. You can find a collection of alternative themes in the Asciidoctor Stylesheet Factory. |
Unlike AsciiDoc Python, Asciidoctor loads some resources from a CDN.
It’s possible to configure Asciidoctor to load all resources from local files.
For instance, you can unset the webfonts attribute so that the generated HTML does not use fonts from Google Fonts.
There are similar attributes to control how additional resources are resolved.
|
95.5. Mathematical Expressions
Both AsciiDoc Python and Asciidoctor can convert embedded LaTeX and AsciiMath expressions (e.g., asciimath:[expression], latexmath:[expression], etc), but with Asciidoctor you need to activate STEM support first using the stem attribute (see Activating stem support).
For block content, AsciiDoc Python uses a [latex] style delimited block.
In Asciidoctor, use a stem passthrough block instead.
See Block Stem Content.
95.6. AsciiDoc Python Extensions
The extension mechanism is completely different in Asciidoctor, but the ‘standard’ extensions have been re-implemented, so they should work with minor changes.
| AsciiDoc Python | Asciidoctor |
|---|---|
source |
|
music |
Not implemented. |
latex (block macro) |
Use a |
graphviz |
Incorporated into Asciidoctor Diagram. |
95.7. Custom Extensions
AsciiDoc Python custom extensions will not work with Asciidoctor because AsciiDoc Python extensions are essentially Python commands, and the Asciidoctor extensions are Ruby (or Java) classes. To re-write your extensions, see Extensions.
95.8. Features Introduced by Asciidoctor
95.8.1. New Syntax
Asciidoctor has shorthand for id, role, style and options. See Setting Attributes on an Element for details.
The following longhand syntax in AsciiDoc Python:
[[id]]
[style,role="role",options="option1,option2"]can be written using the shorthand supported by Asciidoctor:
[style#id.role%option1%option2]The longhand forms still work, but you should use the new forms for future compatibility, convenience and readability.
95.8.2. Enhancements
There are lots of new features and improvements Asciidoctor. These are some of the more interesting ones when migrating:
A detailed list of the improvements is shown in Differences between Asciidoctor and AsciiDoc Python.
95.8.3. Recommended Practices
See the AsciiDoc Style Guide and Recommended Practices for ways to make your documents clearer and more consistent.
96. Convert DocBook XML to AsciiDoc
One of the things Asciidoctor excels at is converting AsciiDoc source into valid and well-formed DocBook XML content.
What if you’re in the position where you need to go the other way: migrate all your legacy DocBook XML content to AsciiDoc? The prescription (℞) you need to get rid of your DocBook pains could be DocBookRx.
DocBookRx is an early version of a DocBook to AsciiDoc converter written in Ruby. This converter is far from perfect at the moment, but it improves with each document it converts.
The plan is to evolve it into a robust library for performing this conversion in a reliable way. You can read more about this initiative in the README.
The best thing about this tool is all the active users who are putting it through its paces. The more advanced the DocBook XML this tool tackles, and the more feedback we receive, the better the tool will become. Use it today to escape from XML hell!
97. Convert Markdown to AsciiDoc
|
Discuss and Contribute
Use Issue 462 to drive development of this section. Your contributions make a difference. No contribution is too small.
|
98. Convert Confluence XHTML to AsciiDoc
You can convert Atlassian Confluence XHTML pages to Asciidoctor using this Groovy script.
The script calls Pandoc to convert single or multiple HTML files exported from Confluence to AsciiDoc files. You’ll need Pandoc installed before running this script.
| If you have trouble running this script, you can use the Pandoc command referenced inside the script to convert XHTML files to AsciiDoc manually. |
@Grab('net.sourceforge.htmlcleaner:htmlcleaner:2.4')
import org.htmlcleaner.*
def src = new File('html').toPath()
def dst = new File('asciidoc').toPath()
def cleaner = new HtmlCleaner()
def props = cleaner.properties
props.translateSpecialEntities = false
def serializer = new SimpleHtmlSerializer(props)
src.toFile().eachFileRecurse { f ->
def relative = src.relativize(f.toPath())
def target = dst.resolve(relative)
if (f.isDirectory()) {
target.toFile().mkdir()
} else if (f.name.endsWith('.html')) {
def tmpHtml = File.createTempFile('clean', 'html')
println "Converting $relative"
def result = cleaner.clean(f)
result.traverse({ tagNode, htmlNode ->
tagNode?.attributes?.remove 'class'
if ('td' == tagNode?.name || 'th'==tagNode?.name) {
tagNode.name='td'
String txt = tagNode.text
tagNode.removeAllChildren()
tagNode.insertChild(0, new ContentNode(txt))
}
true
} as TagNodeVisitor)
serializer.writeToFile(
result, tmpHtml.absolutePath, "utf-8"
)
"pandoc -f html -t asciidoc -R -S --normalize -s $tmpHtml -o ${target}.adoc".execute().waitFor()
tmpHtml.delete()
}/* else {
"cp html/$relative $target".execute()
}*/
}The script is designed to be run locally on HTML files or directories containing HTML files exported from Confluence.
-
Save the script contents to a
convert.groovyfile in a working directory. -
Make the file executable according to your specific OS requirements.
-
Place individual files, or a directory containing files into the working directory.
-
Run
groovy convert filename.htmlto convert a single file. -
Confirm the output file meets requirements
-
Recurse through a directory by using this command pattern:
groovy convert directory/*.html
This script was created by Cédric Champeau (melix). You can find the source of this script hosted at this GitHub Gist.
Resources
99. Copyright and License
Copyright © 2012-2014 Dan Allen and Ryan Waldron. Free use of this software is granted under the terms of the MIT License.
See the LICENSE file for details.
100. Authors
Asciidoctor was written by Dan Allen, Ryan Waldron, Jason Porter, Nick Hengeveld and other contributors.
The initial code from which Asciidoctor emerged was written by Nick Hengeveld to process the git man pages for the Git project site. Refer to the commit history of asciidoc.rb to view the initial contributions.
AsciiDoc was written by Stuart Rackham and has received contributions from many other individuals.
101. Troubleshooting
-
Part way through the document, the blocks stop rendering correctly. What went wrong?
When content is not rendered as you expect in the later part of a document, it’s usually due to a delimited block missing its closing delimiter line. The most devious culprit is the open block. An open block doesn’t have any special styling, but its contents have the same restrictions as other delimited blocks, i.e. it can not contain section titles.
To solve this problem, first look for missing delimiter lines. Syntax highlighting in your text editor can help with this. Also look at the rendered output to see if the block styles are extending past where you intended. When working with open blocks, you may need to add custom styles (such as a red border) to the class selector .openblock so that you can see its boundaries.
-
Why don’t URLs containing underscores (
_) or carets (^) work after they’re rendered?This problem occurs because the markup parser interprets parts of the URL (i.e., the link target) as valid text formatting markup. Most lightweight markup languages have this issue because they don’t use a grammar-based parser. Asciidoctor plans to handle URLs more carefully in the future (see issue #281), which may be solved by moving to a grammar-based parser (see issue #61). Thankfully, there are many ways to include URLs of arbitrary complexity using the AsciiDoc passthrough mechanisms.
Solution AThe simplest way to get a link to behave is to assign it to an attribute.
= Document Title
:link-with-underscores: http://www.asciidoctor.org/now_this__link_works.html

This URL has repeating underscores {link-with-underscores}.
Asciidoctor won’t break links with underscores when they are assigned to an attribute because inline formatting markup is substituted before attributes. The URL remains hidden while the rest of the document is being formatted (strong, emphasis, monospace, etc).
Solution BAnother way to solve formatting glitches is to explicitly specify the formatting you want to have applied to a span of text. This can be done by using the inline pass macro. If you want to display a URL, and have it preserved, put it inside the pass macro and enable the macros substitution, which is what substitutes links.
This URL has repeating underscores pass:macros[http://www.asciidoctor.org/now_this__link_works.html].The pass macro removes the URL from the document, applies the
macrossubstitution to the URL, and then restores the processed URL to its original location once the substitutions are complete on the whole document.Alternatively, you can use
++around the URL only. However, when you use this approach, Asciidoctor won’t recognize it as a URL any more, so you have to use the explicitlinkprefix.This URL has repeating underscores link:++http://www.asciidoctor.org/now_this__link_works.html++[].For more information, see issue #625.
102. Glossary
|
Discuss and Contribute
Use Issue 465 to drive development of this section. Your contributions make a difference. No contribution is too small.
|
- admonition
-
a callout paragraph or block that has a label or icon indicating its priority.
- backend
-
a moniker for the expected output format; used as a key to select which converter to use; often used interchangeably with the name of a converter (i.e., the "html5" backend").
- block attribute
-
an attribute associated with a delimited block or paragraph; these attributes can affect processing of the block, and are available to block processors, but cannot be referenced using an attribute reference.
- built-in attribute
-
a document attribute that controls processing, integrations, styling, and localization.
- cross reference
-
a link from one location in the document to another location marked by an anchor.
- document attribute
-
an attribute associated with the document (node); in other words, an attribute in the global document attributes dictionary; the value of these attributes can be referenced using an attribute reference; if defined in the header, the document attribute is known as a header attribute.
- environment attribute
-
a dynamic document attribute that pertains to, or gives information about, the runtime environment.
- header attribute
-
a document attribute defined in the document header; visible from all nodes in the document; often required for global settings such as the source highlighter or icons mode.
- list continuation
-
a plus sign (
+) on a line by itself that connects adjacent lines of text to a list item. - macro attribute
-
an attribute associated with a block or inline macro; these attributes can affect processing of the macro, and are available to macro processors, but cannot be referenced using an attribute reference.
- predefined attribute
-
a document attribute defined for convenience; often used for inserting special content characters.
- quoted text
-
text which is enclosed in special punctuation to give it emphasis or special meaning.
- user-defined attribute
-
a document attribute defined by the content author; used for storing reusable content, and controlling conditional inclusion.
Appendix A: Catalog of Document Attributes
This appendix catalogs all the recognized document attributes in Asciidoctor. It includes environment, built-in and predefined (aka character reference) attributes. Authors may define any number of additional attributes (aka user-defined attributes) for their own purposes.
A.1. Environment Attributes
Asciidoctor automatically assigns values to various document attributes whenever a document is loaded or converted. These attributes, termed environment attributes, provide information about the runtime environment, such as how, where and when the document is being processed. Like other document attributes, environment attributes can be referenced whereever attribute references are permitted. It’s recommended that you treat these attributes as read only.
| Attribute | Description | Example Value |
|---|---|---|
|
Set if the current processor is Asciidoctor. |
|
|
Asciidoctor version. |
|
|
Backend used to create the output file. |
|
|
The backend value minus any trailing numbers.
For example, if the backend is |
|
|
Last modified date of the source document.[1,2] |
|
|
Last modified date and time of the source document.[1,2] |
|
|
Full path of the directory that contains the source document. |
|
|
Full path of the source document. |
|
|
Root name of the source document (no leading path or file extension). |
|
|
Last modified time of the source document.[1,2] |
|
|
Document type (article, book or manpage). |
|
|
Set if content is being converted to an embeddable document (body only). |
|
|
File extension of the output file name (without leading period). |
|
|
Syntax used when generating the HTML output (html or xhtml). |
|
|
Date when converted.[2] |
|
|
Date and time when converted.[2] |
|
|
Time when converted.[2] |
|
|
Full path of the output directory. |
|
|
Full path of the output file. |
|
|
Default file extension of output file (not the file extension of the specified output file).
Value depends on backend ( |
|
|
Numeric value of the safe mode setting. (UNSAFE=0, SAFE=10, SERVER=10, SECURE=20). |
|
|
Textual value of the safe mode setting. |
|
|
Set if the safe mode is UNSAFE. |
|
|
Set if the safe mode is SAFE. |
|
|
Set if the safe mode is SERVER. |
|
|
Set if the safe mode is SECURE. |
|
|
Home directory of the current user.
Resolves to |
|
[1] Only reflects the last modified time of the source document file, not files which are included.
[2] If the SOURCE_DATE_EPOCH environment variable is set, the value assigned to this attribute is built from a UTC date object that corresponds to the timestamp (integer) stored in that environment variable.
This override offers one way to make the conversion reproducible.
See https://reproducible-builds.org/specs/source-date-epoch/ for more information about the SOURCE_DATE_EPOCH environment variable.
A.2. Built-in Attributes
Built-in document attributes can be set anywhere in the document using an attribute entry line. However, there are some rules to keep in mind regarding the impact of that assignment.
-
Many attributes can only be defined in the document header (or via the API or CLI). Otherwise, they won’t have the desired impact. These are called header attributes. This requirement is marked in the table below.
-
To set an attribute that does not accept a value, simply use an empty value (as indicated by empty in the table).
-
If you set an attribute from the commandline or API, it’s defined for the whole document and cannot be changed in the body unless
@is added to the end of the value. (The one exception to this rule is thesectnumsattribute, which can always be changed). -
If you set an attribute in the body (anywhere after the document header), the attribute is visible from the point it is set until it is unset (assuming it is not locked as a result of being set from the commandline or API).
| Several attributes from AsciiDoc Python have been removed (or deprecated) in Asciidoctor and therefore are not included in this section. See Migrating from AsciiDoc Python if you are updating an older document. |
| Attribute name | Description | Default value[1] | Allowed values | Header only | See also |
|---|---|---|---|---|---|
Compliance |
|||||
attribute-missing |
Controls how missing references are handled. |
skip |
skip, drop, drop-line or warn |
||
attribute-undefined |
Controls how expressions that undefine an attribute are handled. |
drop-line |
drop or drop-line |
||
compat-mode |
Controls whether the legacy parser is used to parse the document. |
not set (Modern parser is used). |
empty (Legacy parser is used). |
||
experimental |
Enable experimental extensions. The features behind this attribute are subject to change and may even be removed in a future version. Currently enables the UI macros (button, menu and kbd). |
not set |
empty |
||
reproducible |
If set, prevents the last-updated date from being added to the HTML footer or DocBook info element. Useful if you want to store the output in a source code control system as it prevents spurious changes every time you convert the document. |
not set |
empty |
||
appendix-caption |
Sets the text used to prefix appendix titles. |
Appendix |
any |
||
caution-caption |
Sets the text used to label CAUTION admonitions when icons are not enabled. |
Caution |
any |
||
chapter-label |
Sets the prefix added to chapter titles (i.e., level-1 section titles when doctype is book). (pdf converter only) |
Chapter |
any |
||
example-caption |
Sets the text used to label example blocks. |
Example |
any |
||
figure-caption |
Sets the text used to label figures. |
Figure |
any |
||
important-caption |
Sets the text used to label IMPORTANT admonitions when icons are not enabled. |
Important |
any |
||
lang |
Set the value of the |
en |
Valid XML country code |
||
last-update-label |
Text label for the “Last updated” time in the footer. Unsetting it will remove the label and time from the footer. |
Last updated |
any |
||
listing-caption |
Sets the text used to label listing blocks. |
not set |
any |
||
manname-title |
Label for the program name section in the manpage. |
NAME |
any |
||
nolang |
Prevents the |
not set |
empty |
||
note-caption |
Sets the text used to label NOTE admonitions when icons are not enabled. |
Note |
any |
||
preface-title |
Sets the title text for an anonymous preface when the doctype is book. |
not set |
any |
||
table-caption |
Text of the label that is automatically prefixed to table titles.
To turn off table caption labels and numbers, add the |
Table |
any |
||
tip-caption |
Sets the text used to label TIP admonitions when icons are not enabled. |
Tip |
any |
||
toc-title |
Title for the table of contents. |
Table of Contents |
any |
||
untitled-label |
Used as the default document title if the document does not have a document title. |
Untitled |
any |
||
version-label |
The label preceding the revnumber in a rendered document’s byline |
Version |
any |
Revision Number, Date and Remark, Translating built-in labels |
|
warning-caption |
Sets the text used to label TIP admonitions when icons are not enabled. |
Warning |
any |
||
Header and metadata |
|||||
app-name |
Application name (for mobile devices).
If set, adds an |
not set |
any |
||
author |
Sets the document’s main author. Can be set automatically via the author info line. |
not set |
any |
||
authorinitials |
Sets the author’s initials (e.g., JD). Derived automatically from the author attribute by default. |
not set |
any |
||
authors |
Sets the document authors as a comma-separated list.
Can be set automatically via the author info line.
If set, adds an |
not set |
any |
||
copyright |
If set, adds a |
not set |
any |
||
doctitle |
Sets the document title. Set automatically to section title if document begins with level-0 section. |
Based on content. |
any |
||
description |
If set, adds a |
not set |
any |
||
Sets the author’s email address. Can be set automatically via the author info line. Can be any inline macro, such as a URL. |
not set |
any |
|||
firstname |
Sets the author’s first name. Can be set automatically via the author info line. |
not set |
any |
||
front-matter |
If |
Front matter content, if captured. |
any |
||
keywords |
If set, adds a |
not set |
any |
||
lastname |
Sets the author’s last name. Can be set automatically via the author info line. |
not set |
any |
||
middlename |
Sets the author’s middle name or initial. Can be set automatically via the author info line. |
not set |
any |
||
orgname |
If set, add an |
not set |
any |
||
revdate |
Sets the revison date. Can be set automatically via the revision info line. |
not set |
any |
||
revremark |
Sets the revison description. Can be set automatically via the revision info line. |
not set |
any |
||
revnumber |
Sets the revison number. Can be set automatically via the revision info line. |
not set |
any |
||
title |
Sets the value of the |
not set |
any |
||
Section titles and table of contents |
|||||
idprefix |
Sets prefix used for auto-generated section IDs. |
_ |
Valid XML ID start character. |
||
idseparator |
Sets word separator used in auto-generated section IDs. |
_ |
Valid XML ID character. |
||
leveloffset |
Pushes the level of subsequent headings down, to make file inclusion more useful. |
0 |
(+/-)0–5. (A leading + or - makes it relative). |
||
sectanchors |
If set, adds an anchor in front of the section title when the mouse cursor hovers over it. |
not set (No anchors). |
empty |
||
sectids |
If set, generates and assigns an ID to any section that does not have one. |
empty (Assigns section ID if not specified). |
empty |
||
sectlinks |
Turns section titles into self-referencing links. |
not set |
empty |
||
sectnums |
If set, numbers sections to depth specified by sectnumlevels. |
not set (Sections are not numbered). |
empty |
||
sectnumlevels |
controls the depth of section numbering |
3 |
0–5 |
||
title-separator |
The character used to separate the main title and subtitle in the document title. |
: |
any |
||
toc |
Switches the table of contents on, and defines its location. |
not set |
auto, left, right, macro or preamble |
||
toclevels |
Maximum section level to display. |
2 |
1–5 |
||
fragment |
Hints to parser that document is a fragment and it should not enforce proper section nesting. |
not set |
empty |
||
General content and formatting |
|||||
asset-uri-scheme |
Controls which protocol is used for assets hosted on a CDN. |
https |
empty, http or https |
||
cache-uri |
If set, cache content read from URIs. |
not set |
empty |
||
data-uri |
Embed graphics as data-uri elements in HTML elements so the file is completely self-contained. |
not set (Images are linked, not embedded). |
empty |
||
docinfo |
Read input from one or more DocBook info files. |
not set |
Comma-separated list of the following values: shared, private, shared-head, private-head, shared-footer or private-footer |
||
docinfodir |
The location where docinfo files are resolved. |
The base directory. |
Directory |
||
docinfosubs |
The AsciiDoc substitutions that get applied to docinfo content. |
not set |
Comma-separated list of substitution names |
||
doctype |
Set the output document type. |
article |
article, book, inline or manpage |
||
eqnums |
Controls automatic equation numbering on LaTeX blocks in HTML output (MathJax). |
not set (Equation numbering is off) |
empty (alias for AMS), AMS, all or none |
||
hardbreaks |
Preserve hard line breaks in the input. |
not set |
empty |
||
hide-uri-scheme |
Hides the URI scheme for all raw links. |
not set |
empty |
||
linkattrs |
Parse attributes inside the link macro. |
not set (Do not parse). |
empty |
||
media |
Specifies the media type of the output, which may enable behavior specific to that media type. |
screen |
screen or print |
||
nofooter |
Suppresses rendering of the footer. |
not set |
empty |
||
nofootnotes |
Turn off display of footnotes. |
not set |
empty |
||
noheader |
Suppresses rendering of the header. |
not set |
empty |
||
outfilesuffix |
Default file extension of output file (includes leading period). |
Set according to backend ( |
File extension |
||
pagewidth |
Page width, used to calculate the absolute width of tables in the DocBook output. |
425 |
Number |
||
relfileprefix |
The path prefix to add to relative xrefs. |
empty |
Path segment |
||
show-link-uri |
Prints the URI of a link after the linked text. (pdf converter only) |
not set |
empty |
||
showtitle |
If set, displays an embedded document’s title.
Mutually exclusive with the |
not set |
empty |
||
stem |
Enables mathematics processing or sets the processor used. |
not set |
empty (defaults to asciimath), asciimath or latexmath |
||
tabsize |
If set, converts tabs to spaces in verbatim content blocks (e.g. listing, literal). |
not set |
0 or more |
- |
|
webfonts |
Control whether webfonts are loaded, and which ones, when using the default stylesheet.
The value populates the |
empty (use default fonts) |
empty or a Google Fonts collection spec |
||
xmlns |
The XML namespace to add to the DocBook 4.5 document. (The DocBook 5 document always declares a namespace). |
not set |
empty (alias for the DocBook namespace) or a valid XML namespace. |
||
Images and icons |
|||||
iconfont-cdn |
Overrides the CDN used to resolve the Font Awesome stylesheet.
Only used when |
cdnjs |
URI |
||
iconfont-name |
Overrides the name of the icon font stylesheet.
Only used when |
font-awesome |
any |
||
iconfont-remote |
If set, allows use of a CDN for resolving the icon font.
Only used when |
empty |
empty |
||
icons |
Chooses icons instead of text for admonitions. |
not set (image) |
font or image |
||
iconsdir |
Where icons are stored.
Only used when |
{imagesdir}/icons (or ./images/icons if imagesdir is not set) |
Directory |
||
icontype |
File type for image icons.
Only used when |
png |
any, but typically jpg, tiff etc. |
||
imagesdir |
Where image files are resolved. |
not set (Same directory as document). |
Directory |
||
Code highlighting and formatting |
|||||
coderay-css |
Controls whether CodeRay uses CSS classes or inline styles. |
class |
class or style |
||
coderay-linenums-mode |
Sets how Coderay inserts line numbers into source listings. |
table |
table or inline |
||
coderay-unavailable |
If set, tells the processor not to attempt to load CodeRay. |
not set |
empty |
||
highlightjsdir |
Location of the highlight.js source code highlighter library. |
not set |
Directory |
||
highlightjs-theme |
Sets the name of the theme used by the highlight.js source code highlighter. |
github |
A style name recognized by highlight.js. |
||
prettifydir |
Location of the prettify source code highlighter library. |
not set (Uses CDN). |
Directory |
||
prettify-theme |
Sets the name of the theme used by the prettify source code highlighter. |
prettify |
A style name recognized by prettify. |
||
prewrap |
Wrap wide code listings. Sets the default behavior only; you can still switch off wrapping on specific listings. |
empty (Code listing will wrap long lines, not scroll). |
empty |
||
pygments-css |
Controls whether Pygments uses CSS classes or inline styles. |
class |
class or style |
||
pygments-linenums-mode |
Sets how Pygments inserts line numbers into source listings. |
table |
table or inline |
||
pygments-style |
Sets the name of the style used by the Pygments source code highlighter |
default |
A style name recognized by Pygments. |
||
pygments-unavailable |
If set, tells the processor not to attempt to load Pygments. |
not set |
empty |
||
source-highlighter |
Source code highlighter to use. |
not set |
coderay, highlightjs, prettify or pygments |
||
source-indent |
Normalize block indentation in code listings. |
not set (Indentation is not modified). |
Number |
||
source-language |
Set the default language for source code listings. |
not set |
Code language name in lowercase. |
||
HTML styling |
|||||
copycss |
If set, copy the CSS files to the output. |
empty (File is copied if |
empty |
||
css-signature |
If set, assign the value to the |
not set |
Valid XML ID |
||
linkcss |
If set, link to the stylesheet instead of embedding it. Cannot be unset in SECURE safe mode. |
not set (when safe mode < SECURE) |
empty |
||
max-width |
Constrain the maximum width of the document body. Not recommended. Use custom CSS instead. |
not set |
CSS length (e.g. 55em, 12cm, etc) |
||
stylesdir |
Location for resolving CSS stylesheets. |
. (Same directory as document). |
Directory |
||
stylesheet |
Name of a CSS stylesheet to replace the default one. |
not set (The default stylesheet is used). |
File name |
||
toc-class |
The CSS class on the table of contents container. |
toc |
Valid CSS class name |
||
Manpage attributes (relevant only when using the manpage doctype and/or converter) |
|||||
mantitle |
Metadata for manpage output. |
Based on content. |
any |
||
manvolnum |
Metadata for manpage output. |
Based on content. |
any |
||
manname |
Metadata for manpage output. |
Based on content. |
any |
||
manpurpose |
Metadata for manpage output. |
Based on content. |
any |
||
man-linkstyle |
Style the links in the manpage output. |
blue R <> |
Link format sequence |
||
mansource |
The source (e.g., application and version) to which the manpage pertains. |
not set |
any |
||
manmanual |
Manual name displayed in the manpage footer. |
not set |
any |
||
Secure attributes (can only be set from the commandline or API, typically for security reasons) |
|||||
allow-uri-read |
If set, allows data to be read from URIs (via include directive, image macro when embedding images, etc.). |
not set |
empty |
CLI or API |
|
max-attribute-value-size |
Limits the maximum size (in bytes) of a resolved attribute value. Since attributes can reference other attributes, it would be possible to create an output document disproportionately larger than the input document without this limit in place. |
4096 (secure mode), not set (other modes) |
0 or greater |
CLI or API |
|
max-include-depth |
Safety feature to curtail infinite include loops and to limit the opportunity to exploit nested includes to compound the size of the output document. |
64 |
0 or greater |
CLI or API |
|
skip-front-matter |
If set, consume YAML-style front matter at the top of the document and store it in the |
not set |
empty |
CLI or API |
|
[1] The default value isn’t necessarily the value you will get by entering {name}.
It may be the fallback value which Asciidoctor uses if the attribute is not defined.
The effect is the same either way.
A.3. Predefined Attributes for Character Replacements
| Attribute name | Replacement text | Appearance |
|---|---|---|
blank |
nothing |
|
empty |
nothing |
|
sp |
single space |
|
nbsp |
  |
|
zwsp[4] |
​ |
|
wj[5] |
⁠ |
|
apos |
' |
' |
quot |
" |
" |
lsquo |
‘ |
‘ |
rsquo |
’ |
’ |
ldquo |
“ |
“ |
rdquo |
” |
” |
deg |
° |
° |
plus |
+ |
+ |
brvbar |
¦ |
¦ |
vbar |
| |
| |
amp |
& |
& |
lt |
< |
< |
gt |
> |
> |
startsb |
[ |
[ |
endsb |
] |
] |
caret |
^ |
^ |
asterisk |
* |
* |
tilde |
~ |
~ |
backslash |
\ |
\ |
backtick |
` |
` |
two-colons |
:: |
:: |
two-semicolons |
;; |
;; |
cpp |
C++ |
C++ |
[1] Some replacements are Unicode characters, whereas others are numeric character references. The character references (e.g., ") are used whenever the use of the Unicode character could interfere with the AsciiDoc syntax or confuse the renderer (i.e., the browser). It’s up to the converter to transform the reference into something the renderer understands (something both the manpage and PDF converter handle).
[2] Asciidoctor does not prevent you from reassigning predefined attributes. However, it’s best to treat them as read-only unless the output format requires the use of a different encoding scheme. These attributes are an effective tool for decoupling content and presentation.
[3] Asciidoctor allows you to use any of the named character references (aka named entities) defined in HTML (e.g., € resolves to €). However, using named character references can cause problems when generating non-HTML output such as PDF because the lookup table needed to resolve these names may not be defined. Our recommendation is avoid using named character references—with the exception of those defined in XML (i.e., lt, gt, amp, quot and apos). Instead, use numeric character references (e.g., €).
[4] The Zero Width Space (ZWSP) is a code point in Unicode that shows where a long word can be split if necessary.
[5] The word joiner (WJ) is a code point in Unicode prevents a line break at its position.
Appendix B: CLI Options
Security Settings
- -B, --base-dir=DIR
-
Base directory containing the document and resources. Defaults to the directory containing the source file, or the working directory if the source is read from a stream. Can be used as a way to chroot the execution of the program.
- -S, --safe-mode=SAFE_MODE
-
Set safe mode level: unsafe, safe, server or secure. Disables potentially dangerous macros in source files, such as
include::[]. If not set, the safe mode level defaults to unsafe when Asciidoctor is invoked using this script. - --safe
-
Set safe mode level to safe. Enables include macros, but restricts access to ancestor paths of source file. Provided for compatibility with the asciidoc command. If not set, the safe mode level defaults to unsafe when Asciidoctor is invoked using this script.
Document Settings
- -a, --attribute=ATTRIBUTE
-
Define, override or delete a document attribute. Command-line attributes take precedence over attributes defined in the source file.
ATTRIBUTE is normally formatted as a key-value pair, in the form NAME=VALUE. Alternate acceptable forms are NAME (where the VALUE defaults to an empty string), NAME! (unassigns the NAME attribute) and NAME=VALUE@ (where VALUE does not override value of NAME attribute if it’s already defined in the source document). Values containing spaces should be enclosed in quotes.
This option may be specified more than once.
- -b, --backend=BACKEND
-
Backend output file format: html5, docbook5, docbook45 and manpage are supported out of the box. You can also use the backend alias names html (aliased to html5) or docbook (aliased to docbook5). Defaults to html5. Other options can be passed, but if Asciidoctor cannot find the backend, it will fail during conversion.
- -d, --doctype=DOCTYPE
-
Document type: article, book, manpage or inline. Sets the root element when using the docbook backend and the style class on the HTML body element when using the html backend. The book document type allows multiple level-0 section titles in a single document. The manpage document type enables parsing of metadata necessary to produce a manpage. The inline document type allows the content of a single paragraph to be formatted and returned without wrapping it in a containing element. Defaults to article.
Rendering Control
- -D, --destination-dir=DIR
-
Destination output directory. Defaults to the directory containing the source file, or the working directory if the source is read from a stream. If specified, the directory is resolved relative to the working directory.
- -E, --template-engine=NAME
-
Template engine to use for the custom converter templates. The gem with the same name as the engine will be loaded automatically. This name is also used to build the full path to the custom converter templates. If a template engine is not specified, it will be auto-detected based on the file extension of the custom converter templates found.
- -e, --eruby
-
Specifies the eRuby implementation to use for executing the custom converter templates written in ERB. Supported values are erb and erubis. Defaults to erb.
- -I, --load-path=DIRECTORY
-
Add the specified directory to the load path, so that -r can load extensions from outside the default Ruby load path. This option may be specified more than once.
- -n, --section-numbers
-
Auto-number section titles. Synonym for --attribute numbered.
- -o, --out-file=OUT_FILE
-
Write output to file OUT_FILE. Defaults to the base name of the input file suffixed with backend extension. If the input is read from standard input, then the output file defaults to stdout. If OUT_FILE is - then the standard output is also used. If specified, the file is resolved relative to the working directory.
- -r, --require=LIBRARY
-
Require the specified library before executing the processor, using the standard Ruby require. This option may be specified more than once.
- -s, --no-header-footer
-
Suppress the document header and footer in the output.
- -T, --template-dir=DIR
-
A directory containing custom converter templates that override one or more templates from the built-in set. (requires tilt gem)
If there is a subfolder that matches the engine name (if specified), that folder is appended to the template directory path. Similarly, if there is a subfolder in the resulting template directory that matches the name of the backend, that folder is appended to the template directory path.
This option may be specified more than once. Matching templates found in subsequent directories override ones previously discovered.
Processing Information
- -q, --quiet
-
Silence warnings.
- --trace
-
Include backtrace information on errors. Not enabled by default.
- -v, --verbose
-
Verbosely print processing information and configuration file checks to stderr.
- -t, --timings
-
Display timings information (time to read, parse and convert).
Program Information
- -h, --help
-
Show the help message.
- -V, --version
-
Print program version number.
-vcan also be used if no other flags or arguments are present.
Appendix C: Ruby API Options
| Name | Description | Default value | Allowed values | CLI equivalent |
|---|---|---|---|---|
|
Sets additional document attributes, which override equivalently-named attributes defined in the document unless the value ends with |
not set |
Any number of built-in or user-defined attributes in one of the following formats: Hash: |
|
|
Selects the converter to use (as registered with this keyword). |
html5 |
html5, docbook5, docbook45, manpage, or any backend registered through an active converter |
|
|
Sets the base (aka working) directory containing the document and resources. |
The directory of the source file, or the working directory if the source is read from a stream. |
file path |
|
|
If true, tells the parser to capture images and links in the reference table.
(Normally only IDs, footnotes and indexterms are included).
The reference table is available via the |
false |
boolean |
n/a |
|
Specifies a user-supplied |
not set |
|
n/a
(Can be emulated using a combination of |
|
Sets the document type. |
article |
article, book, manpage, inline |
|
|
Specifies the eRuby implementation to use for executing the converter templates written in ERB. |
erb |
erb, erubis |
|
|
A Ruby block that registers (and possibly defines) Asciidoctor extensions for this instance of the processor. |
not set |
A Ruby block that conforms to the Asciidoctor extensions API (the same code that would be passed to the |
n/a
(Can be emulated using |
|
Overrides the extensions registry instance. Instead of providing a Ruby block containing extensions to register, this option lets you replace the extension registry itself, giving you complete control over how extensions are registered for this processor. |
not set |
|
n/a |
|
If true, add the document header and footer (i.e., framing) around the body content in the output. NOTE: The default value for this option is opposite of the default value for the CLI. |
false |
boolean |
|
|
If true, the processor will create the necessary output directories if they don’t yet exist. |
false |
boolean |
n/a (Implicitly enabled). |
|
If true, the source is parsed eagerly (i.e., as soon as the source is passed to the |
true |
boolean |
n/a |
|
Sets the safe mode. |
:secure |
:unsafe, :safe, :server, :secure |
|
|
Keeps track of the file and line number for each parsed block. (Useful for tooling applications where the association between the converted output and the source file is important). |
false |
boolean |
n/a |
|
If true, enables the built-in cache used by the template converter when reading the source of template files.
Only relevant if the |
true |
boolean |
n/a |
|
Specifies a directory of Tilt-compatible templates to be used instead of the default built-in templates.
Deprecated. Please use |
not set |
file path |
|
|
An array of directories containing Tilt-compatible converter templates to be used instead of the default built-in templates. |
not set |
An array of file paths |
|
|
Template engine to use for the custom converter templates. The gem with the same name as the engine will be loaded automatically. This name is also used to build the full path to the custom converter templates. |
auto |
Template engine name (e.g., slim, haml, erb, etc.) |
|
|
Low-level options passed directly to the template engine. |
not set |
A nested Hash of options with the template engine name as the top-level key and the option name as the second-level key. |
n/a |
|
Capture time taken to read, parse, and convert document. Internal use only. |
not set |
|
|
|
The name of the output file to write, or true to use the default output file ( |
not set |
true, file path |
|
|
Destination directory for output file(s), relative to |
The directory containing the source file, or the working directory if the source is read from a stream. |
file path |
|
Appendix D: Application Messages
All warning, error, and failure messages emitted by the Asciidoctor CLI (i.e., asciidoctor) are listed in the table below.
These messages are written to the console via stderr (i.e., standard error).
Most messages also apply to the API, though keep in mind they’re written directly to stderr.
- <docname>
-
represents the basename of the source file being processed (e.g.,
sample.adoc). - <file>
-
represents a path to the input file or other referenced file.
- <uri>
-
represents a URI being referenced.
- <x> or <y>
-
placeholders for other contextual information in the message.
- ERROR
-
Errors do not stop conversion, but the output document will almost certainly be wrong.
- FAILURE
-
Failures are fatal; no output document will be produced.
- WARNING
-
Warnings do not stop conversion, but they indicate possible problems, and the output may not be what you were expecting.
| Category | Message | Cause | See also |
|---|---|---|---|
ERROR |
input file <file> missing or cannot be read |
Check that the file exists and that the filename is not misspelled. |
|
ERROR |
include file has illegal reference to ancestor of jail, auto-recovering |
The safe mode is restricting access to an include file outside of the base directory. |
|
ERROR |
input file and output file cannot be the same: <file> |
Choose a different output directory or filename. |
|
ERROR |
partintro block can only be used when doctype is book and it's a child of a part section. Excluding block content. |
Invalid book document structure. |
|
ERROR |
unmatched macro: endif::<x>[] |
|
|
ERROR |
<docname> dropping cell because it exceeds specified number of columns |
||
ERROR |
<docname> illegal block content outside of partintro block |
Invalid book document structure. |
|
ERROR |
<docname> invalid part, must have at least one section (e.g., chapter, appendix, etc.) |
Invalid book document structure. |
|
ERROR |
<docname> malformed manpage title |
Invalid manpage document structure. |
|
ERROR |
<docname> malformed name section body |
Invalid manpage document structure. |
|
ERROR |
<docname> maximum include depth of 64 exceeded |
Does your file include itself, directly or indirectly? |
|
ERROR |
<docname> mismatched macro: endif::<x>[], expected endif::<y>[] |
ifdef/endif blocks must be strictly nested. |
|
ERROR |
<docname> name section expected |
Invalid manpage document structure. |
|
ERROR |
<docname> name section title must be at level 1 |
Invalid manpage document structure. |
|
ERROR |
<docname> only book doctypes can contain level 0 sections |
Illegal use of a level-0 section when doctype is not book. |
|
ERROR |
<docname> table missing leading separator, recovering automatically |
Check for missing cell separator characters at the start of the line. |
|
FAILED |
missing converter for backend '<x>'. Processing aborted. (RuntimeError) |
You used -b with an invalid or missing backend. |
|
FAILED |
'tilt' could not be loaded |
You must have the tilt gem installed ( |
|
WARNING |
abstract block cannot be used in a document without a title when doctype is book. Excluding block content. |
Invalid book document structure. |
|
WARNING |
cannot retrieve contents of <x> at URI: <uri> (allow-uri-read attribute not enabled) |
Reading from a URI is only allowed in certain safe modes and the allow-uri-read attribute must be passed to the application. |
|
WARNING |
could not retrieve contents of <x> at URI: <uri> |
Web address not found. |
|
WARNING |
could not retrieve image data from URI: <uri> |
Web address not found. Only occurs with |
|
WARNING |
dropping line containing reference to missing attribute: <x> |
An attribute cannot be resolved and the |
|
WARNING |
file does not exist or cannot be read: <file> |
You specified a stylesheet ( |
|
WARNING |
gem 'thread_safe' is not installed. This gem is recommended when registering custom converters. |
You have registered a custom converter, and you have not installed the thread_safe gem. |
|
WARNING |
gem 'thread_safe' is not installed. This gem is recommended when using custom backend templates. |
You are using custom templates ( |
|
WARNING |
image to embed not found or not readable: <file> |
You used |
|
WARNING |
include file not readable: <file> |
You do not have permission to access the file. |
|
WARNING |
input path <file> is a <x>, not a file |
The path is not a file (perhaps it is a socket or a block device). |
|
WARNING |
optional gem 'asciimath' is not installed. Functionality disabled. |
asciimath is one of the libraries used for equations. |
|
WARNING |
optional gem 'coderay' is not installed. Functionality disabled. |
CodeRay is used for source code highlighting. |
|
WARNING |
skipping reference to missing attribute: <x> |
An attribute cannot be resolved and the |
|
WARNING |
tables must have at least one body row |
||
WARNING |
tag '<x>' not found in include file: <file> |
You tried to include by tagged region, but the included document does not have that tag. |
|
WARNING |
<docname> callout list item index: expected <x> got <y> |
Callouts are expected to be in numerical order, just like any ordered list. |
|
WARNING |
<docname> include <x> not readable: <y> |
If <y> is a file, do you have read permissions for it?
If it is a URI and |
|
WARNING |
<docname> include file not found: <file> |
Probably a typo or missing file. If not, make sure you understand the search process. |
|
WARNING |
<docname> invalid empty <x> detected in style attribute |
The first positional attribute in the block attributes could not be parsed. |
|
WARNING |
<docname> invalid style for <x> block: <y> |
You have added a custom style to a block, but you haven’t registered a custom block extension to handle it. |
|
WARNING |
<docname> invalid style for paragraph: <x> |
You have a line |
|
WARNING |
<docname> list item index: expected <x>, got <y> |
You gave explicit numbers on an ordered list, but they were not sequential. Asciidoctor renumbers them for you, and gives this warning. |
|
WARNING |
<docname> multiple ids detected in style attribute |
Multiple IDs cannot be specified in the block style (e.g., |
|
WARNING |
<docname> no callouts refer to list item <x> |
The callout is missing or not recognized. In source listings, is the callout the last thing on the line? |
|
WARNING |
<docname> section title out of sequence |
Invalid document structure. Check section levels. |